Vehicle Exterior. Land Cruiser. Urj200, 202 Grj200 Vdj200
Lighting (Ext). Land Cruiser. Urj200, 202 Grj200 Vdj200
Headlight Dimmer Switch -- Removal |
- HINT:
- Use the same procedure for RHD and LHD vehicles.
- The procedure listed below is for LHD vehicles.
| 1. DISCONNECT CABLE FROM NEGATIVE BATTERY TERMINAL |
- CAUTION:
- Wait at least 90 seconds after disconnecting the cable from the negative (-) battery terminal to disable the SRS system.
- NOTICE:
- When disconnecting the cable, some systems need to be initialized after the cable is reconnected (Click here).
| 2. REMOVE SPIRAL CABLE |
Remove the spiral cable (Click here).
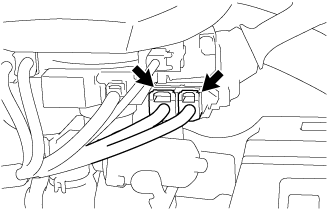
| 3. REMOVE WINDSHIELD WIPER SWITCH ASSEMBLY |
Disconnect the 2 connectors.
 |
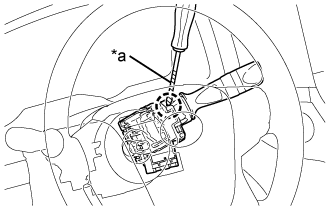
Using a screwdriver wrapped with protective tape, disengage the claw and remove the wiper switch.
Text in Illustration *a Protective Tape - NOTICE:
- If the claw is pushed with excessive force, it may be broken.
 |
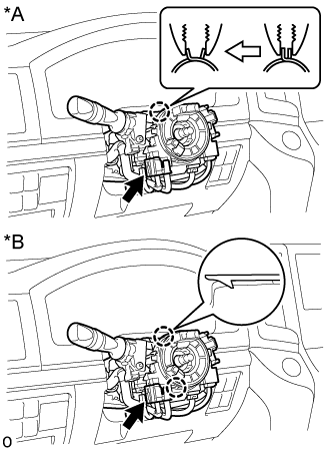
| 4. REMOVE HEADLIGHT DIMMER SWITCH ASSEMBLY |
for clamp Type:
Text in Illustration *A for Clamp Type *B for Press Fit Type Disconnect the connector.
While loosening the band clamp as shown in the illustration, detach the claw to remove the dimmer switch.
 |
for Press Fit Type:
Disconnect the connector.
Pull the headlight dimmer switch toward the seat to detach the 2 claws and remove it.