Clutch Unit (For Hatchback) Removal
REMOVE MANUAL TRANSAXLE ASSEMBLY
REMOVE CLUTCH RELEASE FORK SUB-ASSEMBLY
REMOVE CLUTCH RELEASE BEARING ASSEMBLY
REMOVE RELEASE BEARING HUB CLIP
REMOVE CLUTCH RELEASE FORK BOOT
REMOVE RELEASE FORK SUPPORT
REMOVE CLUTCH COVER ASSEMBLY
REMOVE CLUTCH DISC ASSEMBLY
Clutch Unit (For Hatchback) -- Removal |
| 1. REMOVE MANUAL TRANSAXLE ASSEMBLY |
(YARIS_NCP93 RM000001B3W05NX.html)
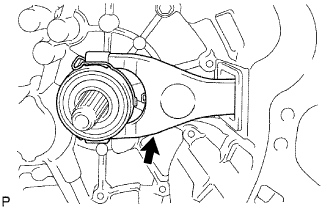
| 2. REMOVE CLUTCH RELEASE FORK SUB-ASSEMBLY |
Remove the clutch release fork sub-assembly with the clutch release bearing assembly from the manual transaxle assembly.
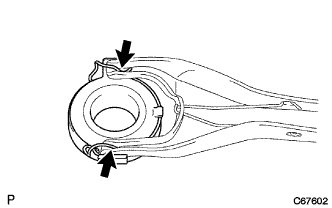
| 3. REMOVE CLUTCH RELEASE BEARING ASSEMBLY |
Disengage the release bearing hub clip and remove the clutch release bearing assembly from the clutch release fork sub-assembly.
| 4. REMOVE RELEASE BEARING HUB CLIP |
Remove the release bearing hub clip from the clutch release bearing assembly.
| 5. REMOVE CLUTCH RELEASE FORK BOOT |
Remove the clutch release fork boot from the manual transaxle assembly.
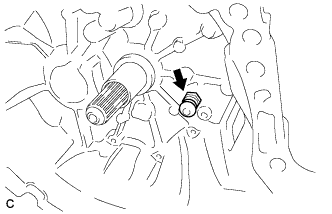
| 6. REMOVE RELEASE FORK SUPPORT |
Remove the release fork support from the manual transaxle assembly.
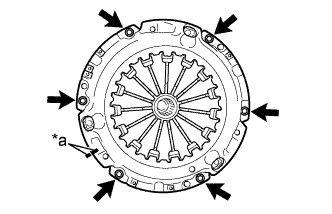
| 7. REMOVE CLUTCH COVER ASSEMBLY |
Put the matchmarks on the clutch cover assembly and the flywheel sub-assembly.
Text in Illustration*a
| Matchmark
|
Loosen the 6 bolts one turn at a time until spring tension is released.
Remove the 6 bolts and pull off the clutch cover assembly.
- NOTICE:
- Do not drop the clutch disc assembly.
| 8. REMOVE CLUTCH DISC ASSEMBLY |
Remove the clutch disc assembly.
- NOTICE:
- Keep the lining part of the clutch disk and the surfaces of the pressure plate and flywheel free of oil and foreign matter.