Headlight Assembly (For Hid Headlight) Removal
PRECAUTION
DISCONNECT CABLE FROM NEGATIVE BATTERY TERMINAL
REMOVE RADIATOR GRILLE
REMOVE FOG LIGHT COVER LH
REMOVE FOG LIGHT COVER RH
REMOVE FRONT BUMPER COVER
REMOVE HEADLIGHT ASSEMBLY LH
Headlight Assembly (For Hid Headlight) -- Removal |
- CAUTION:
- Make sure that the headlight control ECU sub-assembly LH is not connected or hot before removing the headlight control ECU sub-assembly.
- HINT:
- Use the same procedure for the RH and LH sides.
- The procedure listed below is for the LH side.
- NOTICE:
- After turning the ignition switch off, waiting time may be required before disconnecting the cable from the battery terminal. Therefore, make sure to read the disconnecting the cable from the battery terminal notice before proceeding with work (Toyota Fortuner RM000000UYX010X.html).
| 2. DISCONNECT CABLE FROM NEGATIVE BATTERY TERMINAL |
- NOTICE:
- When disconnecting the cable, some systems need to be initialized after the cable is reconnected (Toyota Fortuner RM000004W63000X.html).
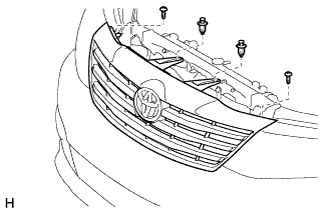
| 3. REMOVE RADIATOR GRILLE |
Remove the 2 clips and 2 screws.
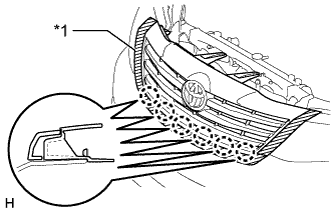
Put protective tape around the radiator grille.
Text in Illustration*1
| Protective Tape
|
Detach the 6 claws and remove the radiator grille.
| 4. REMOVE FOG LIGHT COVER LH |
Put protective tape around the fog light cover.
Using the screwdriver, detach the 8 claws and remove the fog light cover.
- HINT:
- Tape the screwdriver tip before use.
Text in Illustration*1
| Protective Tape
|
| 5. REMOVE FOG LIGHT COVER RH |
- HINT:
- Use the same procedure described for the LH side.
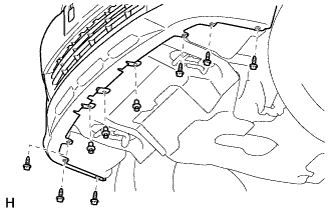
| 6. REMOVE FRONT BUMPER COVER |
Remove the 6 screws and 3 clips.
Put protective tape around the front bumper cover.
Remove the 2 screws, 2 bolts and 5 clips.
Text in Illustration*1
| Protective Tape
|
w/ Headlight Cleaner System:
Disconnect the headlight cleaner hose, and then drain the washer fluid.
- HINT:
- Use a container to collect the washer fluid.
w/ Fog Light:
Disconnect the 2 fog light connectors.
Detach the 8 claws and remove the front bumper cover.
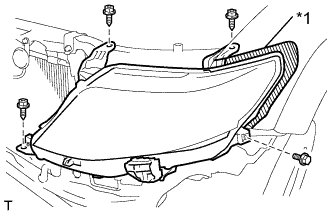
| 7. REMOVE HEADLIGHT ASSEMBLY LH |
Put protective tape around the headlight assembly LH.
Text in Illustration*1
| Protective tape
|
Remove the 3 screws and bolt.
Disconnect the connectors and remove the headlight assembly LH.