Ultrasonic Sensor Removal
REMOVE COOL AIR INTAKE DUCT SEAL
REMOVE FRONT BUMPER ASSEMBLY
REMOVE NO. 1 ULTRASONIC SENSOR
REMOVE LUGGAGE COMPARTMENT TRIM COVER
REMOVE DECK SIDE TRIM BOX LH
REMOVE DECK SIDE TRIM BOX RH
REMOVE SPARE WHEEL COVER
REMOVE ROPE HOOK ASSEMBLY
REMOVE REAR LUGGAGE COMPARTMENT TRIM COVER
REMOVE ROOM LIGHT ASSEMBLY
REMOVE ROPE HOOK
REMOVE FRONT LUGGAGE COMPARTMENT TRIM COVER
REMOVE LUGGAGE COMPARTMENT TRIM HOOK
REMOVE SIDE LUGGAGE COMPARTMENT TRIM COVER
DISCONNECT LUGGAGE ROOM WIRE
REMOVE REAR BUMPER PLATE
REMOVE REAR BUMPER ASSEMBLY
REMOVE NO. 2 ULTRASONIC SENSOR
REMOVE NO. 1 ULTRASONIC SENSOR
Ultrasonic Sensor -- Removal |
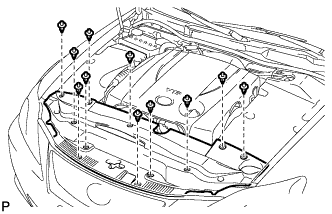
| 1. REMOVE COOL AIR INTAKE DUCT SEAL |
Using a clip remover, remove the 11 clips and cool air intake duct seal.
| 2. REMOVE FRONT BUMPER ASSEMBLY |
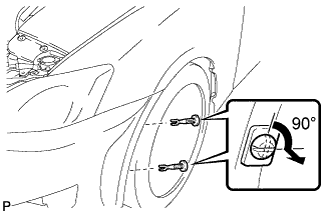
Using a screwdriver, turn the pin 90 degrees and remove the 2 pin hold clips.
- HINT:
- Tape the screwdriver tip before use.
- Use the same procedures for the RH side and LH side.
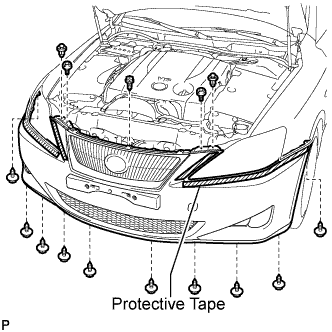
Put protective tape around the front bumper assembly.
Using a clip remover, remove the 2 clips
Remove the 2 radiator grille protectors.
Remove the bolt and 10 screws.
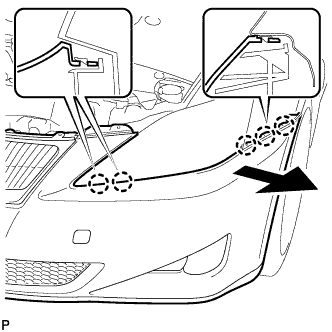
Disengage the 5 claws and disconnect the front bumper assembly as shown in the illustration.
- HINT:
- Use the same procedures for the RH side and LH side.
Disconnect the headlight washer hose. (w/ headlight cleaner system)
Disconnect the connector and remove the front bumper assembly.
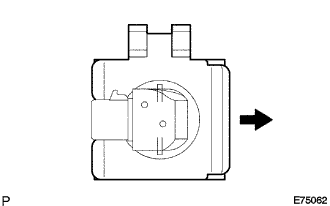
| 3. REMOVE NO. 1 ULTRASONIC SENSOR |
Disconnect the sensor connector.
Remove the sensor retainer as shown in the illustration.
Remove the No. 1 ultrasonic sensor from the front bumper.
| 4. REMOVE LUGGAGE COMPARTMENT TRIM COVER |
| 5. REMOVE DECK SIDE TRIM BOX LH |
| 6. REMOVE DECK SIDE TRIM BOX RH |
| 7. REMOVE SPARE WHEEL COVER |
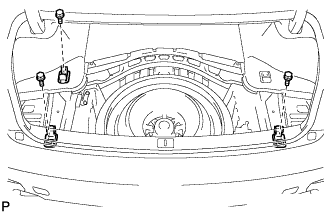
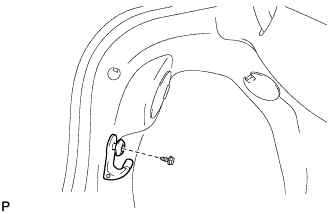
| 8. REMOVE ROPE HOOK ASSEMBLY |
Remove the 3 bolts and 3 rope hook assemblies.
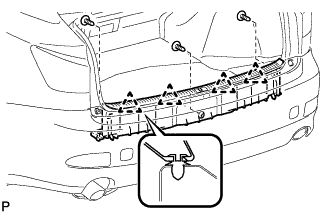
| 9. REMOVE REAR LUGGAGE COMPARTMENT TRIM COVER |
Using a clip remover, remove the 3 clips.
Disengage the 4 clips and remove the rear luggage compartment trim cover.
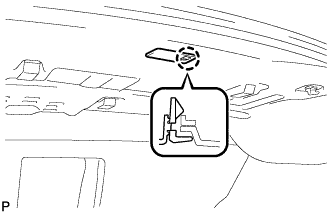
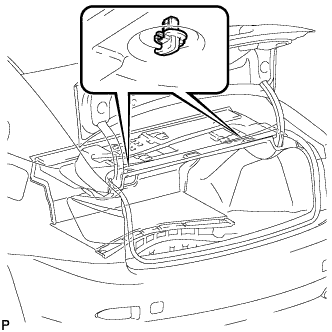
| 10. REMOVE ROOM LIGHT ASSEMBLY |
Disengage the claw and disconnect the No. 2 room light assembly.
Disconnect the connector and remove the No. 2 room light assembly.
Remove the 2 rope hooks.
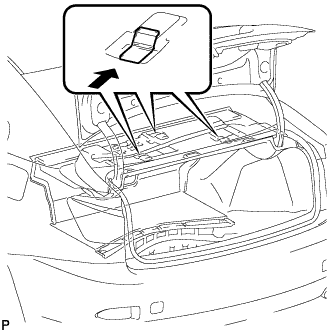
| 12. REMOVE FRONT LUGGAGE COMPARTMENT TRIM COVER |
Remove the 3 luggage compartment trim hooks as shown in the illustration.
Using a clip remover, remove the 2 clips.
Disengage the 4 claws and remove the front luggage compartment trim cover.
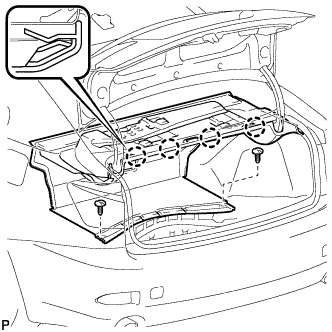
| 13. REMOVE LUGGAGE COMPARTMENT TRIM HOOK |
Remove the screw and No. 1 luggage compartment trim hook.
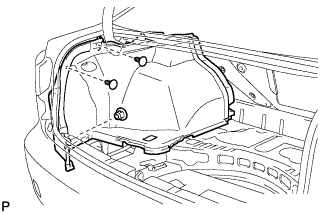
| 14. REMOVE SIDE LUGGAGE COMPARTMENT TRIM COVER |
Using a clip remover, remove the 3 clips and side luggage compartment trim cover LH.
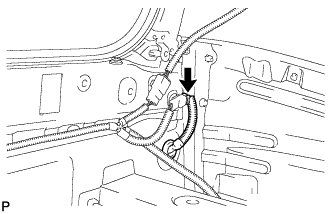
| 15. DISCONNECT LUGGAGE ROOM WIRE |
Disconnect the No. 3 luggage room wire connector.
Disengage the grommet.
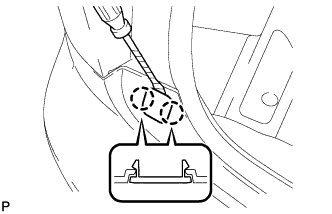
| 16. REMOVE REAR BUMPER PLATE |
Using a screwdriver, disengage the 2 claws and remove the No. 1 rear bumper plate.
- HINT:
- Tape the screwdriver tip before use.
- Use the same procedures for the RH side and LH side.
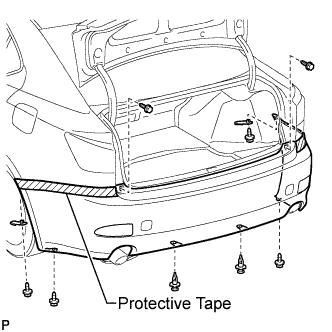
| 17. REMOVE REAR BUMPER ASSEMBLY |
Put protective tape around the rear bumper assembly.
Using a clip remover, remove the 2 clips.
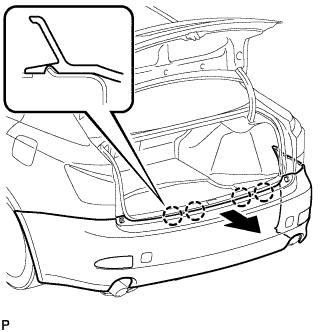
Remove the 6 screws and 2 rear bumper seal brackets.
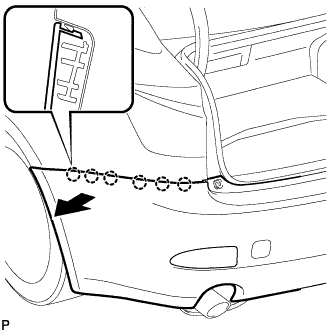
Disengage the 6 claws and disconnect the rear bumper assembly as shown in the illustration.
- HINT:
- Use the same procedures for the RH side and LH side.
Disengage the 4 claws and remove the rear bumper assembly as shown in the illustration.
| 18. REMOVE NO. 2 ULTRASONIC SENSOR |
Disconnect the sensor connector.
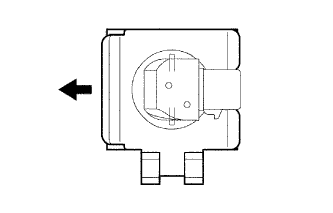
Remove the sensor retainer as shown in the illustration.
Remove the No. 2 ultrasonic sensor from the rear bumper.
| 19. REMOVE NO. 1 ULTRASONIC SENSOR |
Disconnect the sensor connector.
Remove the sensor retainer as shown in the illustration.
Remove the No. 1 ultrasonic sensor from the rear bumper.