Front Wiper Motor Removal
REMOVE COOL AIR INTAKE DUCT SEAL
REMOVE ENGINE ROOM SIDE COVER LH (for 4GR-FSE)
REMOVE ENGINE ROOM SIDE COVER LH (for 2AD-FHV)
REMOVE ENGINE ROOM SIDE COVER RH (for 4GR-FSE)
REMOVE ENGINE ROOM SIDE COVER RH (for 2AD-FHV)
REMOVE FRONT UPPER FENDER PROTECTOR LH
REMOVE FRONT UPPER FENDER PROTECTOR RH
REMOVE ROOF DRIP SIDE FINISH MOULDING LH
REMOVE ROOF DRIP SIDE FINISH MOULDING RH
REMOVE FRONT WIPER ARM HEAD CAP
REMOVE FRONT WIPER ARM AND BLADE ASSEMBLY LH
REMOVE FRONT WIPER ARM AND BLADE ASSEMBLY RH
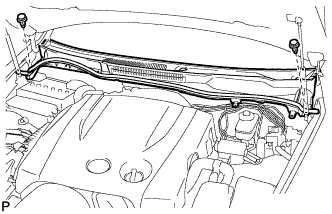
REMOVE COWL TOP VENTILATOR LOUVER SUB-ASSEMBLY
REMOVE WINDSHIELD WIPER MOTOR AND LINK ASSEMBLY
REMOVE WINDSHIELD WIPER MOTOR ASSEMBLY
Front Wiper Motor -- Removal |
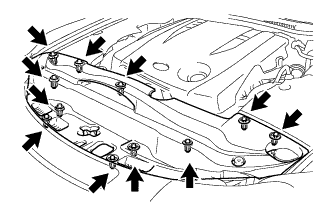
| 1. REMOVE COOL AIR INTAKE DUCT SEAL |
Remove the 11 clips and intake duct seal.
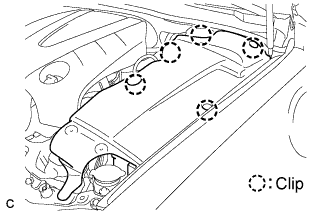
| 2. REMOVE ENGINE ROOM SIDE COVER LH (for 4GR-FSE) |
Remove the 5 clips and side cover.
| 3. REMOVE ENGINE ROOM SIDE COVER LH (for 2AD-FHV) |
Remove the 4 clips and side cover.
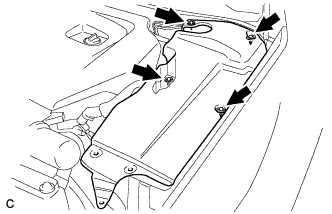
| 4. REMOVE ENGINE ROOM SIDE COVER RH (for 4GR-FSE) |
Remove the 2 clips and side cover.
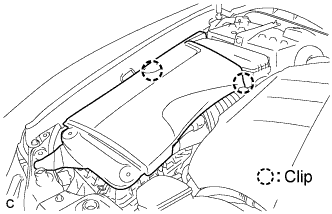
| 5. REMOVE ENGINE ROOM SIDE COVER RH (for 2AD-FHV) |
Remove the 2 clips and side cover.
| 6. REMOVE FRONT UPPER FENDER PROTECTOR LH |
Using a clip remover, separate the clip on the rubber portion of the cowl top ventilator louver sub-assembly from the front upper fender protector LH.
Disengage the 3 clips and the claw to remove the front upper fender protector LH.
| 7. REMOVE FRONT UPPER FENDER PROTECTOR RH |
- HINT:
- Use the same procedures for the RH side and the LH side.
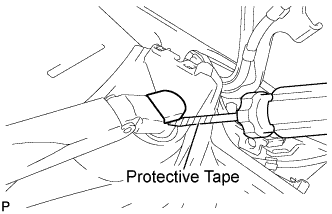
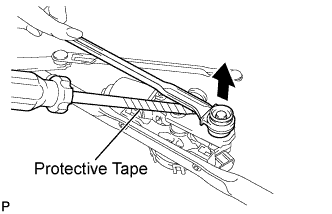
| 8. REMOVE ROOF DRIP SIDE FINISH MOULDING LH |
Put protective tape around the roof drip side finish moulding.
Using a moulding remover, disengage the 6 clips and remove the roof drip side finish moulding.
- NOTICE:
- Do not remove the clips.
- If the clips are damaged or fall off, replace them with new clips.
| 9. REMOVE ROOF DRIP SIDE FINISH MOULDING RH |
- HINT:
- Use the same procedures for the RH side and the LH side.
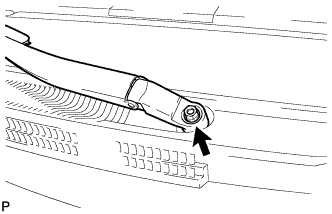
| 10. REMOVE FRONT WIPER ARM HEAD CAP |
Using a screwdriver, remove the front wiper arm head cap.
- HINT:
- Use the same procedures for the RH side and the LH side.
- Tape the screwdriver tip before use.
| 11. REMOVE FRONT WIPER ARM AND BLADE ASSEMBLY LH |
Remove the nut and the front wiper arm and blade assembly LH.
| 12. REMOVE FRONT WIPER ARM AND BLADE ASSEMBLY RH |
Remove the nut and the front wiper arm and blade assembly RH.
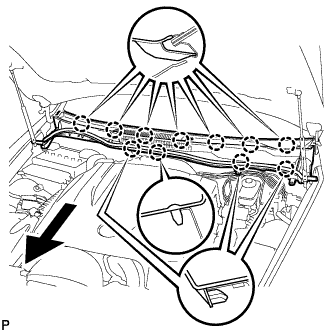
| 13. REMOVE COWL TOP VENTILATOR LOUVER SUB-ASSEMBLY |
Remove the 2 clips.
Disengage the 11 claws, and pull out the cowl top ventilator louver sub-assembly.
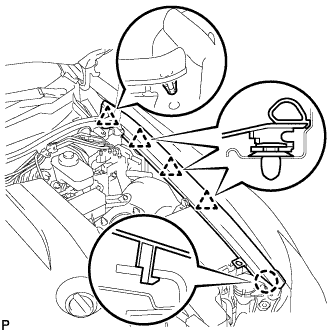
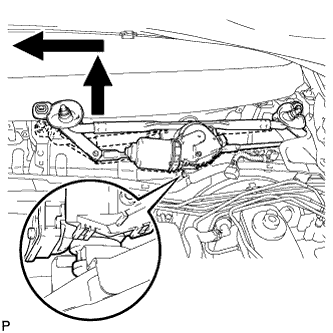
| 14. REMOVE WINDSHIELD WIPER MOTOR AND LINK ASSEMBLY |
Disconnect the 2 connectors.
Remove the 2 bolts.
Disengage the rubber pin of the windshield wiper motor from the vehicle body as shown in the illustration. Remove the windshield wiper motor and link assembly.
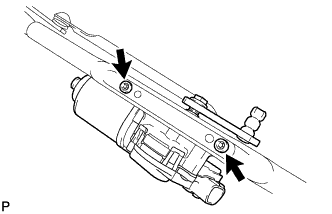
| 15. REMOVE WINDSHIELD WIPER MOTOR ASSEMBLY |
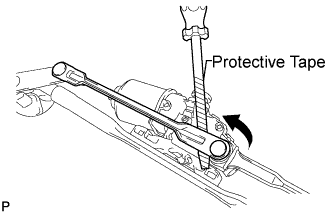
Using a screwdriver, separate the windshield wiper No. 2 link rod from the crank arm pivot of the front wiper motor assembly as shown in the illustration.
- HINT:
- Tape the screwdriver tip before use.
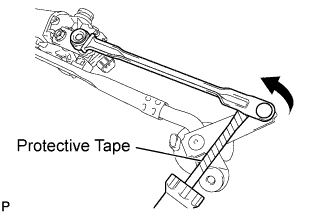
Using a screwdriver, separate the windshield wiper No. 1 link rod from the pivot of the front wiper link assembly as shown in the illustration.
- HINT:
- Tape the screwdriver tip before use.
Position the windshield wiper No. 1 link rod as shown in the illustration. Using a screwdriver, remove the windshield wiper No. 1 link rod.
- HINT:
- Tape the screwdriver tip before use.
Using a "torx" socket wrench (T30), remove the 2 bolts and the windshield wiper motor assembly from the windshield wiper link assembly.