Air Conditioning Unit Disassembly
REMOVE AIR OUTLET CONTROL SERVO MOTOR
REMOVE AIR MIX CONTROL SERVO MOTOR
REMOVE COOLER EXPANSION VALVE
REMOVE AIR CONDITIONING HARNESS ASSEMBLY
REMOVE AIR OUTLET CONTROL SERVO MOTOR
REMOVE AIR MIX CONTROL SERVO MOTOR
REMOVE HEATER RADIATOR UNIT SUB-ASSEMBLY
REMOVE NO. 1 COOLER EVAPORATOR SUB-ASSEMBLY
Air Conditioning Unit -- Disassembly |
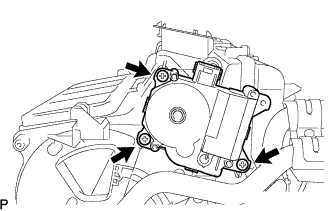
| 1. REMOVE AIR OUTLET CONTROL SERVO MOTOR |
Disconnect the connector.
Remove the 3 screws and air outlet control servo motor.
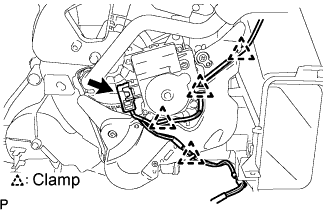
| 2. REMOVE AIR MIX CONTROL SERVO MOTOR |
Remove the 4 clamps and connector, and disconnect the wire harness.
Remove the 3 screws and heater piping cover.
Remove the 3 screws and air mix control servo motor.
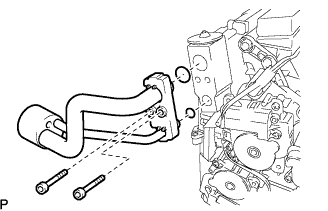
| 3. REMOVE COOLER EXPANSION VALVE |
Remove the packing from the air conditioning tube assembly.
Using a hexagon wrench 4 mm, remove the 2 hexagon bolts and air conditioning tube assembly.
Remove the 2 O-rings from the air conditioning tube assembly.
Remove the cooler expansion valve from the No. 1 cooler evaporator sub-assembly.
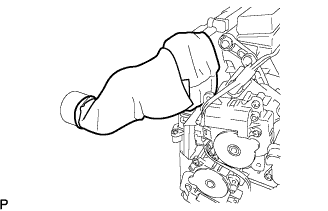
| 4. REMOVE AIR CONDITIONING HARNESS ASSEMBLY |
Remove the 2 connectors and 5 clamps, and then disconnect the wire harness.
Remove the air conditioning harness assembly as shown in the illustration.
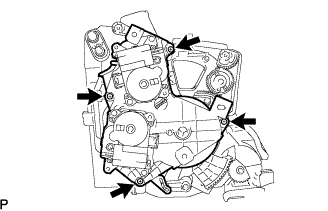
| 5. REMOVE AIR OUTLET CONTROL SERVO MOTOR |
Remove the 2 screws and the air duct.
Remove the 4 screws and the servo motor plate.
Remove the 2 screws.
Release the claw and remove the air outlet control servo motor from the servo motor plate.
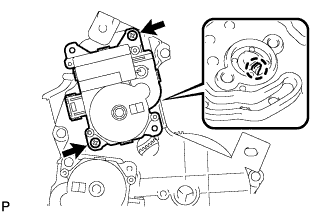
| 6. REMOVE AIR MIX CONTROL SERVO MOTOR |
Remove the 2 screws.
Release the claw and remove the air mix control servo motor from the servo motor plate.
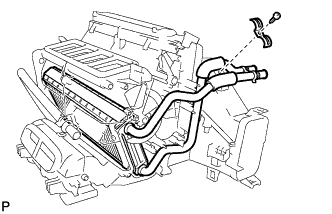
| 7. REMOVE HEATER RADIATOR UNIT SUB-ASSEMBLY |
Remove the screw and clamp.
Remove the heater radiator unit sub-assembly.
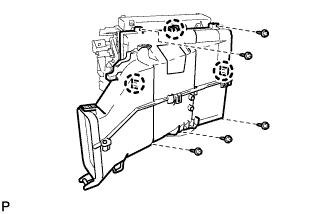
| 8. REMOVE NO. 1 COOLER EVAPORATOR SUB-ASSEMBLY |
Remove the 5 screws.
Release the 3 claws and remove the air duct.
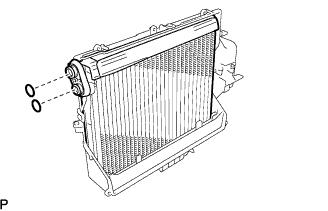
Remove the No. 1 cooler evaporator sub-assembly from the air duct.
Remove the 2 O-rings from the No. 1 cooler evaporator sub-assembly.