Cigarette Lighter Assembly Installation
INSTALL CIGARETTE LIGHTER ASSEMBLY
INSTALL CONSOLE UPPER PANEL ASSEMBLY
INSTALL FRONT CONSOLE UPPER PANEL GARNISH
CONNECT CABLE TO NEGATIVE BATTERY TERMINAL
PERFORM INITIALIZATION
Cigarette Lighter Assembly -- Installation |
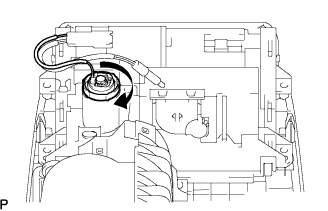
| 1. INSTALL CIGARETTE LIGHTER ASSEMBLY |
Rotate the ring nut in the direction indicated by the arrow mark and install the cigarette lighter to the console panel.
Rotate the socket body in the direction indicated by the arrow mark, and install the socket body to the cigarette lighter.
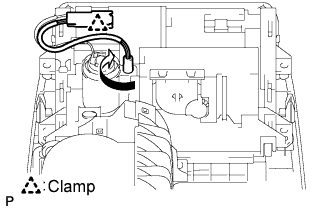
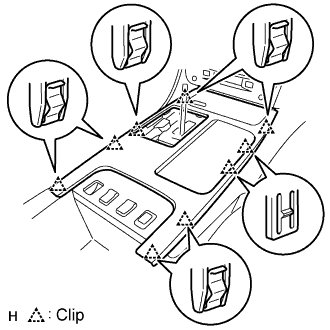
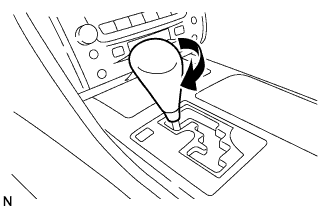
| 2. INSTALL CONSOLE UPPER PANEL ASSEMBLY |
Connect the connector.
Attach the 9 clips to install the ash receptacle.
Install the shift lever knob and twist it in the direction indicated by the arrow.
| 3. INSTALL FRONT CONSOLE UPPER PANEL GARNISH |
Attach the claws to install the garnish.
| 4. CONNECT CABLE TO NEGATIVE BATTERY TERMINAL |
| 5. PERFORM INITIALIZATION |
Perform initialization (Click here).
- NOTICE:
- Certain systems need to be initialized after disconnecting and reconnecting the cable from the negative (-) battery terminal.