Meter / Gauge System -- On-Vehicle Inspection |
| 1. INSPECT SPEEDOMETER |
Inspect the speedometer.
Using a speedometer tester, check that the speedometer reading is within the allowable range shown in the table below. Also, check for proper operation of the odometer.
- Reference:
- Australia, New Zealand
Standard indication Acceptable range 20 km/h (17.5 to 21.5 km/h) 40 km/h 38 to 42 km/h 60 km/h 58 to 63 km/h 80 km/h 78 to 84 km/h 100 km/h 98.5 to 104.5 km/h 120 km/h 119 to 125 km/h 140 km/h 139 to 146 km/h 160 km/h 159 to 167 km/h 180 km/h 179 to 188 km/h 200 km/h 199 to 209 km/h 220 km/h 219 to 230 km/h 240 km/h 239 to 251 km/h
- Reference:
- Countries other than Australia, New Zealand, Europe (RHD)
Standard indication Acceptable range 20 km/h (21.0 to 25.0 km/h) 40 km/h 41.7 to 46.2 km/h 60 km/h 62.7 to 67.2 km/h 80 km/h 83.4 to 88.4 km/h 100 km/h 104.3 to 109.3 km/h 120 km/h 125.1 to 130.6 km/h 140 km/h 145.8 to 151.8 km/h 160 km/h 166.2 to 173.2 km/h 180 km/h 186.9 to 194.5 km/h 200 km/h 207.7 to 215.7 km/h 220 km/h 228.4 to 236.8 km/h 240 km/h 249.2 to 258.0 km/h
- Reference:
- Europe RHD
Standard indication Acceptable range 20 mph 21.0 to 23.5 mph 40 mph 42 to 44.5 mph 60 mph 62.5 to 66.0 mph 80 mph 83.1 to 87.1 mph 100 mph 103.9 to 108.4 mph 120 mph 124.7 to 129.6 mph 140 mph 145.4 to 150.7 mph
- NOTICE:
- Do not use worn, underinflated or overinflated tires, as the speedometer reading will be inaccurate.
Check the deflection width of the speedometer indicator.
- Reference:
- Below 0.5 km/h (0.3 mph)
| 2. INSPECT TACHOMETER |
Inspect the tachometer.
Connect the tune-up test tachometer and start the engine.
- NOTICE:
- Reversing the connection of the tachometer will damage the transistors and the insides of the diodes.
- When removing or installing the tachometer, be careful not to drop or strike it.
Compare the result of the test with the standard indication.
- DC 13.5 V, at 25°C (77°F)
- Reference:
Standard indication (rpm) Acceptable range (rpm)
Data in ( ) are for reference700 630 to 770 1,000 (900 to 1100) 2,000 (1850 to 2150) 3,000 2800 to 3200 4,000 (3800 to 4200) 5,000 4800 to 5200 6,000 (5750 to 6250) 7,000 6700 to 7300 8,000 (7700 to 8300)
- DC 13.5 V, at 25°C (77°F)
| 3. INSPECT FUEL RECEIVER GAUGE |
Disconnect the connector from the sender gauge.
 |
Turn the engine switch on (IG), then check the position of the receiver gauge needle.
- OK:
- Needle position is on EMPTY
Connect terminals 2 and 3 on the wire harness side connector of the fuel sender gauge.
Turn the engine switch on (IG), then check the position of the receiver gauge needle.
- OK:
- Needle position is on FULL
| 4. INSPECT FUEL LEVEL WARNING LIGHT |
Disconnect the connector from the sender gauge.
Turn the engine switch on (IG), then check that the fuel level needle indicates EMPTY and the fuel level warning light comes on.
- OK:
- Fuel level needle indicates EMPTY and warning light comes on.
| 5. INSPECT BRAKE WARNING LIGHT |
Inspect the parking brake warning light.
Disconnect the connector from the parking brake switch.
Turn the engine switch on (IG).
Ground the terminal of the wire harness side connector, then check the parking brake warning light.
- OK:
- Brake warning light comes on.
Inspect the brake fluid level warning light.
Disconnect the connector from the brake fluid level warning switch.
Turn the engine switch on (IG).
Connect a terminal to the other terminal of the wire harness side connector, then check the brake fluid level warning switch.
- OK:
- Brake warning light comes on.
| 6. INSPECT BRAKE FLUID LEVEL WARNING SWITCH |
Remove the reservoir tank cap and strainer.
Disconnect the connector.
Measure the resistance between the terminals.
- Standard:
- Float up (switch off): 10 kΩ or higher
Use a siphon, etc. to take fluid out of the reservoir tank.
Measure the resistance between the terminals.
- Standard:
- Float down (switch on): Below 1 Ω
Pour the fluid back in the reservoir tank.
| 7. INSPECT WASHER FLUID LEVEL WARNING SWITCH |
Disconnect the connector from the washer level warning switch.
Turn the engine switch on (IG).
Ground the terminal of the wire harness side connector, then check the washer level warning light.
- OK:
- Washer level warning light comes on.
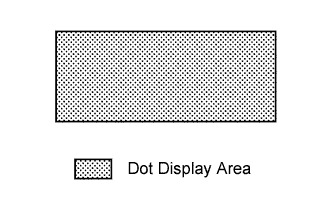
| 8. INSPECT MULTI-DISPLAY |
Dot display inspection mode
- HINT:
- Dot display inspection mode can be exited by turning the engine switch from on (IG) to off.
- Dot display inspection mode can be performed using the intelligent tester's Active Test (Click here)
With the engine switch off, turn the engine switch on (IG) while pressing the steering pad switch's DISP switch.
All of the multi-display's dots will illuminate.
When all of the dots are illuminated, check that the display is not damaged.