Front Wiper Motor -- Removal |
| 1. DISCONNECT CABLE FROM NEGATIVE BATTERY TERMINAL |
- CAUTION:
- Wait at least 90 seconds after disconnecting the cable from the negative (-) battery terminal to prevent airbag and seat belt pretensioner activation.
| 2. REMOVE COOL AIR INTAKE DUCT SEAL |
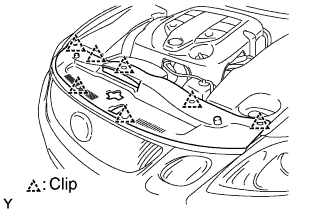 |
Remove the 7 clips and duct seal.
| 3. REMOVE ENGINE ROOM SIDE COVER LH (for LHD) |
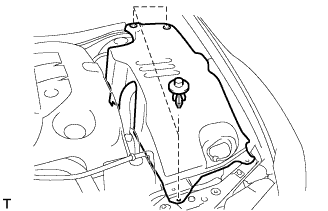 |
Using a clip remover, remove the 3 clips and side cover.
| 4. REMOVE ENGINE ROOM SIDE COVER RH (for RHD) |
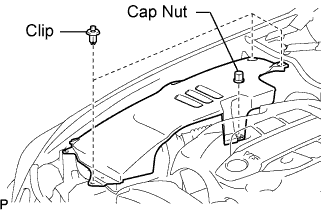 |
Remove the cap nut.
Using a clip remover, remove the 3 clips and side cover.
| 5. REMOVE FRONT PILLAR TO FRONT SIDE SEAL SUB-ASSEMBLY LH |
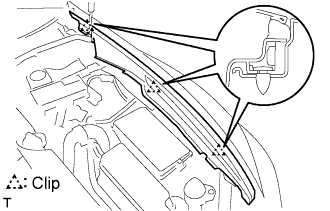 |
Using a clip remover, detach the 3 clips and remove the side seal.
| 6. REMOVE FRONT PILLAR TO FRONT SIDE SEAL SUB-ASSEMBLY RH |
- HINT:
- Use the same procedures described for the LH side.
| 7. REMOVE FRONT WIPER ARM AND BLADE ASSEMBLY LH |
Remove the nut, wiper arm and blade.
| 8. REMOVE FRONT WIPER ARM AND BLADE ASSEMBLY RH |
Remove the nut, wiper arm and blade.
| 9. REMOVE FRONT FENDER TO COWL SIDE SEAL LH |
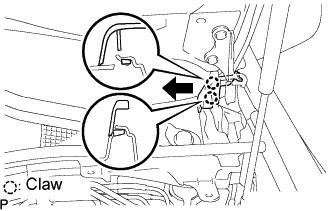 |
Pull the cowl side seal in the direction indicated by the arrow in the illustration to detach the 2 claws and remove the cowl side seal.
| 10. REMOVE FRONT FENDER TO COWL SIDE SEAL RH |
- HINT:
- Use the same procedures described for the LH side.
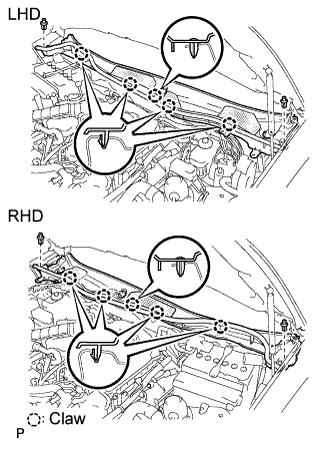
| 11. REMOVE COWL TOP VENTILATOR LOUVER SUB-ASSEMBLY |
Remove the 2 clips and detach the 5 claws.
 |
Pull the ventilator louver in the direction indicated by the arrow in the illustration to detach the 10 claws and remove the ventilator louver.
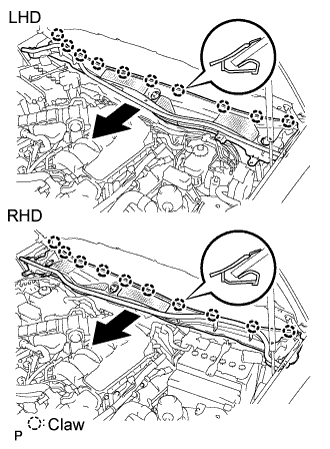 |
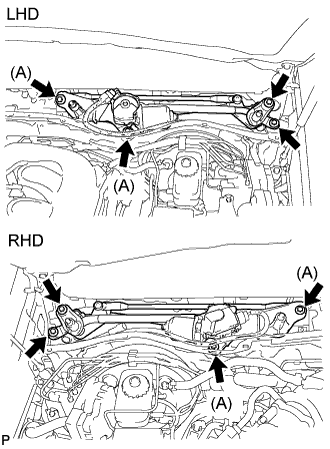
| 12. REMOVE FRONT WIPER MOTOR AND LINK ASSEMBLY |
Disconnect the connector. Then detach the 2 clamps and remove the wire harness from the cowl top panel.
 |
Remove the 4 bolts and the wiper motor and link assembly.
- HINT:
- The 2 bolts labeled (A) in the illustration cannot be removed from the wiper motor and link because they are integrated into the wiper motor and link.
 |
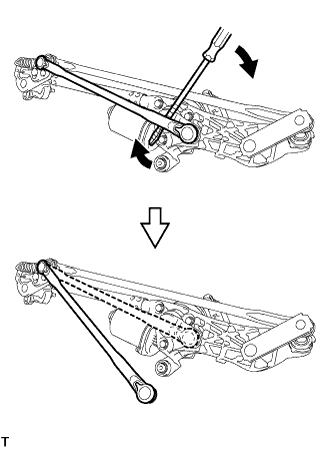
| 13. REMOVE FRONT WIPER MOTOR ASSEMBLY |
Using a screwdriver, disconnect the rod of the wiper link from the wiper motor as shown in the illustration.
- HINT:
- Tape the screwdriver tip before use.
 |
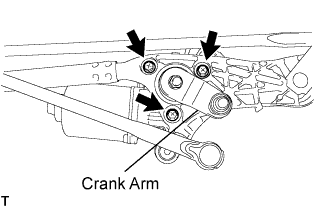
Remove the 3 bolts and wiper motor.
- HINT:
- Rotate the crank arm as necessary to remove the bolts.
 |