Front Seat Outer Belt Assembly -- Removal |
- HINT:
- Use the same procedures for the RH side and LH side.
- The procedures listed below are for the RH side.
- A bolt without a torque specification is shown in the standard bolt chart (Click here).
| 1. DISCONNECT CABLE FROM NEGATIVE BATTERY TERMINAL |
- CAUTION:
- Wait at least 90 seconds after disconnecting the cable from the negative (-) battery terminal to prevent airbag and seat belt pretensioner activation.
| 2. DISCONNECT FRONT SEAT OUTER BELT ASSEMBLY |
Using a screwdriver, detach the 2 claws and remove the front seat belt hole cover.
- HINT:
- Tape the screwdriver tip before use.
 |
Apply protective tape around the seat belt anchor cover cap to the cushion shield.
 |
Using a screwdriver, detach the 2 claws and remove the seat belt anchor cover cap.
- HINT:
- Tape the screwdriver tip before use.
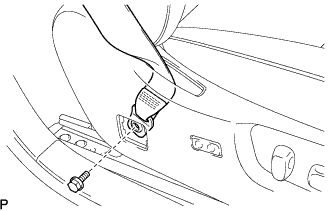
Move the seat using the power seat switch knob so that the seat belt anchor bolt is revealed.
Remove the bolt and front seat outer belt anchor.
 |
| 3. REMOVE FRONT SEAT ASSEMBLY |
Operate the power seat switch knob and move the seat to the rearmost position.
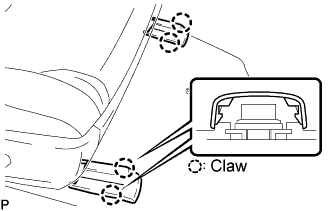 |
Using a screwdriver, detach the 4 claws and remove the seat track bracket cover front inner and outer.
- HINT:
- Tape the screwdriver tip before use.
Remove the 2 bolts on the front side of the seat.
Operate the power seat switch knob and move the seat to the foremost position.
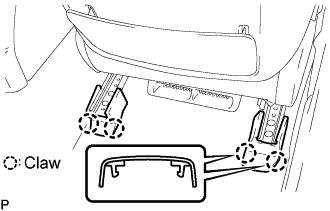
Using a screwdriver, detach the 4 claws and remove the seat track bracket cover rear inner and outer.
 |
Remove the 2 bolts on the rear side of the seat.
Disconnect the connectors under the seat. Then remove the seat.
| 4. REMOVE FRONT DOOR SCUFF PLATE |
- HINT:
- Use the same procedures described for the LH side.
| 5. REMOVE REAR DOOR SCUFF PLATE |
- HINT:
- Use the same procedures described for the LH side.
| 6. REMOVE CENTER PILLAR GARNISH LOWER |
- HINT:
- Use the same procedures described for the LH side.
| 7. REMOVE CENTER PILLAR GARNISH |
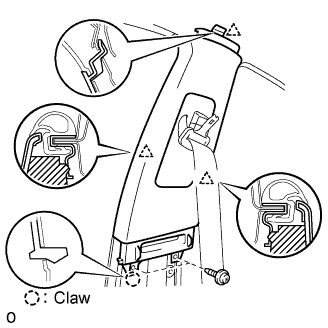 |
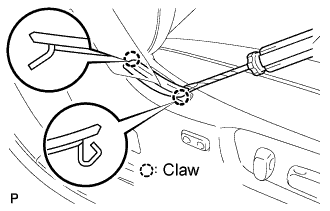
Using a screwdriver, detach the 3 clips and claw, and remove the 2 screws and center pillar garnish.
- HINT:
- Tape the screwdriver tip before use.
Pull out the outer belt anchor from the center pillar garnish.
| 8. REMOVE FRONT SEAT OUTER BELT ASSEMBLY |
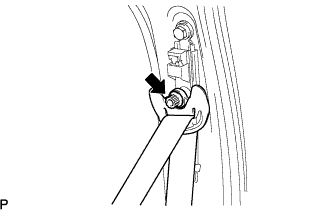 |
Remove the nut and shoulder anchor.
Disconnect the pretensioner connector as shown in the illustration labeled A.
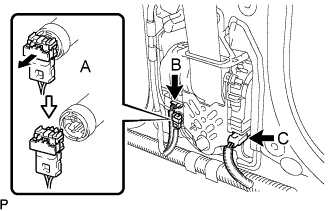 |
Disconnect the tension reducer connector labeled B.
Disconnect the pre-crash safety connector labeled C.
Remove the 2 bolts and seat belt.
 |
| 9. REMOVE FRONT SHOULDER BELT ANCHOR ADJUSTER ASSEMBLY |
 |
Remove the bolt.
Rotate the adjuster approximately 90°. Then pull and remove it.