Center Airbag Sensor Assembly Installation
INSTALL CENTER AIRBAG SENSOR ASSEMBLY
INSTALL CONSOLE BOX
INSTALL CONSOLE BOX REGISTER ASSEMBLY
INSTALL CONSOLE BOX PLATE
INSTALL INSTRUMENT PANEL FINISH PANEL LH END
INSTALL INSTRUMENT PANEL FINISH PANEL RH END
INSTALL FRONT ASH RECEPTACLE ASSEMBLY
INSTALL CONSOLE UPPER PANEL GARNISH FRONT
CONNECT CABLE TO NEGATIVE BATTERY TERMINAL
PERFORM INITIALIZATION
INSPECT SRS WARNING LIGHT
Center Airbag Sensor Assembly -- Installation |
| 1. INSTALL CENTER AIRBAG SENSOR ASSEMBLY |
Check that the engine switch is off.
Check that the battery negative (-) terminal is disconnected.
- NOTICE:
- After disconnecting the negative battery terminal, wait for at least 90 seconds before starting the operation.
Install the center airbag sensor with the nut and 2 bolts.
- Torque:
- 18 N*m{184 kgf*cm, 13 ft.*lbf}
- NOTICE:
- If the center airbag sensor has been dropped, or there are any cracks, dents or other defects in the case, bracket or connector, replace it with a new one.
- When installing the center airbag sensor, be careful that the SRS wiring does not interfere with other parts and that it is not pinched between other parts.
Check that there is no looseness in the installation parts of the center airbag sensor.
Connect the holder (with connectors).
Check that the water-proof sheet is properly set.
Connect the connector.
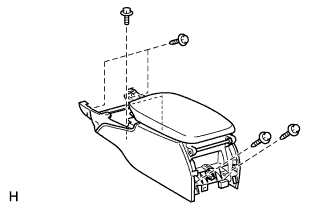
Install the console box with the 4 bolts and 2 screws.
| 3. INSTALL CONSOLE BOX REGISTER ASSEMBLY |
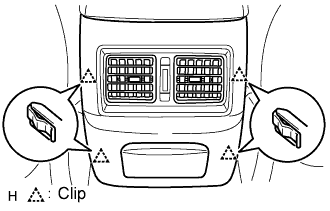
Attach the 4 clips to install the register.
| 4. INSTALL CONSOLE BOX PLATE |
Connect the connector.
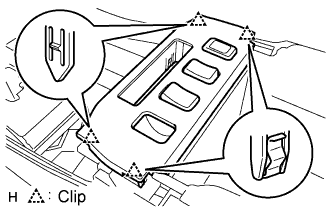
Attach the 4 clips to install the console box.
| 5. INSTALL INSTRUMENT PANEL FINISH PANEL LH END |
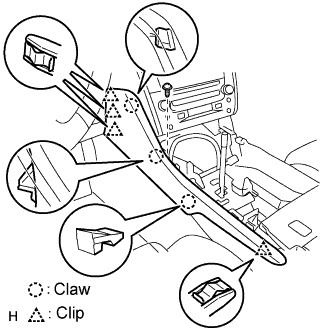
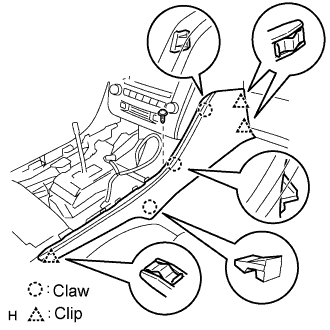
Attach the 4 clips and 3 claws to install the finish panel end.
Install the screw.
| 6. INSTALL INSTRUMENT PANEL FINISH PANEL RH END |
Attach the 3 clips and 3 claws to install the finish panel end.
Install the screw.
| 7. INSTALL FRONT ASH RECEPTACLE ASSEMBLY |
Connect the connector.
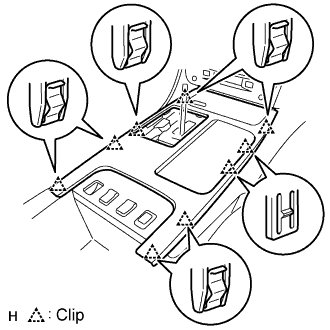
Attach the 9 clips to install the ash receptacle.
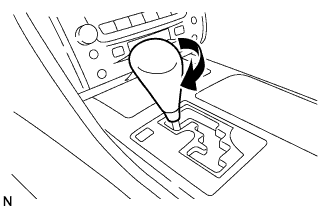
Install the shift lever knob and twist it in the direction indicated by the arrow.
| 8. INSTALL CONSOLE UPPER PANEL GARNISH FRONT |
Attach the claws to install the garnish.
| 9. CONNECT CABLE TO NEGATIVE BATTERY TERMINAL |
| 10. PERFORM INITIALIZATION |
| 11. INSPECT SRS WARNING LIGHT |

