Heated Oxygen Sensor (For Sensor 2) Installation
Engine. Lexus Gs430, Gs300. Uzs190 Grs190
INSTALL HEATED OXYGEN SENSOR (for Bank 2 Sensor 2)
INSTALL HEATED OXYGEN SENSOR (for Bank 1 Sensor 2)
INSTALL INSTRUMENT PANEL FINISH PANEL END LH
INSTALL INSTRUMENT PANEL FINISH PANEL END RH
INSTALL CONSOLE BOX PLATE
INSTALL CONSOLE UPPER PANEL ASSEMBLY
INSTALL FRONT CONSOLE UPPER GARNISH
CONNECT CABLE TO NEGATIVE BATTERY TERMINAL
PERFORM INITIALIZATION
Heated Oxygen Sensor (For Sensor 2) -- Installation |
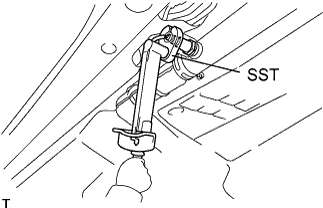
| 1. INSTALL HEATED OXYGEN SENSOR (for Bank 2 Sensor 2) |
Using SST, install the sensor to the front exhaust pipe.
- SST
- 09224-00010
- Torque:
- 40 N*m{408 kgf*cm, 30 ft.*lbf}for use with SST
- 44 N*m{449 kgf*cm, 32 ft.*lbf}for use without SST
- HINT:
- Use a torque wrench with a fulcrum length of 300 mm (11.81 in.).
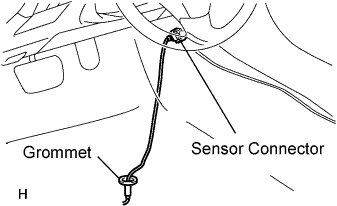
Pass the sensor connector through the floor panel and install the grommet.
Connect the sensor connector.
Install the scuff plate.
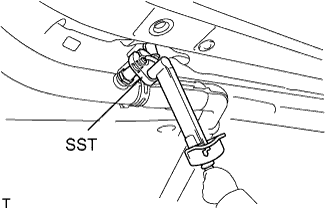
| 2. INSTALL HEATED OXYGEN SENSOR (for Bank 1 Sensor 2) |
Using SST, install the sensor to the front exhaust pipe.
- SST
- 09224-00010
- Torque:
- 40 N*m{408 kgf*cm, 30 ft.*lbf}for use with SST
- 44 N*m{449 kgf*cm, 32 ft.*lbf}for not use without SST
- HINT:
- Use a torque wrench with a fulcrum length of 300 mm (11.81 in.).
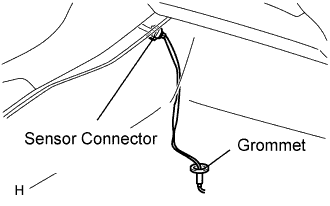
Pass the sensor connector through the floor panel and install the grommet.
Connect the sensor connector.
| 3. INSTALL INSTRUMENT PANEL FINISH PANEL END LH |
Attach the 2 claws and 4 clips to install the side panel.
| 4. INSTALL INSTRUMENT PANEL FINISH PANEL END RH |
Attach the 3 clips and 3 claws to install the finish panel end.
Install the screw.
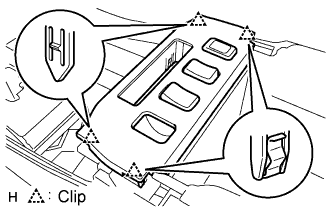
| 5. INSTALL CONSOLE BOX PLATE |
Connect the connector.
Attach the 4 clips to install the console box.
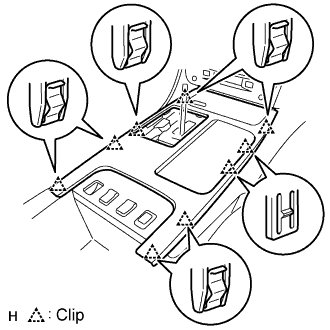
| 6. INSTALL CONSOLE UPPER PANEL ASSEMBLY |
Connect the connector.
Attach the 9 clips to install the ash receptacle.
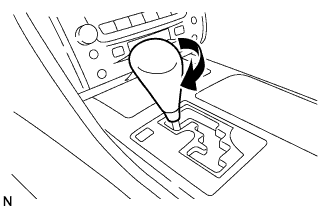
Install the shift lever knob and twist it in the direction indicated by the arrow.
| 7. INSTALL FRONT CONSOLE UPPER GARNISH |
Attach the claws to install the garnish.
| 8. CONNECT CABLE TO NEGATIVE BATTERY TERMINAL |
| 9. PERFORM INITIALIZATION |
Perform initialization (Click here).
- NOTICE:
- Certain systems need to be initialized after disconnecting and reconnecting the cable from the negative (-) battery terminal.