High Pressure Side Fuel Pump -- Removal |
- CAUTION:
- Do not allow fuel to spray when removing the pipe between the high pressure side fuel pump and the fuel injector. The fuel in the pipe is highly pressurized.
| 1. DISCHARGE FUEL SYSTEM PRESSURE |
- CAUTION:
- Do not disconnect any part of the fuel system until you have discharged the fuel system pressure.
- Even after discharging the fuel pressure, place a shop rag over fittings as you separate them to reduce the risk of fuel spray on yourself or in the engine compartment.
Disconnect the cable from the negative (-) battery terminal.
- NOTICE:
- Wait at least 90 seconds after disconnecting the cable from the negative (-) battery terminal to prevent airbag and seat belt pretensioner activation.
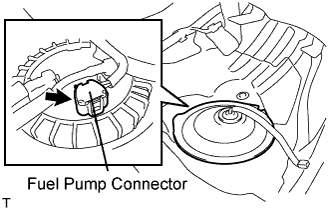
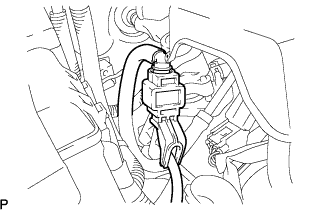
Disconnect the fuel pump connector.
 |
Connect the cable to the negative (-) battery terminal.
Start the engine. After the engine has stopped on its own, turn the engine switch off.
- HINT:
- DTC P0171/P0172 (system too lean) may be set.
Crank the engine again, then check that the engine does not start.
Loosen the fuel tank cap, then discharge the pressure in the fuel tank completely.
Connect the fuel pump connector.
| 2. DISCONNECT CABLE FROM NEGATIVE BATTERY TERMINAL |
- CAUTION:
- Wait at least 90 seconds after disconnecting the cable from the negative (-) battery terminal to prevent airbag and seat belt pretensioner activation.
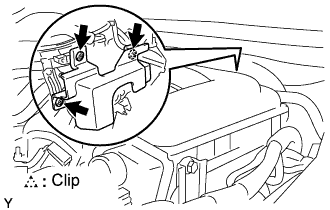
| 3. REMOVE COOL AIR INTAKE DUCT SEAL |
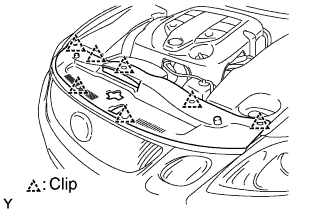 |
Remove the 7 clips and duct seal.
| 4. REMOVE ENGINE UNDER COVER |
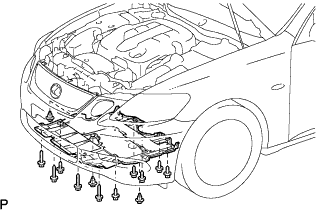 |
Using a clip remover, remove the 3 clips.
Remove the 10 screws and under cover.
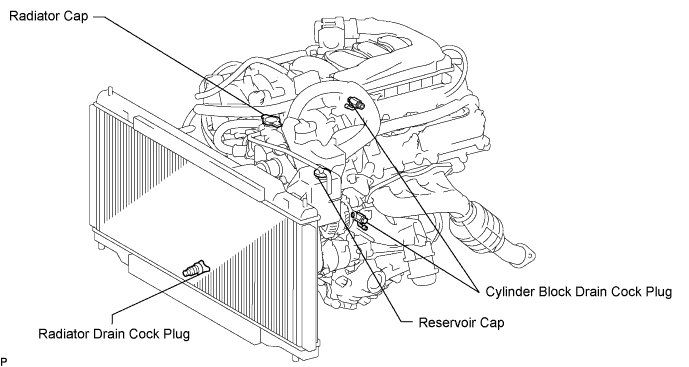
| 5. DRAIN ENGINE COOLANT |
- CAUTION:
- Do not remove the radiator cap while the engine and radiator are still hot. Pressurized, hot engine coolant and steam may be released and cause serious burns.
Remove the radiator cap and reservoir cap.
Loosen the radiator drain cock plug and 2 cylinder block drain cock plugs. Then drain the coolant.
- HINT:
- Collect the coolant in a container and dispose of it according to the regulations in your area.
| 6. REMOVE ENGINE ROOM SIDE COVER RH |
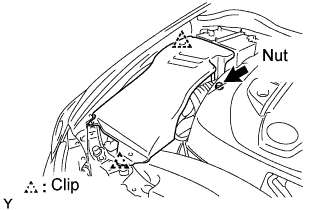 |
Loosen the nut and remove the 2 clips and side cover.
| 7. REMOVE V-BANK COVER |
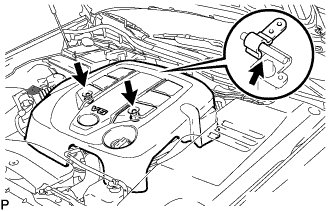 |
Remove the 2 nuts and V-bank cover.
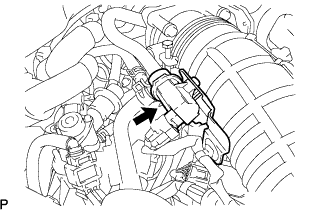
| 8. DISCONNECT NO. 2 VENTILATION HOSE |
 |
Disconnect the ventilation hose from the cylinder head.
| 9. REMOVE AIR CLEANER CAP WITH AIR CLEANER HOSE |
Disconnect the MAF meter connector.
 |
Disconnect the clamp from the air cleaner.
Disconnect the VSV (for EVAP).
 |
Disconnect the 4 clamps.
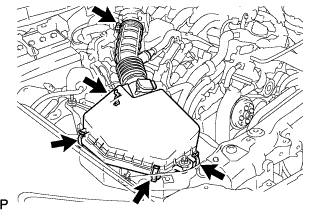 |
Remove the hose clamp and air cleaner cap with air cleaner hose.
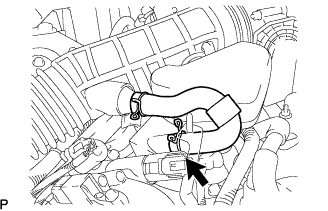
| 10. DISCONNECT WATER BY-PASS HOSE |
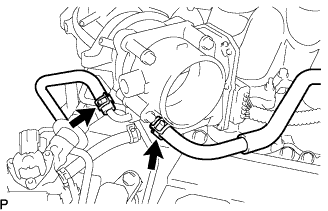 |
Disconnect the 2 water by-pass hoses from the throttle body.
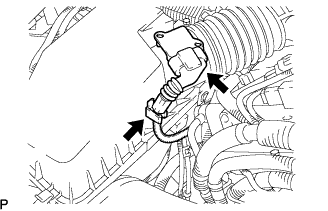
| 11. DISCONNECT HEATER WATER INLET HOSE |
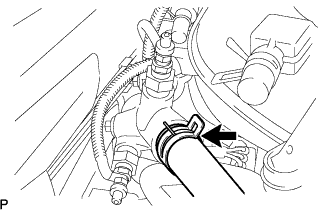 |
Disconnect the hose from the water hose joint.
| 12. REMOVE ENGINE REAR COVER |
 |
Remove the 3 clips and engine rear cover.
| 13. DISCONNECT FUEL MAIN TUBE |
Remove the fuel pipe clamp.
 |
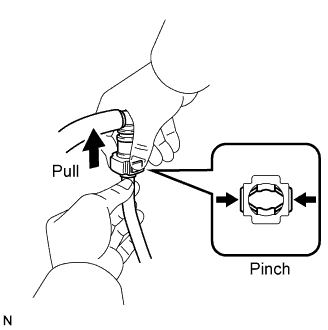
Pinch and pull the fuel tube's connector to disconnect it from the fuel main pipe.
- NOTICE:
- Check for foreign matter in the fuel tube around the fuel tube's connector. Clean it if necessary. Foreign matter can affect the O-ring's ability to seal the connector and fuel main pipe.
- Do not use any tools to separate the connector and pipe.
- Do not forcefully bend or twist the hose.
- Keep the connector and pipe free from foreign matter.
- If the connector and pipe are stuck together, pinch the connector and turn it carefully to disconnect it.
Put the connector in a plastic bag to prevent damage and contamination.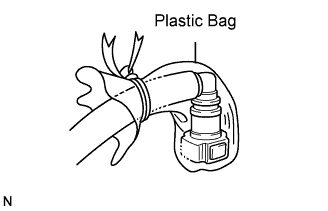
 |
| 14. DISCONNECT UNION TO CHECK VALVE HOSE |
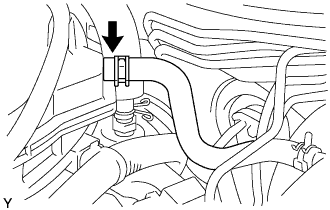 |
Disconnect the hose from the surge tank.
| 15. DISCONNECT VENTILATION HOSE |
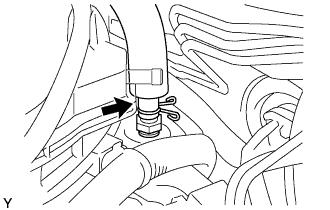 |
Disconnect the ventilation hose from the ventilation valve.
| 16. REMOVE INTAKE AIR SURGE TANK |
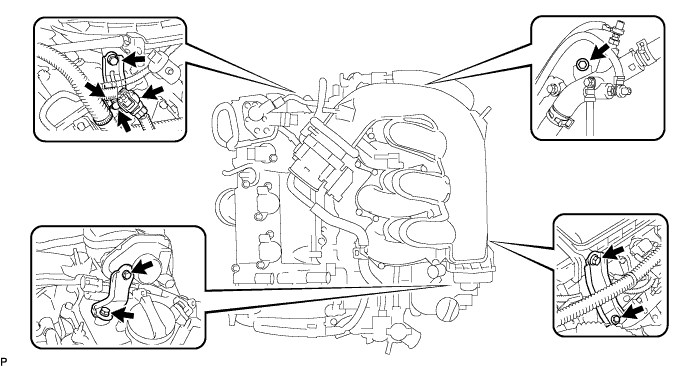
Disconnect the throttle motor connector.
Disconnect the IACV connector.
Disconnect the wire harness clamp from the surge tank.
Remove the 2 bolts and intake manifold stay.
Disconnect the 2 wire harness clamps from the surge tank stays.
Remove the 4 bolts and 2 surge tank stays.
Remove the bolt and disconnect the water hose joint.
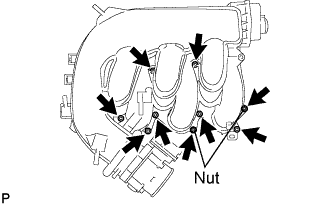
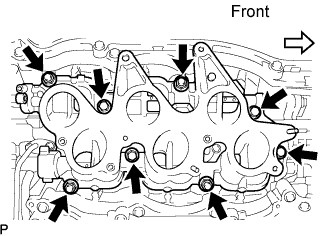
Using a 5 mm hexagon socket wrench, remove the 7 bolts, 2 nuts and gasket.
- HINT:
- Cover the intake manifold port to prevent foreign matter from entering it.
 |
| 17. REMOVE INTAKE MANIFOLD |
 |
Disconnect the DC motor connector for the SCV.
Disconnect the SCV position sensor connector.
Remove the 4 bolts, 4 nuts, intake manifold and gasket.
- HINT:
- Cover the cylinder head intake port to prevent foreign matter from entering it.
| 18. DISCONNECT NO. 1 FUEL PIPE |
Disconnect the fuel pipe hose.
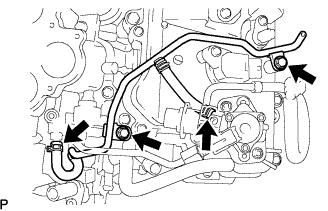 |
Remove the 2 bolts and fuel pipe.
| 19. REMOVE FUEL PRESSURE PULSATION DAMPER |
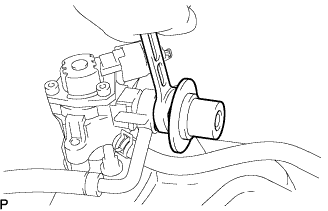 |
Remove the fuel pulsation damper and 2 gaskets, and disconnect the fuel main tube from the fuel pump.
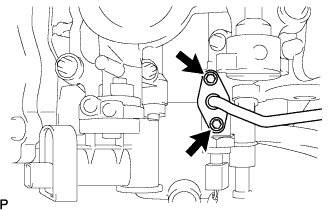
| 20. DISCONNECT NO. 2 FUEL PIPE |
Disconnect the fuel high pressure side fuel pump connector.
Fix the union bolt on the fuel pump side in place with a 21 mm wrench. Using a 19 mm union nut wrench, loosen the union and remove the fuel pipe.
- NOTICE:
- There must be absolutely no free play in the union on the fuel pump side.
- If the union on the fuel pump side has free play, replace the fuel pump.
 |
Remove the 2 bolts on the delivery pipe side.
- NOTICE:
- Do not remove the fuel pipe from the delivery pipe. Only remove the 2 bolts.
- If the No. 2 fuel pipe is accidentally removed, replace its O-ring, No. 1 backup ring and No. 2 backup ring.
 |
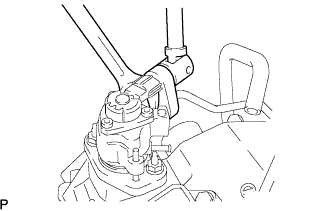
| 21. REMOVE HIGH PRESSURE SIDE FUEL PUMP |
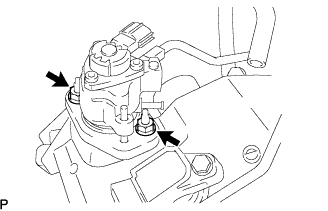 |
Disconnect the fuel hose.
Remove the 2 nuts, fuel pump and fuel pump insulator.