Engine. Lexus Gs430, Gs300. Uzs190 Grs190
INSTALL CAMSHAFT SUB GEAR
INSTALL CAMSHAFT TIMING TUBE ASSEMBLY
INSTALL SPARK PLUG TUBE
INSTALL NO. 1 TIGHT PLUG
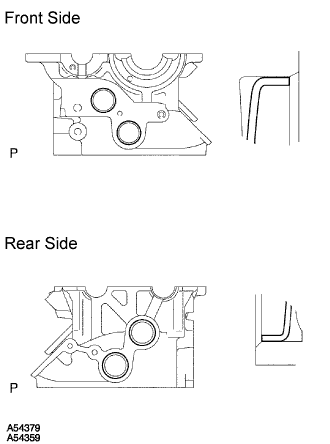
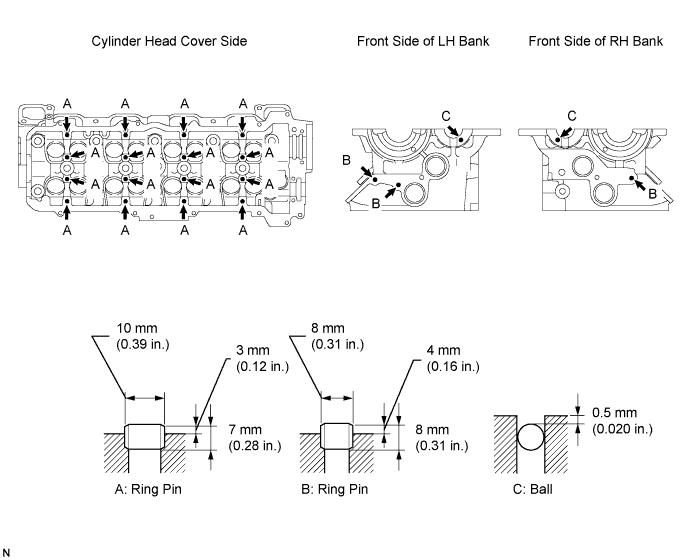
INSTALL RING PIN
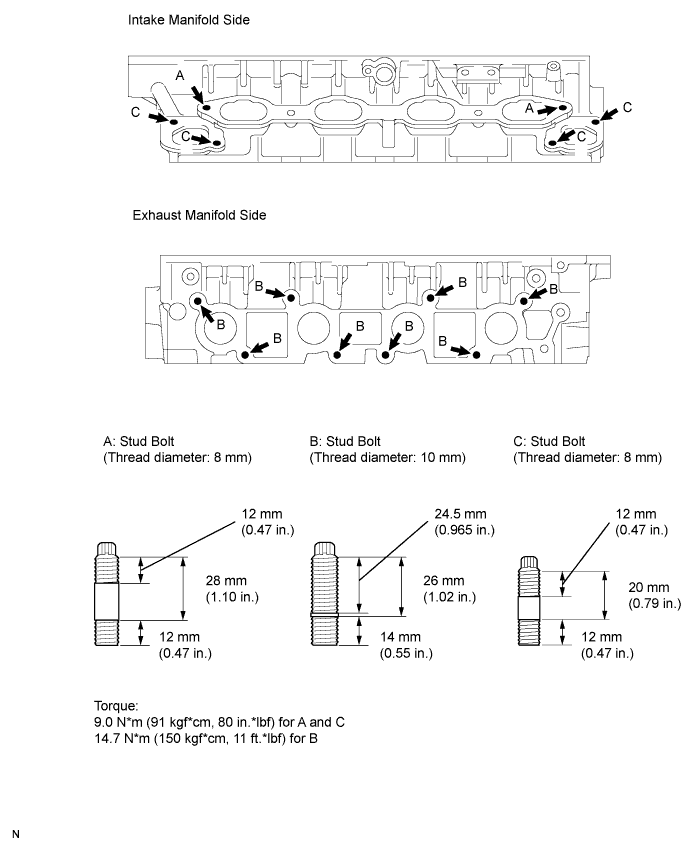
INSTALL STUD BOLT
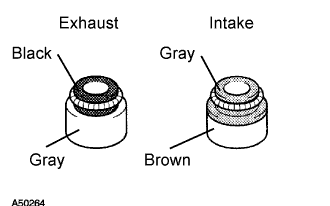
INSTALL VALVE STEM OIL SEAL
INSTALL INTAKE VALVE
INSTALL EXHAUST VALVE
INSTALL VALVE LIFTER
Cylinder Head -- Reassembly |
| 1. INSTALL CAMSHAFT SUB GEAR |
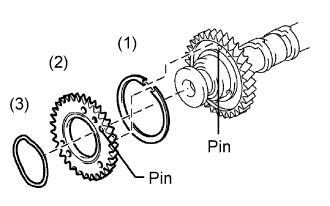
Install the bolt washer (1), sub gear (2) and wave washer (3).
- HINT:
- Attach the pins on the gears to the gear bolt washer ends.
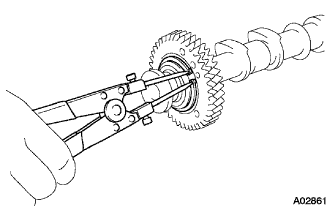
Using snap ring pliers, install the snap ring.
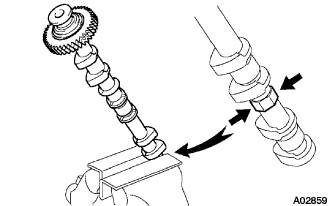
Mount the hexagon head portion of the camshaft in a vise.
- NOTICE:
- Be careful not to damage the camshaft.
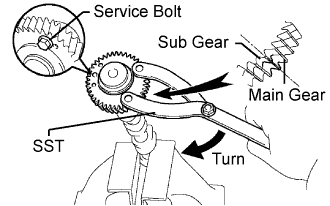
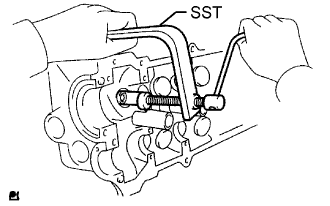
Using SST, align the holes of the driven main gear and sub gear by turning the sub gear clockwise, and temporarily install a service bolt.
- SST
- 09960-10010(09962-01000,09963-00500)
Align the gear teeth of the driven main gear and sub gear, and tighten the service bolt.
| 2. INSTALL CAMSHAFT TIMING TUBE ASSEMBLY |
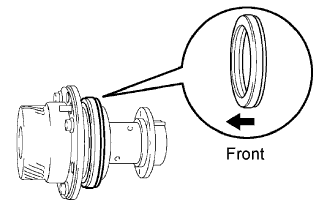
Insert a new oil seal into the camshaft timing tube until it reaches the stopper.
- NOTICE:
- Be careful of the installation direction.
- Do not turn over the lip of the oil seal.
Align the timing tube knock pin with the knock pin groove of the drive gear, and temporarily install the drive gear with the 4 bolts.
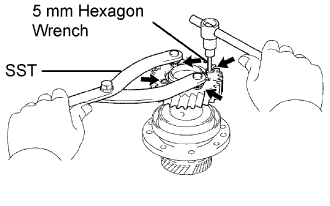
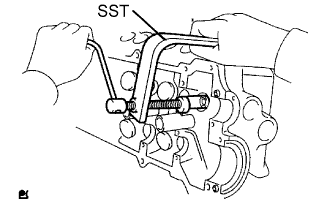
Using SST and a 5 mm hexagon wrench, uniformly tighten the 4 bolts in several passes.
- SST
- 09960-10010(09962-01000,09963-00500)
- Torque:
- 7.5 N*m{76 kgf*cm, 66 in.*lbf}
- NOTICE:
- Be careful not to damage the timing tube.
Mount the hexagon head portion of the camshaft in a vise.
- NOTICE:
- Be careful not to damage the camshaft.
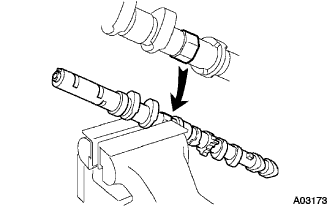
Align the camshaft knock pin with the knock pin groove of the timing tube, and push the timing tube by hand until it touches the bottom.
Using a 10 mm hexagon wrench, install the bolt.
- Torque:
- 78 N*m{795 kgf*cm, 58 ft.*lbf}
Install the seal washer and screw plug.
- Torque:
- 15 N*m{152 kgf*cm, 11 ft.*lbf}
| 3. INSTALL SPARK PLUG TUBE |
- HINT:
- When using a new cylinder head, the spark plug tubes must be installed.
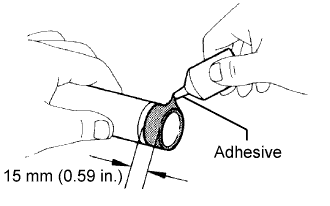
Apply adhesive to the end of the spark plug tube.
- Adhesive:
- Part No. 08833-00070, THREE BOND 1324 or equivalent.
- NOTICE:
- Install the spark plug tube within 3 minutes after applying adhesive.
- Be careful not to deform the spark plug tube.
- Be careful not to expose the seal to coolant for at least 1 hour after installing it.
Using a wooden block and hammer, tap in a new spark tube until there is 48.4 to 49.6 mm (1.906 to 1.953 in.) protruding from the camshaft bearing cap installation surface of the cylinder head.
- NOTICE:
- To avoid tapping in a new spark plug tube too far, measure the protrusion length while tapping.
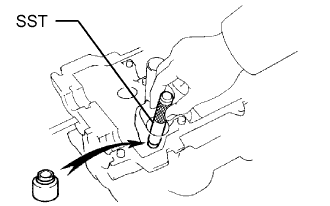
| 4. INSTALL NO. 1 TIGHT PLUG |
Apply adhesive to the end of the spark plug tube.
- Adhesive:
- Part No. 08833-0070, THREE BOND 1324 or equivalent.
Using SST and a hammer, tap in a new tight plug as shown in the illustration.
- SST
- 09550-60010(09951-00200)
09950-70010(09951-07100)
| 7. INSTALL VALVE STEM OIL SEAL |
Using SST, push in a new oil seal.
- SST
- 09201-41020
- NOTICE:
- Failure to use SST will cause the seal to be damaged or improperly seated.
Apply a light coat of engine oil in a new oil seal.
- NOTICE:
- Pay close attention when installing the intake and exhaust oil seals. For example, installing the intake oil seal into the exhaust or installing the exhaust oil seal to the intake can cause installation problems later.
- HINT:
- The intake valve oil seal is gray/brown and the exhaust valve oil seal is black/gray.
Install the valve, spring seat, compression spring and spring retainer.
Using SST, compress the compression spring and place the 2 keepers around the valve stem.
- SST
- 09202-70020(09202-00010)
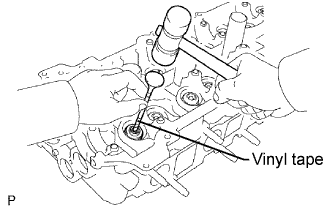
Using a plastic-faced hammer and a discarded valve with its tip wrapped in tape, lightly tap the installed valve to ensure that it is securely fit.
- NOTICE:
- Be careful not to damage the valve stem tip.
Install the valve, spring seat, compression spring and spring retainer.
- NOTICE:
- Install the same parts in the same combination to the original locations.
Using SST, compress the compression spring and place the 2 keepers around the valve stem.
- SST
- 09202-70020(09202-00010)
Using a plastic-faced hammer and a discarded valve with its tip wrapped in tape, lightly tap the installed valve to ensure that it is securely fit.
- NOTICE:
- Be careful not to damage the valve stem tip.
Install the valve lifter and shim.
Check that the valve lifter rotates smoothly by hand.