Vehicle Exterior. Land Cruiser. Urj200, 202 Grj200 Vdj200
Lighting (Ext). Land Cruiser. Urj200, 202 Grj200 Vdj200
Back-Up Light Assembly (For Standard) -- Removal |
- HINT:
- Use the same procedure for the RH and LH sides.
- The procedure listed below is for the LH side.
| 1. REMOVE REAR LIGHT ASSEMBLY LH |
Put protective tape around the rear light assembly LH.
Text in Illustration *1 Protective Tape
 |
Remove the 3 nuts.
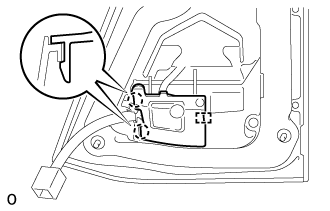
Detach the clip and remove the rear light assembly LH.
Disconnect the connector.
| 2. REMOVE REAR LIGHT GASKET LH |
Remove the rear light gasket LH from the rear light lens and body LH.
| 3. REMOVE REAR LIGHT COVER |
Detach the 2 claws and guide and remove the rear light cover from the rear light lens and body LH.
 |
| 4. REMOVE BACK UP LIGHT BULB |
Detach the clamp.
 |
Turn the rear light socket and wire LH in the direction indicated by the arrow in the illustration and remove the socket and back up light bulb.
Remove the back up light bulb from the rear light socket and wire LH.
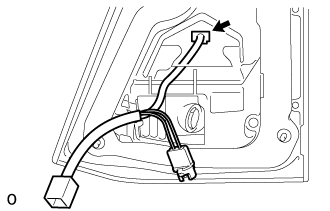
| 5. REMOVE REAR LIGHT SOCKET AND WIRE LH |
Disconnect the connector and remove the rear light socket and wire LH from the rear light lens and body LH.
 |