Rear Wiper Motor -- Installation |
| 1. INSTALL REAR WIPER MOTOR ASSEMBLY |
Temporarily install the rear wiper motor assembly with the 3 bolts.
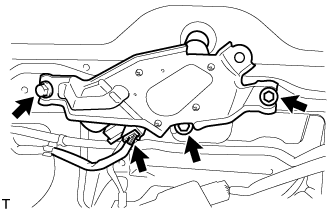 |
Tighten the 3 bolts.
- Torque:
- 5.5 N*m{56 kgf*cm, 49 in.*lbf}
Connect the connector.
| 2. INSTALL REAR WIPER MOTOR GROMMET |
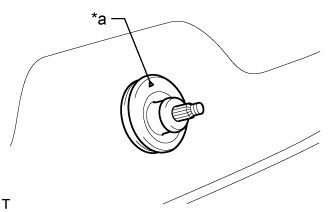
Apply MP grease to the entire circumference of the lip portion of the rear wiper motor grommet.
Text in Illustration *a Lip Portion - HINT:
- Do not fill the hole with MP grease. Only apply MP grease to the grooves of the lip portion.
 |
Install the rear wiper motor grommet as shown in the illustration.
Text in Illustration *a Position Mark
 |
| 3. INSTALL REAR WIPER ARM AND BLADE ASSEMBLY |
When reinstalling:
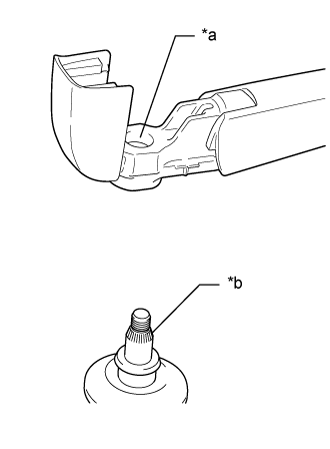
Text in Illustration *a Rear Wiper Arm Serrations *b Rear Wiper Motor Assembly Pivot Serrations - NOTICE:
- Do not grind the rear wiper arm serrations.
Clean the rear wiper arm serrations.
Clean the rear wiper motor assembly pivot serrations.
 |
Turn the engine switch on (IG).
Operate the rear wiper motor assembly and stop at the automatic stop (park) position.
Turn the engine switch off.
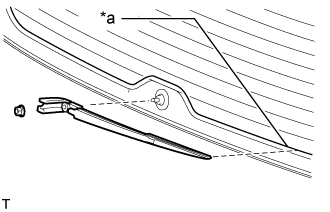
Align the rear wiper arm and blade assembly as shown in the illustration and install it with the nut.
- Torque:
- 5.5 N*m{56 kgf*cm, 49 in.*lbf}
- HINT:
- Hold the arm hinge by the hand when tightening the nut.
Text in Illustration *a Defogger Line
 |
Operate the rear wiper motor assembly while spraying washer fluid on the glass. Make sure that the rear wipers function properly and the wipers do not come into contact with the vehicle body.
Raise the rear wiper arm 2 times and check that the tip of the rear wiper blade is within the range shown in the illustration.
Return the rear wiper arm head cap.
 |
Attach the 2 claws to install the rear wiper arm head cap.
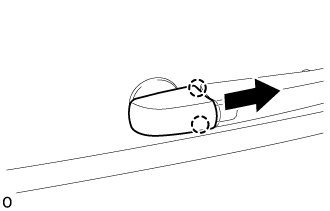 |
| 4. INSTALL REAR WIPER ARM HEAD CAP |
Attach the 2 guides and temporarily install the rear wiper arm head cap.
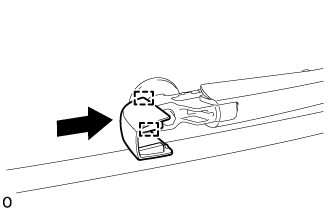 |
Return the rear wiper arm head cap.
 |
Attach the 2 claws to install the rear wiper arm head cap.
 |
| 5. INSTALL BACK DOOR GARNISH |
Attach the 14 clips to install the back door garnish.
| 6. INSTALL BACK DOOR SIDE GARNISH LH |
Attach the 3 clips and 2 claws to install the back door side garnish LH.
| 7. INSTALL BACK DOOR SIDE GARNISH RH |
w/o Power Back Door:
- HINT:
- Use the same procedure described for the LH side.
w/ Power Back Door:
Attach the clip and 4 claws to install the back door side garnish RH.
| 8. INSTALL CENTER BACK DOOR GARNISH |
Attach the 5 clips and 4 claws to install the center back door garnish.