Land Cruiser URJ200 URJ202 GRJ200 VDJ200 - 3UR-FE ENGINE CONTROL
POWER STEERING OIL PRESSURE SWITCH - REMOVAL
| 1. REMOVE FRONT FENDER SPLASH SHIELD SUB-ASSEMBLY LH |
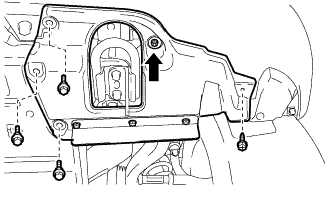
Remove the 3 bolts and screw.
Turn the clip indicated by the arrow in the illustration to remove the front fender splash shield sub-assembly LH.
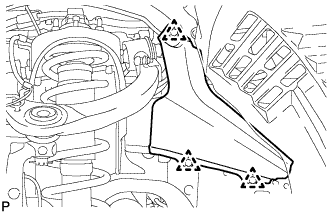
| 2. REMOVE FRONT FENDER SPLASH SHIELD SUB-ASSEMBLY RH |
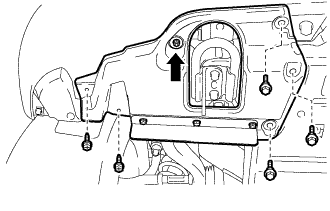
Remove the 3 bolts and 2 screws.
Turn the clip indicated by the arrow in the illustration to remove the front fender splash shield sub-assembly RH.
| 3. REMOVE NO. 1 ENGINE UNDER COVER SUB-ASSEMBLY |

Remove the 10 bolts and No. 1 engine under cover.
| 4. REMOVE AIR CLEANER HOSE ASSEMBLY |

Disconnect the vacuum hose and No. 2 ventilation hose.
Loosen the 2 hose clamps.
Remove the air cleaner hose.
| 5. REMOVE AIR CLEANER ASSEMBLY |
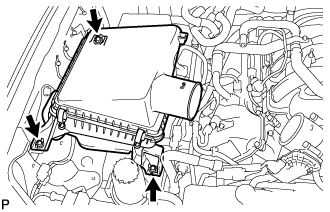
Remove the 3 bolts and air cleaner.
| 6. REMOVE V-BANK COVER SUB-ASSEMBLY |

Raise the front of the V-bank cover to detach the 3 pins. Then remove the 2 V-bank cover hooks from the bracket, and remove the V-bank cover.
| *1 | Bracket |
| *2 | Hook |
| *3 | Pin |
| *4 | Grommet |
| 7. REMOVE FAN AND GENERATOR V BELT |
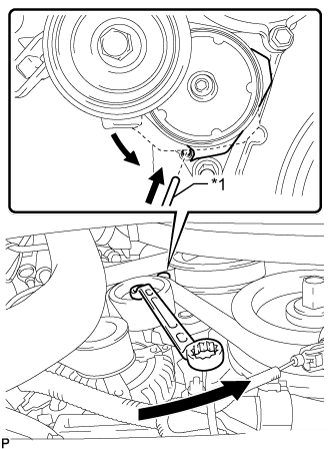
While turning the belt tensioner counterclockwise, align the service hole for the belt tensioner and the belt tensioner fixing position, and then insert a bar of 5 mm (0.197 in.) into the service hole to fix the belt tensioner in place.
| *1 | Bar |
- HINT:
- The pulley bolt for the belt tensioner has a left-hand thread.
Remove the V belt.
| 8. DRAIN POWER STEERING FLUID |
| 9. REMOVE FRONT WHEEL |
| 10. REMOVE FRONT FENDER APRON SEAL FRONT RH |
Using a clip remover, remove the 3 clips and fender apron seal.
| 11. REMOVE POWER STEERING OIL PRESSURE SWITCH |

Disconnect the switch connector.
Using a 24 mm deep socket wrench, remove the oil pressure switch.
Remove the O-ring.