INSTALL PCV VALVE SUB-ASSEMBLY
INSTALL PCV HOSE
INSTALL NO. 3 ENGINE COVER
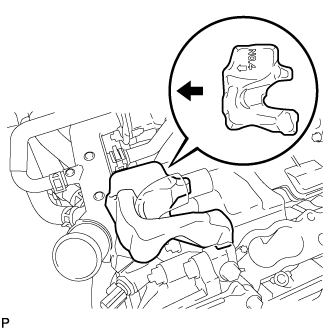
INSTALL NO. 4 ENGINE COVER
INSTALL INTAKE MANIFOLD
Pcv Valve -- Installation |
| 1. INSTALL PCV VALVE SUB-ASSEMBLY |
Apply a light coat of engine oil to the O-ring.
Text in Illustration*1
| O-ring
|
- HINT:
- When reusing the PCV valve, inspect the O-ring.
- If the O-ring has scratches or cuts, replace the PCV valve.
Using a 22 mm ball joint lock nut wrench, install the PCV valve sub-assembly.
- Torque:
- 3.5 N*m{36 kgf*cm, 31 in.*lbf}
- NOTICE:
- Use the formula to calculate special torque values for situations where a ball joint lock nut wrench is combined with a torque wrench (Click here).
Connect the PCV valve hose to the valve.
Secure the hose with the clamp.
Text in Illustration*a
| Upper Side
|
*b
| 5 to 10 mm (0.197 to 0.394 in.)
|
- HINT:
- Make sure the direction of the hose clamp is as shown in the illustration.
| 3. INSTALL NO. 3 ENGINE COVER |
Install the No. 3 engine cover.
Text in Illustration
| Engine Front
|
- HINT:
- Position the No. 3 engine cover so that the arrow mark faces the front of the engine and install it.
| 4. INSTALL NO. 4 ENGINE COVER |
Install the No. 4 engine cover.
Text in Illustration
| Engine Front
|
- HINT:
- Position the No. 4 engine cover so that the arrow mark faces the front of the engine and install it.
| 5. INSTALL INTAKE MANIFOLD |
(Click here)