Drive Belt -- Removal |
| 1. REMOVE FRONT FENDER SPLASH SHIELD SUB-ASSEMBLY LH |
Remove the 3 bolts and screw.
 |
Loosen the clip and remove the front fender splash shield LH.
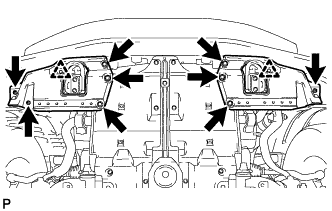
| 2. REMOVE FRONT FENDER SPLASH SHIELD SUB-ASSEMBLY RH |
Remove the 3 bolts and 2 screws.
Loosen the clip and remove the front fender splash shield RH.
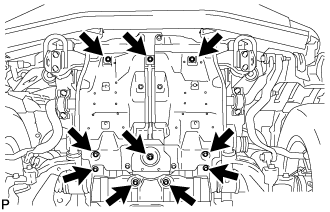
| 3. REMOVE NO. 1 ENGINE UNDER COVER SUB-ASSEMBLY |
Remove the 10 bolts and No. 1 engine under cover.
 |
| 4. REMOVE UPPER RADIATOR SUPPORT SEAL |
Remove the 7 clips and upper radiator support seal.
| 5. REMOVE NO. 1 ENGINE COVER SUB-ASSEMBLY (w/ Intercooler) |
Remove the 2 nuts and No. 1 engine cover.
 |
| 6. REMOVE AIR CLEANER CAP SUB-ASSEMBLY |
Loosen the hose clamp.
 |
Disconnect the mass air flow meter connector and using a clip remover, detach the wire harness clamp from the air cleaner cap.
Detach the 4 clamps and remove the air cleaner cap.
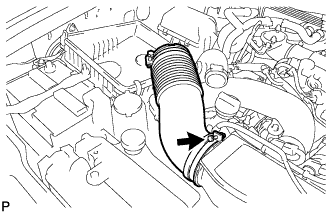
| 7. REMOVE NO. 1 AIR CLEANER HOSE |
Loosen the hose clamp and remove the No. 1 air cleaner hose.
 |
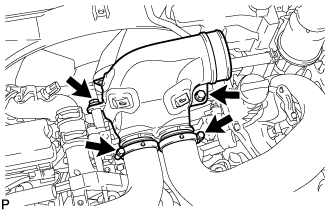
| 8. REMOVE INTAKE AIR CONNECTOR |
w/ Viscous Heater:
Disconnect the 2 connectors from the viscous with magnet clutch heater and water temperature sensor.Text in Illustration *A w/ Viscous Heater
 |
w/o Viscous Heater:
Disconnect the connector from the water temperature sensor.
Using a clip remover, detach the 3 wire harness clamps.
Loosen the 2 hose clamps and remove the 2 bolts and intake air connector.
 |
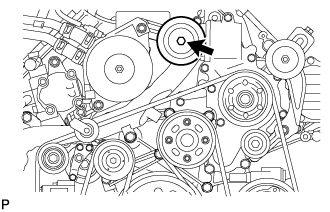
| 9. REMOVE V-RIBBED BELT (w/ Viscous Heater) |
Loosen the lock nut and turn the bolt counterclockwise.
 |
Remove the V-ribbed belt.
| 10. REMOVE NO. 1 IDLER PULLEY (w/ Viscous Heater) |
Remove the bolt, cover, No. 1 idler pulley and collar.
 |
| 11. REMOVE NO. 3 IDLER PULLEY (w/ Viscous Heater) |
Remove the nut and No. 3 idler pulley.
 |
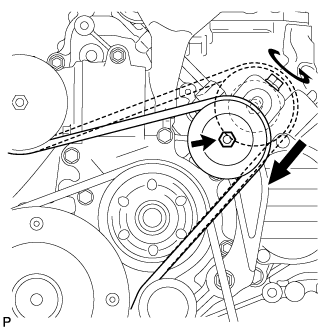
| 12. REMOVE V-RIBBED BELT |
Using a wrench to the V-ribbed belt tensioner bracket, turn the wrench clockwise and remove the V-ribbed belt.
 |