Window Defogger Switch (For Manual Cooler System) Removal
REMOVE GLOVE COMPARTMENT DOOR ASSEMBLY
REMOVE LOWER INSTRUMENT PANEL FINISH PANEL SUB-ASSEMBLY
REMOVE SWITCH BASE
REMOVE REAR WINDOW DEFOGGER SWITCH ASSEMBLY
Window Defogger Switch (For Manual Cooler System) -- Removal |
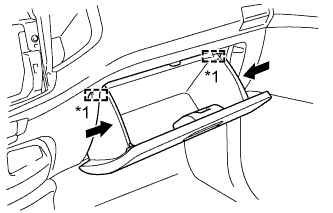
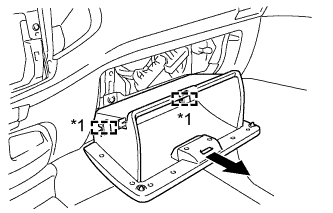
| 1. REMOVE GLOVE COMPARTMENT DOOR ASSEMBLY |
Slightly bend the upper part of the glove compartment door to release the 2 stoppers and open the glove compartment door until it is horizontal.
Text in Illustration*1
| Stopper
|
Pull the glove compartment door toward the rear of the vehicle to detach the 2 hinges and remove the glove compartment door.
Text in Illustration*1
| Hinge
|
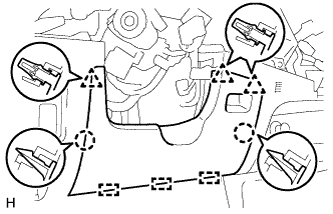
| 2. REMOVE LOWER INSTRUMENT PANEL FINISH PANEL SUB-ASSEMBLY |
Detach the 2 claws, 3 clips and 3 guides and remove the lower instrument panel finish panel.
Detach the 9 claws and guide.
- HINT:
- If the claws are difficult to detach, detach the claws from the back of the switch base.
Disconnect the connectors and remove the switch base.
| 4. REMOVE REAR WINDOW DEFOGGER SWITCH ASSEMBLY |
Detach the 2 claws and remove the rear defogger switch assembly.