Lexus IS250 IS220d GSE20 ALE20 - OTHER SYSTEM
CENTER POWER OUTLET SOCKET - REMOVAL
| 1. REMOVE SHIFT LEVER KNOB SUB-ASSEMBLY (for Automatic Transmission) |
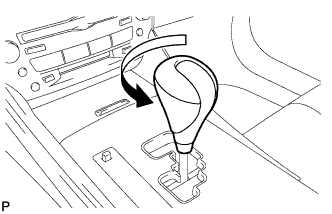
Turn the shift lever knob counterclockwise and remove the shift lever knob sub-assembly.
| 2. REMOVE SHIFT LEVER KNOB SUB-ASSEMBLY (for Manual Transmission) |
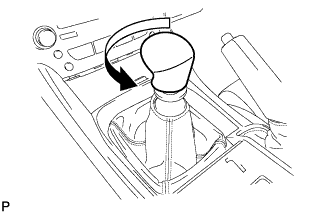
Turn the shift lever knob counterclockwise and remove the shift lever knob sub-assembly.
| 3. REMOVE UPPER NO. 1 CONSOLE PANEL GARNISH (for Automatic Transmission) |
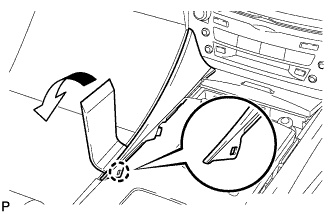
Using a moulding remover, disengage the claw.
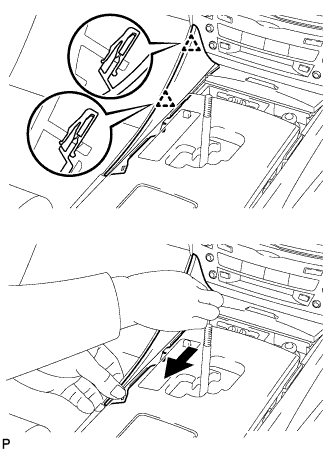
Pull the upper No. 1 console panel garnish in the direction indicated by the arrow to disengage the 2 clips and remove it.
| 4. REMOVE UPPER NO. 2 CONSOLE PANEL GARNISH (for Automatic Transmission) |
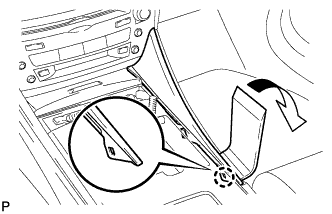
Using a moulding remover, disengage the claw.
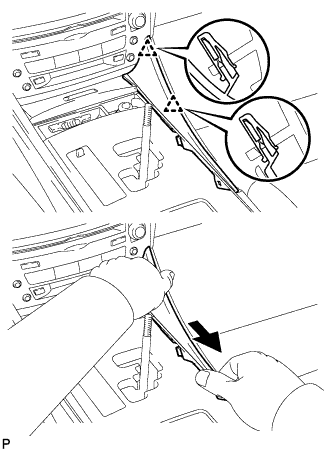
Pull the upper No. 2 console panel garnish in the direction indicated by the arrow to disengage the 2 clips and remove it.
| 5. REMOVE CONSOLE PANEL SUB-ASSEMBLY (for Automatic Transmission) |
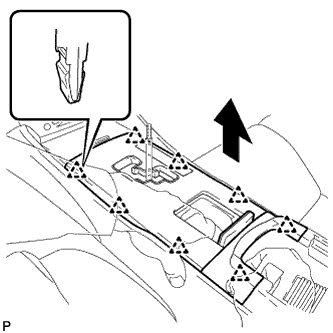
Disengage the 8 clips.
Disconnect the connectors and remove the console panel sub-assembly.
| 6. REMOVE REAR CONSOLE PANEL SUB-ASSEMBLY (for Manual Transmission) |
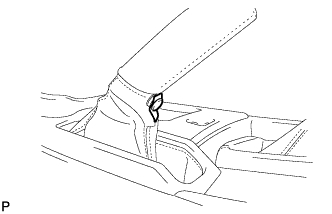
Open the snap.
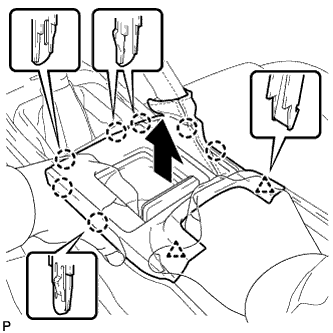
Disengage the 7 claws and 2 clips, and then remove the rear console panel sub-assembly.
| 7. REMOVE FRONT CONSOLE PANEL SUB-ASSEMBLY (for Manual Transmission) |
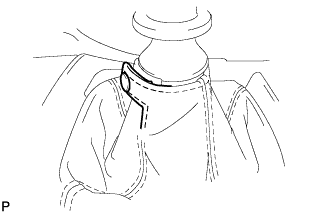
Open the snap.
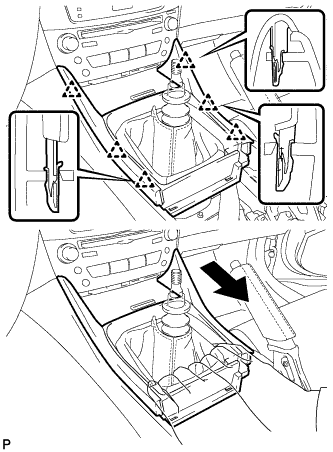
Pull the front console panel sub-assembly in the direction indicated by the arrow to disengage the 6 clips and remove it.
| 8. REMOVE FRONT ASH RECEPTACLE SUB-ASSEMBLY |
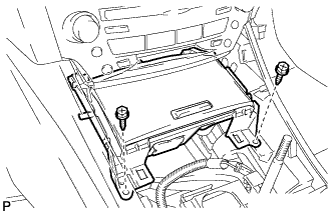
Remove the 2 screws <F-.
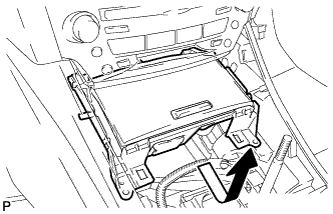
Pull the front ash receptacle sub-assembly in the direction indicated by the arrow to disconnect the connectors and remove it.
| 9. REMOVE CONSOLE BOX REGISTER ASSEMBLY |
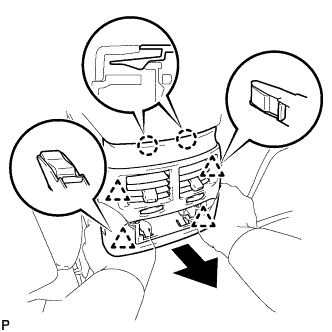
Remove the rear ash receptacle assembly.
Disengage the 2 claws and 4 clips, and then remove the console box register assembly.
| 10. REMOVE CONSOLE BOX |
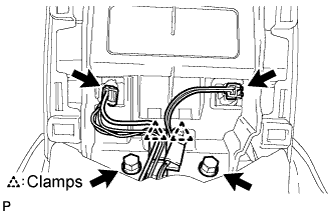
Remove the 2 bolts <C-.
Disconnect the 2 connectors.
Disengage the 2 clamps.
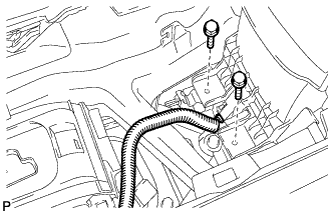
Remove the 2 bolts <C-.
Disconnect the connector.
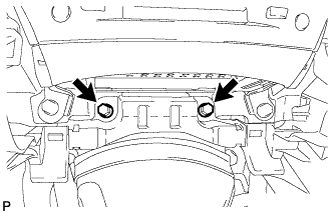
Remove the 2 bolts <C-.
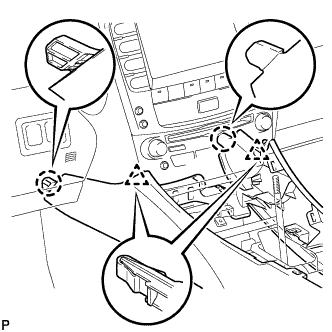
Disengage the 2 claws and 2 clips, and then remove the console box.
| 11. REMOVE POWER OUTLET SOCKET ASSEMBLY |

Rotate the socket to disengage the notch.

Pull out the socket halfway and rotate the socket until its protrusion is aligned with the groove of the cover.
Remove the socket from the cover.