Front Lower Suspension Arm (For 2Wd) Removal
Suspension. Hilux. Tgn26, 36 Kun25, 26, 35, 36 Ggn25
REMOVE FRONT WHEEL
REMOVE FRONT SPEED SENSOR LH (w/ ABS)
DISCONNECT FRONT SHOCK ABSORBER WITH COIL SPRING
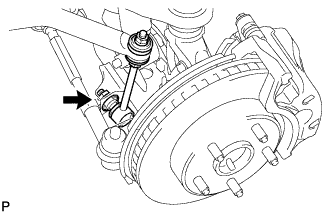
DISCONNECT FRONT STABILIZER LINK ASSEMBLY LH
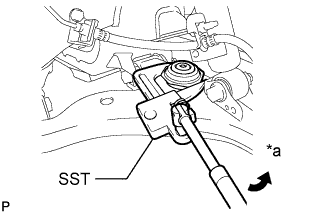
REMOVE FRONT SPRING BUMPER
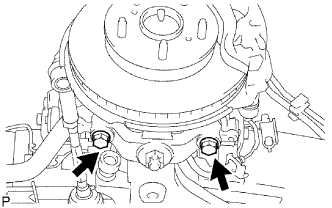
REMOVE FRONT LOWER SUSPENSION ARM SUB-ASSEMBLY LH
REMOVE FRONT LOWER BALL JOINT ATTACHMENT LH
REMOVE FRONT NO. 1 LOWER ARM BUSH
REMOVE FRONT NO. 2 LOWER ARM BUSH
REMOVE LOWER BALL JOINT ASSEMBLY
Front Lower Suspension Arm (For 2Wd) -- Removal |
- HINT:
- Use the same procedure for the RH and LH sides.
- The procedure listed below is for the LH side.
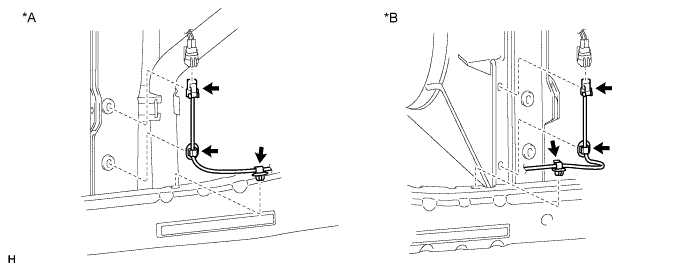
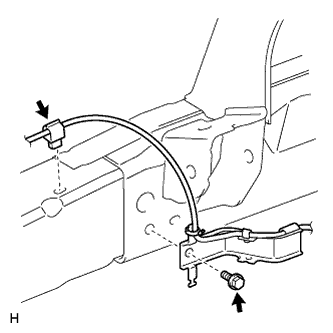
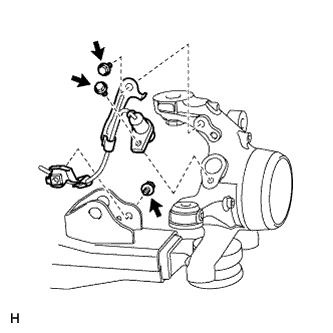
| 2. REMOVE FRONT SPEED SENSOR LH (w/ ABS) |
Disconnect the connector.
Text in Illustration*A
| for LH
| *B
| for RH
|
Detach the 2 clamps and the connector.
Detach the clamp and remove the bolt and harness clamp.
Remove the bolt and harness clamp.
Remove the 3 bolts, 2 harness clamps and speed sensor.
- NOTICE:
- Keep the sensor tip and sensor installation hole free from foreign matter.
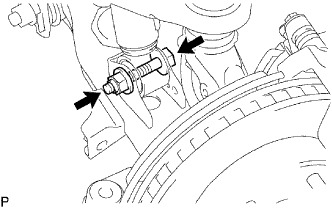
| 3. DISCONNECT FRONT SHOCK ABSORBER WITH COIL SPRING |
Remove the nut and bolt.
- HINT:
- While fixing the nut in place, loosen and remove the bolt.
Disconnect the shock absorber with coil spring from the lower arm.
| 4. DISCONNECT FRONT STABILIZER LINK ASSEMBLY LH |
Remove the nut and disconnect the stabilizer link from the lower arm.
- HINT:
- If the ball joint turns together with the nut, use a 6 mm hexagon wrench to hold the stud in place.
| 5. REMOVE FRONT SPRING BUMPER |
Using SST, remove the front spring bumper.
Text in Illustration*a
| Turn
|
- SST
- 09922-10010
- NOTICE:
- Rotate SST in the direction shown in the illustration.
| 6. REMOVE FRONT LOWER SUSPENSION ARM SUB-ASSEMBLY LH |
Remove the 2 bolts, and disconnect the ball joint attachment from the steering knuckle.
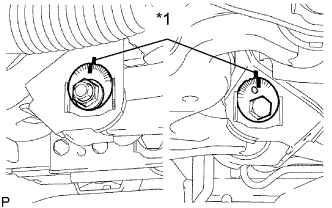
Place matchmarks on the No. 1 camber adjusting cam and vehicle frame, and No. 2 camber adjusting cam and vehicle frame.
Text in Illustration*1
| Matchmark
|
Remove the 2 nuts, No. 1 and No. 2 camber adjusting cams, 2 camber adjusting cams and lower arm.
| 7. REMOVE FRONT LOWER BALL JOINT ATTACHMENT LH |
Remove the cotter pin and nut.
Using SST, remove the ball joint attachment.
- SST
- 09628-00011
| 8. REMOVE FRONT NO. 1 LOWER ARM BUSH |
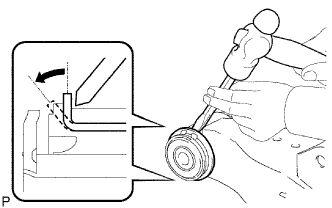
Using a hammer and chisel, strike and bend the entire flange of the bush as shown in the illustration.
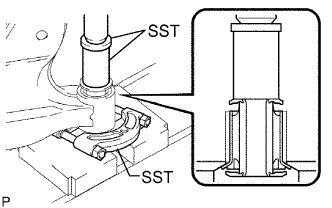
Using SST, and a press, press out the bush.
- SST
- 09632-36010
09950-00020
09950-60010(09951-00520)
| 9. REMOVE FRONT NO. 2 LOWER ARM BUSH |
Using a hammer and chisel, strike and bend the entire flange of the bush as shown in the illustration.
Using SST and a press, press out the bush.
- SST
- 09632-36010
09950-00020
09950-60010(09951-00520)
| 10. REMOVE LOWER BALL JOINT ASSEMBLY |
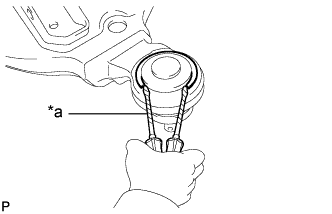
Using 2 screwdrivers and a hammer, remove the snap ring.
Text in Illustration*a
| Protective tape
|
- HINT:
- Tape the screwdriver tip before use.
Remove the dust cover set ring and dust cover from the lower arm.
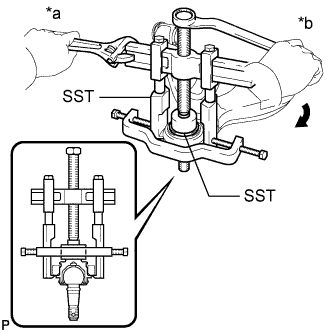
Using SST, remove the ball joint.
Text in Illustration*a
| Hold
|
*b
| Turn
|
- SST
- 09950-40011(09951-04010,09952-04010,09953-04020,09954-04010,09955-04031,09957-04010,09958-04011)
09710-22021(09710-01081)
