Power Window Regulator Motor (For Sedan Front Side) -- Removal |
- HINT:
- Use the same procedure for both the RH and LH sides.
- The procedure described below is for the LH side.
| 1. DISCONNECT CABLE FROM NEGATIVE BATTERY TERMINAL |
| 2. REMOVE FRONT DOOR LOWER FRAME BRACKET GARNISH |
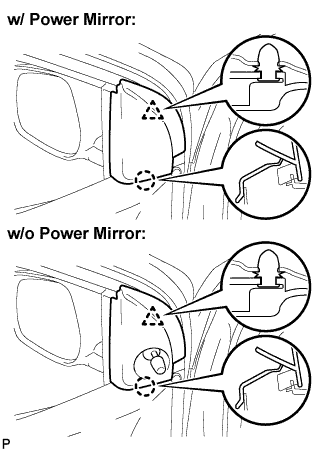 |
Disengage the claw and clip and remove the front door lower frame bracket garnish.
| 3. REMOVE FRONT ARMREST BASE UPPER PANEL |
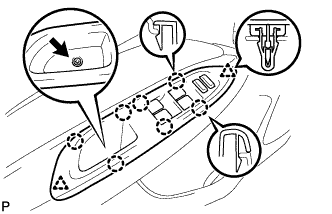 |
for Driver side with power window:
Remove the screw.
Disengage the 7 claws and 2 clips and remove the front armrest base upper panel.
Disconnect the connector.
for Front passenger side with power window:
Remove the screw.
Disengage the 7 claws and 2 clips and remove the front armrest base upper panel.
Disconnect the connector.
 |
w/o Power window:
Remove the screw.
Disengage the 5 claws and 2 clips and remove the front armrest base upper panel.
 |
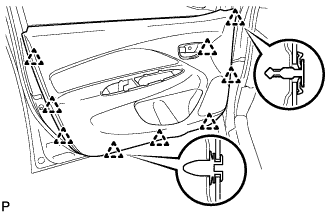
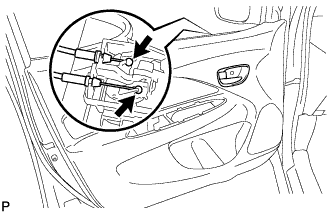
| 4. REMOVE FRONT DOOR TRIM BOARD SUB-ASSEMBLY |
w/ Power window:
Remove the screw.
Disengage the 9 clips.
Disconnect the front door lock remote control cable and front door inside locking cable and remove the front door trim board.
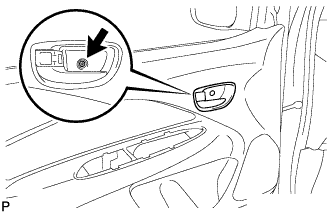 |
w/o Power window:
Remove the screw.
Disengage the 9 clips.
Disconnect the front door lock remote control cable and front door inside locking cable and remove the front door trim board.
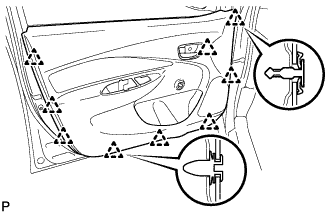
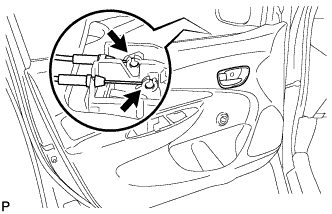
 |
| 5. REMOVE OUTER REAR VIEW MIRROR |
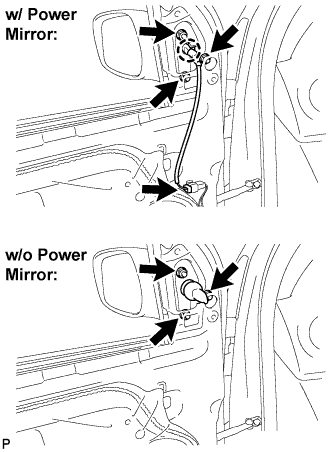 |
w/ Power mirror:
Disconnect the connector.
Remove the 3 nuts, disengage the claw and remove the outer rear view mirror.
| 6. REMOVE FRONT DOOR BELT MOULDING |
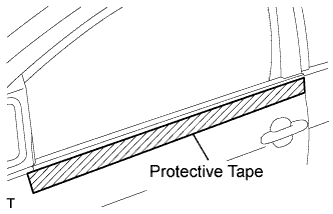
Apply protective tape to the door panel in the periphery of the front door belt moulding.
 |
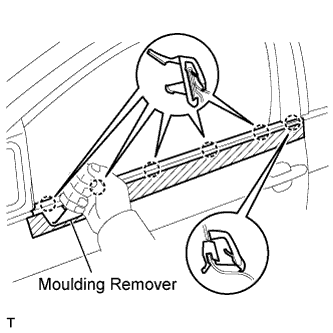
Using a moulding remover, disengage the 6 claws and remove the front door belt moulding.
 |
| 7. REMOVE FRONT DOOR TRIM BRACKET |
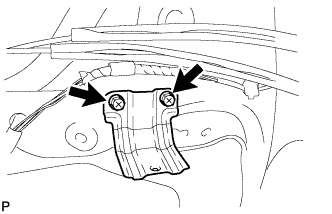 |
Remove the 2 screws and front door trim bracket.
| 8. REMOVE FRONT DOOR SERVICE HOLE COVER |
 |
Disconnect the connectors and clamps, then remove the front door service hole cover.
- NOTICE:
- Remove any tape remaining on the door side.
| 9. REMOVE FRONT DOOR GLASS SUB-ASSEMBLY |
w/ Power window:
Driver side:
Provisionally install the power window regulator master switch.Passenger side:
Provisionally install the power window regulator switch.
w/o Power window:
Provisionally install the front door window regulator handle.
Move the front door glass until the 2 bolts can be seen through the service holes.
 |
Remove the 2 bolts.
- NOTICE:
- Do not drop or damage the front door glass when removing the bolts.
Remove the front door glass in the direction indicated by the arrows in the illustration.
- NOTICE:
- Do not damage the glass.
 |
w/ Power window:
Driver side:
Remove the power window regulator master switch.Passenger side:
Remove the power window regulator switch.
w/o Power window:
Remove the front door window regulator handle.
| 10. REMOVE FRONT DOOR WINDOW REGULATOR SUB-ASSEMBLY |
 |
w/ Power window:
Disconnect the connector.
Loosen bolt A.
Remove the 5 bolts, then remove the front door window regulator.
- NOTICE:
- Do not drop or damage the window regulator when removing the bolts.
- HINT:
- Remove the window regulator through the service hole.
w/o Power window:
Loosen bolt A.
Remove the 5 bolts, then remove the front door window regulator.
- NOTICE:
- Do not drop or damage the window regulator when removing the bolts.
- HINT:
- Remove the window regulator through the service hole.
 |
| 11. REMOVE POWER WINDOW REGULATOR MOTOR ASSEMBLY FRONT |
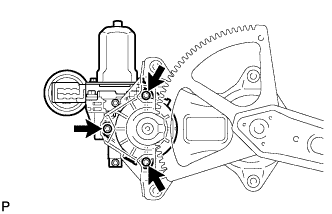 |
Using "Torx" socket wrench T25, remove the 3 screws and power window regulator motor.