Side Airbag Sensor (For Hatchback 5 Door Rear Side) -- Installation |
- CAUTION:
- Some of these service operations affect the SRS airbag system. Read the precautionary notices concerning the SRS airbag system before servicing (YARIS_NCP93 RM000000KT10EAX.html).
- HINT:
- The procedure described below is for the RH side. Use the same procedure for both the RH and LH sides, unless otherwise specified.
| 1. INSTALL SIDE AIRBAG SENSOR ASSEMBLY |
Check that the ignition switch is off.
Check that the cable is disconnected from the negative (-) battery terminal.
- CAUTION:
- Wait at least 90 seconds after disconnecting the cable from the negative (-) battery terminal to disable the SRS system.
Insert the pin (stopper) into the body hole to install the side airbag sensor assembly to the vehicle with the bolt.
- Torque:
- 9.0 N*m{92 kgf*cm, 80 in.*lbf}
- NOTICE:
- If the side airbag sensor assembly has been dropped, or there are any cracks, dents or other defects in the case or connector, replace it with a new one.
- When installing the side airbag sensor assembly, be careful that the SRS wiring does not interfere with or is not pinched between other parts.
- Make sure that the pin (stopper) is securely inserted into the body hole.
- Tighten the bolt while holding the side airbag sensor assembly because the side airbag sensor assembly pin (stopper) is easily damaged.
Connect the connector to the side airbag sensor assembly.
- NOTICE:
- When connecting any airbag connector, take care not to damage the airbag wire harness.
Connect the connector as shown in the illustration (when locking, make sure that the outer connector locking sleeve returns to its original position and a click sound can be heard).

Text in Illustration *1 Outer Connector Locking Sleeve - - *a Slide - - - HINT:
- When connected, the outer connector locking sleeve will slide. Be sure not to hold the outer connector locking sleeve while connecting, as it may result in an insecure fit.
Check that there is no looseness in the installation parts of the side airbag sensor assembly.
| 2. INSTALL CENTER PILLAR LOWER GARNISH |
Engage the 2 clips and the 2 claws.
Engage the 2 guides and install the center pillar lower garnish.
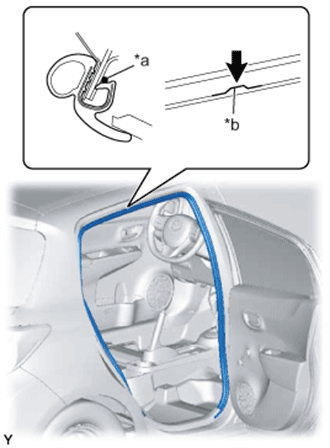
| 3. INSTALL REAR DOOR OPENING TRIM WEATHERSTRIP |
Align the paint mark on the rear door opening trim weatherstrip with the flange position on the vehicle body and install the weatherstrip.
Text in Illustration *a Paint Mark *b Flange Position - Paint Mark:
Area Color RH Side Purple LH Side Pink
- NOTICE:
- After installation, check that the corners fit correctly.
 |
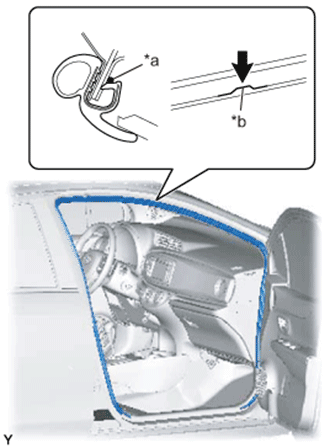
| 4. INSTALL FRONT DOOR OPENING TRIM WEATHERSTRIP |
Align the paint mark on the front door opening trim weatherstrip with the flange position on the vehicle body and install the weatherstrip.
Text in Illustration *a Paint Mark *b Flange Position - Paint Mark:
Area Color RH Side Gold LH Side Silver
- NOTICE:
- After installation, check that the corners fit correctly.
 |
| 5. INSTALL REAR DOOR SCUFF PLATE |
Engage the guide and the 5 claws and install the rear door scuff plate.
| 6. INSTALL FRONT DOOR SCUFF PLATE |
Engage the 8 claws and install the front door scuff plate.
| 7. CONNECT CABLE TO NEGATIVE BATTERY TERMINAL |
- Torque:
- 5.4 N*m{55 kgf*cm, 48 in.*lbf}
| 8. INSPECT SRS WARNING LIGHT |