Shift Lever (For Hatchback) Disassembly
REMOVE UPPER POSITION INDICATOR HOUSING
REMOVE SHIFT LOCK RELEASE BUTTON COVER
REMOVE CONTROL POSITION INDICATOR PLATE
REMOVE SHIFT LOCK CONTROL ECU SUB-ASSEMBLY
REMOVE INDICATOR LIGHT WIRE SUB-ASSEMBLY
REMOVE POSITION INDICATOR LIGHT BULB
REMOVE POSITION INDICATOR LIGHT CAP
REMOVE POSITION INDICATOR LIGHT GUIDE
REMOVE POSITION INDICATOR SLIDE COVER
REMOVE NO. 2 POSITION INDICATOR SLIDE COVER
REMOVE LOWER POSITION INDICATOR HOUSING
Shift Lever (For Hatchback) -- Disassembly |
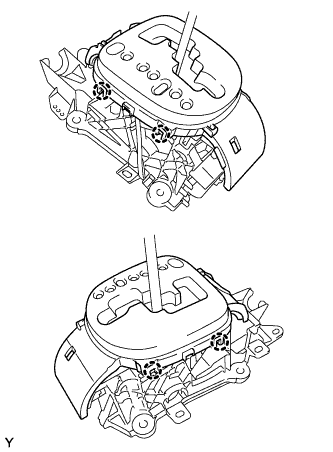
| 1. REMOVE UPPER POSITION INDICATOR HOUSING |
Disengage the 4 claws and remove the upper position indicator housing from the shift lock control unit assembly.
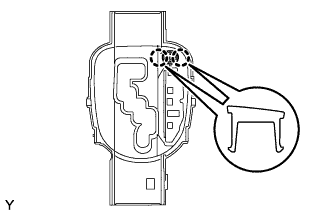
| 2. REMOVE SHIFT LOCK RELEASE BUTTON COVER |
Disengage the 2 claws and remove the shift lock release button cover from the upper position indicator housing.
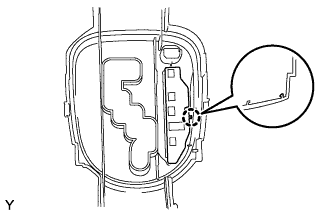
| 3. REMOVE CONTROL POSITION INDICATOR PLATE |
Disengage the claw and remove the control position indicator plate from the upper position indicator housing.
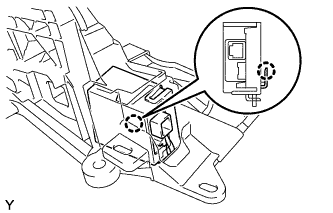
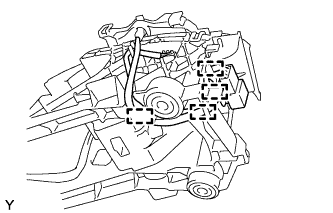
| 4. REMOVE SHIFT LOCK CONTROL ECU SUB-ASSEMBLY |
Disengage the claw and pull out the shift lock control ECU sub-assembly from the shift lock control unit assembly.
Disengage the 3 clamps and separate the shift lock solenoid wire from the shift lock unit cover.
Disconnect the shift lock solenoid connector.
Disengage the 3 claws and remove the shift lock unit cover from the shift lock control ECU sub-assembly.
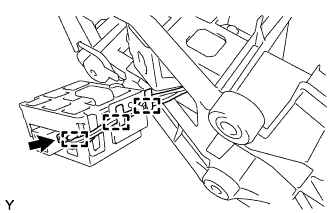
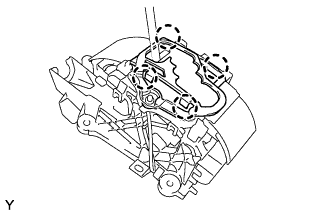
| 5. REMOVE INDICATOR LIGHT WIRE SUB-ASSEMBLY |
Separate the indicator light wire socket.
Disengage the 4 clamps and separate the indicator light wire sub-assembly from the shift lock control unit assembly.
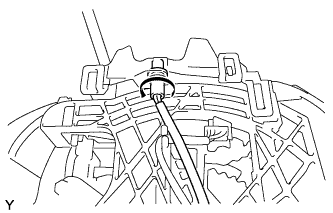
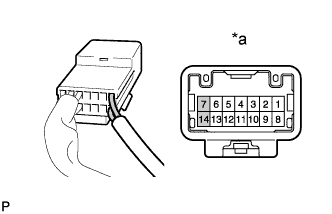
Using a screwdriver, lift up the terminal retainer of the transmission control switch connector to release the lock.
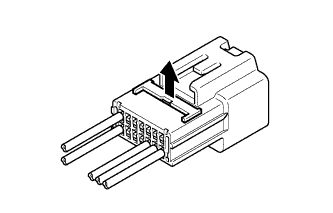
Using a thin-bladed screwdriver, pull out terminal 7 and 14 of the transmission control switch connector.
Text in Illustration*a
| Component without harness connected
(Transmission Control Switch)
|
| 6. REMOVE POSITION INDICATOR LIGHT BULB |
Remove the position indicator light bulb from the indicator light wire sub-assembly.
| 7. REMOVE POSITION INDICATOR LIGHT CAP |
Remove the position indicator light cap from the position indicator light bulb.
| 8. REMOVE POSITION INDICATOR LIGHT GUIDE |
Disengage the 4 claws and remove the position indicator light guide from the shift lock control unit assembly.
| 9. REMOVE POSITION INDICATOR SLIDE COVER |
Remove the position indicator slide cover from the shift lock control unit assembly.
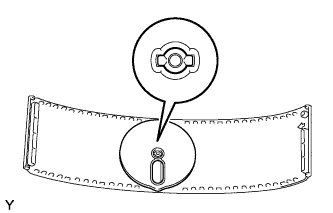
| 10. REMOVE NO. 2 POSITION INDICATOR SLIDE COVER |
Align the cutouts on the shank of the No. 2 position indicator slide cover and the position indicator slide cover, and remove the No. 2 position indicator slide cover from the position indicator slide cover.
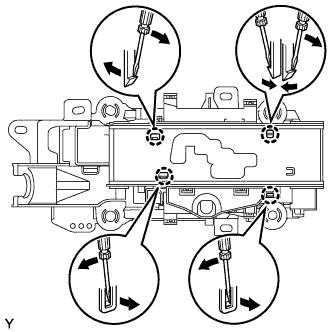
| 11. REMOVE LOWER POSITION INDICATOR HOUSING |
Disengage the 4 claws and remove the lower position indicator housing from the shift lock control unit assembly.