Camshaft Position Sensor (For Hatchback) -- Installation |
| 1. INSTALL CAMSHAFT POSITION SENSOR |
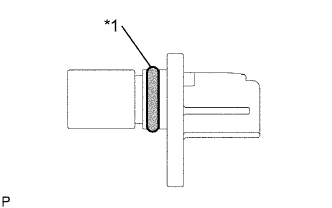
Apply a light coat of engine oil to the O-ring.
Text in Illustration *1 O-ring - NOTICE:
- If reusing the camshaft position sensor, be sure to inspect the O-ring.
 |
Install the camshaft position sensor with the bolt.
- Torque:
- 8.0 N*m{82 kgf*cm, 71 in.*lbf}
- NOTICE:
- If a component has been dropped or subjected to a strong impact, replace it.
- Make sure that the O-ring is not damaged or does not jump out of position during installation.
Connect the camshaft position sensor connector.
| 2. INSTALL AIR CLEANER CAP SUB-ASSEMBLY WITH NO. 1 AIR CLEANER HOSE |
Install the air cleaner cap sub-assembly with No. 1 air cleaner hose onto the throttle body assembly
Engage the 2 clamps and connect the air cleaner cap sub-assembly to the air cleaner case sub-assembly.
Tighten the hose clamp.
- Torque:
- 3.0 N*m{31 kgf*cm, 27 in.*lbf}
Connect the vacuum switching valve assembly connector.
Connect the mass air flow meter connector.
Engage the 2 clamps and connect the wire harness to the air cleaner cap sub-assembly and vacuum switching valve assembly.
Connect the No. 2 fuel vapor feed hose to the intake manifold.
Connect the fuel vapor feed hose assembly to the No. 1 air cleaner hose and vacuum switching valve assembly with the 2 hose clamps.
Engage the clamp and connect the fuel vapor feed hose assembly to the No. 1 air cleaner hose.
| 3. INSTALL BATTERY |
Install the battery.
Install the battery clamp with the 2 nuts.
- Torque:
- 3.5 N*m{36 kgf*cm, 31 in.*lbf}
| 4. INSTALL NO. 2 CYLINDER HEAD COVER |
Install the No. 2 cylinder head cover with the 4 nuts.
- Torque:
- 7.0 N*m{71 kgf*cm, 62 in.*lbf}
| 5. INSPECT FOR ENGINE OIL LEAK |