Ecm (For Sedan) Installation
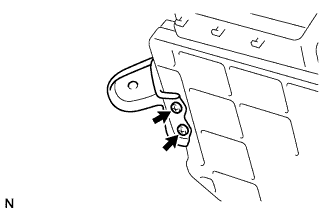
INSTALL ECM BRACKET NO. 2
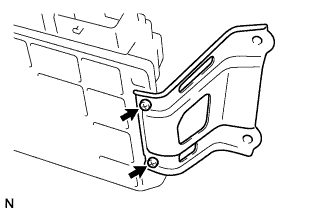
INSTALL ECM BRACKET
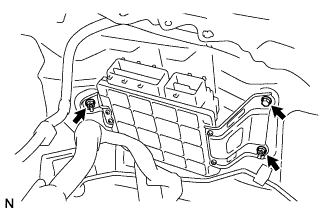
INSTALL ECM
INSTALL COWL TOP PANEL OUTER
INSTALL FRONT AIR SHUTTER SEAL
INSTALL FRONT WIPER MOTOR AND LINK
INSTALL COWL TOP VENTILATOR LOUVER SUB-ASSEMBLY
INSTALL COWL SIDE VENTILATOR SUB-ASSEMBLY LH
INSTALL COWL SIDE VENTILATOR SUB-ASSEMBLY RH
INSTALL FRONT WIPER ARM AND BLADE ASSEMBLY LH
INSTALL FRONT WIPER ARM AND BLADE ASSEMBLY RH
INSTALL FRONT WIPER ARM HEAD CAP
CONNECT CABLE TO NEGATIVE BATTERY TERMINAL
Ecm (For Sedan) -- Installation |
| 1. INSTALL ECM BRACKET NO. 2 |
Install ECM bracket No. 2 with the 2 screws.
Install the ECM bracket with the 2 screws.
Install the ECM with the bolt and 2 nuts.
- Torque:
- 8.0 N*m{82 kgf*cm, 71 in.*lbf}
Connect the 2 ECM connectors.
Install the 2 lock knobs and harness clamp.
| 4. INSTALL COWL TOP PANEL OUTER |
Install the cowl top panel outer and install the 8 bolts.
- Torque:
- 6.5 N*m{66 kgf*cm, 58 in.*lbf}
Install the cowl top panel outer center bracket and install the 2 bolts.
- Torque:
- 6.5 N*m{66 kgf*cm, 58 in.*lbf}
Connect the wire harness and engage the claw.
| 5. INSTALL FRONT AIR SHUTTER SEAL |
Install the front air shutter seal and engage the 3 claws.
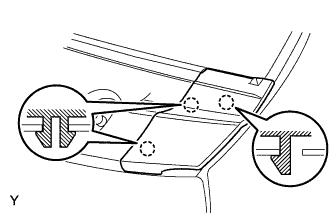
| 6. INSTALL FRONT WIPER MOTOR AND LINK |
Connect the connector.
Slide the wiper link as shown in the illustration and engage the rubber pin with the body.
Install the front wiper motor and link with the 2 bolts.
- Torque:
- 5.5 N*m{56 kgf*cm, 49 in.*lbf}
| 7. INSTALL COWL TOP VENTILATOR LOUVER SUB-ASSEMBLY |
Connect the washer hoses.
Engage the 5 hooks.
Engage the 8 hooks and the 4 claws.
Install the cowl top ventilator louver sub-assembly with the 3 clips.
| 8. INSTALL COWL SIDE VENTILATOR SUB-ASSEMBLY LH |
Engage the 3 claws and install the cowl side ventilator sub-assembly LH.
| 9. INSTALL COWL SIDE VENTILATOR SUB-ASSEMBLY RH |
- HINT:
- Use the same procedure as for the LH side.
| 10. INSTALL FRONT WIPER ARM AND BLADE ASSEMBLY LH |
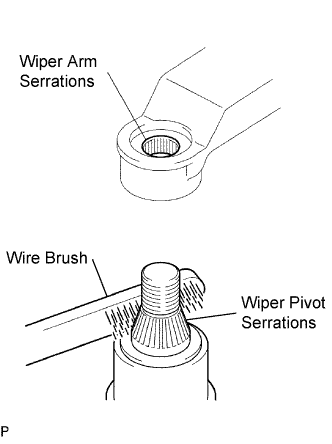
Scrape any metal powder off the serrated part of the wiper arm with a round file or the equivalent (when reinstalling).
Clean the wiper pivot serrations with a wire brush.
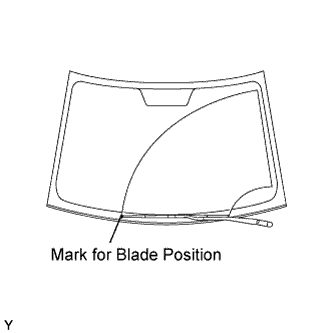
Operate the wiper, then stop the windshield wiper motor in the automatic stop position.
Align the blade tip with the mark on the windshield glass, as shown in the illustration.
Tighten the nut of the front wiper arm.
- Torque:
- 26 N*m{265 kgf*cm, 19 ft.*lbf}
| 11. INSTALL FRONT WIPER ARM AND BLADE ASSEMBLY RH |
Scrape any metal powder off the serrated part of the wiper arm with a round file or the equivalent (when reinstalling).
Clean the wiper pivot serrations with a wire brush.
Operate the wiper, then stop the windshield wiper motor in the automatic stop position.
Align the blade tip with the mark on the windshield glass, as shown in the illustration.
Tighten the nut of the front wiper arm.
- Torque:
- 26 N*m{265 kgf*cm, 19 ft.*lbf}
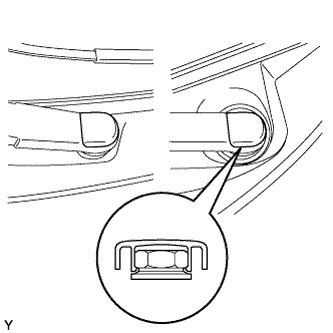
| 12. INSTALL FRONT WIPER ARM HEAD CAP |
Engage the claw and install the 2 front wiper arm head caps.
| 13. CONNECT CABLE TO NEGATIVE BATTERY TERMINAL |
- Torque:
- 5.4 N*m{55 kgf*cm, 48 in.*lbf}