Rear Shock Absorber Installation
INSTALL REAR COIL SPRING
INSTALL REAR BUMPER SPRING
INSTALL REAR COIL SPRING UPPER INSULATOR
INSTALL REAR SUSPENSION SUPPORT ASSEMBLY
INSTALL REAR SPRING BRACKET SUB-ASSEMBLY
INSTALL REAR SUSPENSION SUPPORT
INSTALL REAR NO. 1 SHOCK ABSORBER CUSHION WASHER
INSTALL REAR SHOCK ABSORBER WITH COIL SPRING
INSTALL REAR WHEEL
STABILIZE SUSPENSION
FULLY TIGHTEN REAR SHOCK ABSORBER WITH COIL SPRING
INSTALL INNER LUGGAGE COMPARTMENT TRIM COVER
INSTALL REAR FLOOR FINISH PLATE
INSTALL SPARE WHEEL COVER
INSPECT REAR WHEEL ALIGNMENT
PLACE FRONT WHEELS FACING STRAIGHT AHEAD (w/ VSC)
DISCONNECT CABLE FROM NEGATIVE BATTERY TERMINAL (w/ VSC)
CONNECT CABLE TO NEGATIVE BATTERY TERMINAL (w/ VSC)
PERFORM YAW RATE SENSOR ZERO POINT CALIBRATION (w/ VSC)
CHECK STEERING ANGLE SENSOR ZERO POINT CALIBRATION (w/ VSC)
Rear Shock Absorber -- Installation |
- HINT:
- Use the same procedure for the RH side and LH side.
- The procedure listed below is for the LH side.
| 1. INSTALL REAR COIL SPRING |
Using SST, compress the rear coil spring.
- SST
- 09727-30021(09727-00010,09727-00021,09727-00031)
- NOTICE:
- Do not use an impact wrench. It will damage SST.
Install the coil spring into the shock absorber assembly.
- NOTICE:
- Make sure that the end of the rear coil spring is positioned in the depression of the lower spring seat.
| 2. INSTALL REAR BUMPER SPRING |
| 3. INSTALL REAR COIL SPRING UPPER INSULATOR |
| 4. INSTALL REAR SUSPENSION SUPPORT ASSEMBLY |
| 5. INSTALL REAR SPRING BRACKET SUB-ASSEMBLY |
| 6. INSTALL REAR SUSPENSION SUPPORT |
| 7. INSTALL REAR NO. 1 SHOCK ABSORBER CUSHION WASHER |
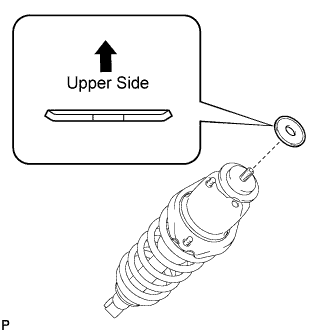
Install the rear No. 1 shock absorber cushion washer.
- HINT:
- Be sure to install the rear No. 1 shock absorber cushion washer in the correct direction.
Temporarily install a new nut.
- NOTICE:
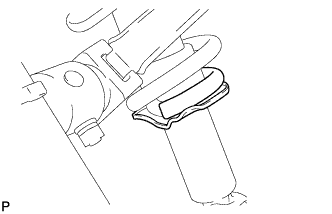
- Position the rear spring bracket sub-assembly with rear shock absorber lower bushing as shown in the illustration.
- HINT:
- Position the RH side on the symmetrical to the illustration.
Using a socket hexagon wrench (6 mm), secure the rear shock absorber piston rod and tighten the nut.
- Torque:
- 39 N*m{398 kgf*cm, 29 ft.*lbf}
Remove SST from the rear coil spring.
- NOTICE:
- Do not use an impact wrench. It will damage SST.
| 8. INSTALL REAR SHOCK ABSORBER WITH COIL SPRING |
Install the rear shock absorber with coil spring with the bolt (lower side).
- Torque:
- 80 N*m{816 kgf*cm, 59 ft.*lbf}
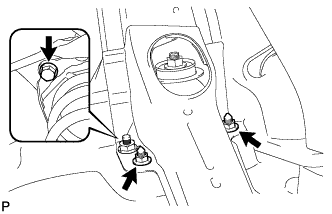
Install the rear shock absorber with coil spring with the 2 nuts (upper side).
- Torque:
- 80 N*m{816 kgf*cm, 59 ft.*lbf}
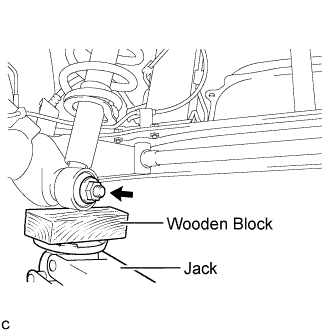
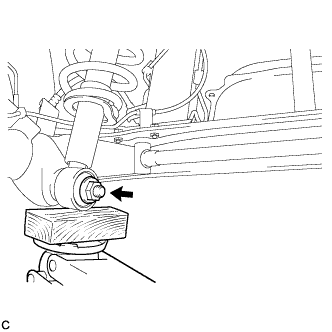
Support the rear axle beam using a jack and wooden block.
Temporarily install the rear shock absorber with coil spring (lower side) and rear shock absorber cushion retainer with the nut.
- Torque:
- 103 N*m{1050 kgf*cm, 76 ft.*lbf}
Lower the vehicle.
Bounce the vehicle up and down several times to stabilize the suspension.
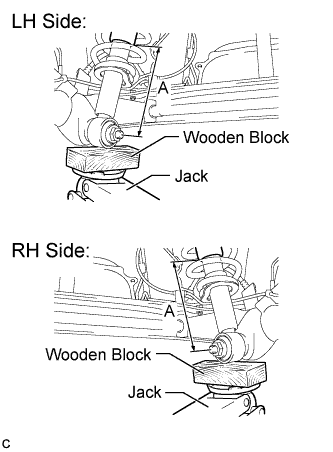
Jack up the rear axle beam, placing a wooden block underneath to avoid damage. Apply load to the suspension so that the rear shock absorber with coil spring is positioned as shown in the illustration.
- Length A:
- 206 mm (8.11 in.)
If the rear shock absorber with coil spring cannot be positioned as shown in the illustration even when the rear axle beam is jacked up, apply additional load to the vehicle such as by having a person sit in the rear seat.
- CAUTION:
- Do not jack up the rear axle beam too high as the vehicle may fall.
| 11. FULLY TIGHTEN REAR SHOCK ABSORBER WITH COIL SPRING |
Fully tighten the nut on the rear shock absorber with coil spring (lower side).
- Torque:
- 80 N*m{816 kgf*cm, 59 ft.*lbf}
- NOTICE:
- The final torque must be applied under standard vehicle height conditions.
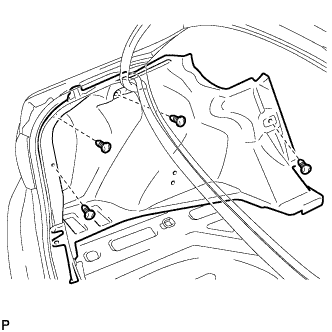
| 12. INSTALL INNER LUGGAGE COMPARTMENT TRIM COVER |
Install the inner luggage compartment trim cover LH with the 4 clips.
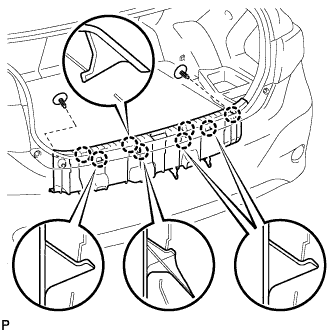
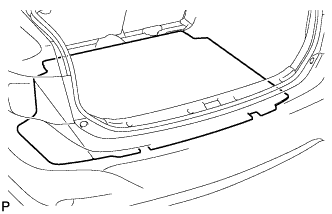
| 13. INSTALL REAR FLOOR FINISH PLATE |
Engage the 8 claws and install the rear floor finish plate.
Install the 2 clips.
| 14. INSTALL SPARE WHEEL COVER |
Install the spare wheel cover.
| 15. INSPECT REAR WHEEL ALIGNMENT |
COROLLA_ZRE142 RM000002Y7V02LX.html.
| 16. PLACE FRONT WHEELS FACING STRAIGHT AHEAD (w/ VSC) |
| 17. DISCONNECT CABLE FROM NEGATIVE BATTERY TERMINAL (w/ VSC) |
- NOTICE:
- Disconnect the cable from the negative (-) battery terminal for more than 2 seconds.
| 18. CONNECT CABLE TO NEGATIVE BATTERY TERMINAL (w/ VSC) |
| 19. PERFORM YAW RATE SENSOR ZERO POINT CALIBRATION (w/ VSC) |
COROLLA_ZRE142 RM000000XHR08KX.html.
| 20. CHECK STEERING ANGLE SENSOR ZERO POINT CALIBRATION (w/ VSC) |
COROLLA_ZRE142 RM000000ZRR0D0X_03_0002.html.