Front Strut Bar Installation
TEMPORARILY TIGHTEN TOWER BAR BRACKET SUB-ASSEMBLY LH
TEMPORARILY TIGHTEN TOWER BAR BRACKET SUB-ASSEMBLY RH
TEMPORARILY TIGHTEN SUSPENSION TOWER DAMPER ASSEMBLY
FULLY TIGHTEN TOWER BAR BRACKET SUB-ASSEMBLY LH
FULLY TIGHTEN TOWER BAR BRACKET SUB-ASSEMBLY RH
FULLY TIGHTEN SUSPENSION TOWER DAMPER ASSEMBLY
INSTALL OUTER COWL TOP PANEL
INSTALL WINDSHIELD WIPER MOTOR AND LINK ASSEMBLY
INSTALL COWL TOP VENTILATOR LOUVER LH
INSTALL CENTER NO.1 COWL TOP VENTILATOR LOUVER
INSTALL HOOD TO COWL TOP SEAL
INSTALL FRONT WIPER ARM AND BLADE ASSEMBLY RH
INSTALL FRONT WIPER ARM AND BLADE ASSEMBLY LH
REMOVE FRONT WIPER ARM HEAD CAP
Front Strut Bar -- Installation |
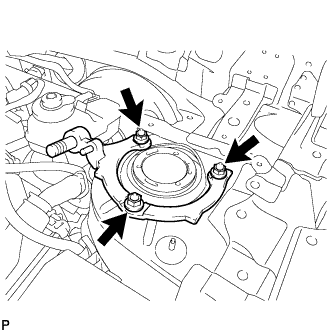
| 1. TEMPORARILY TIGHTEN TOWER BAR BRACKET SUB-ASSEMBLY LH |
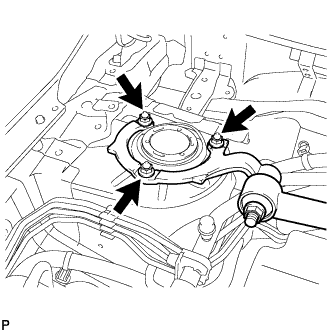
Temporarily tighten the tower bar bracket sub assembly LH with the 3 nuts.
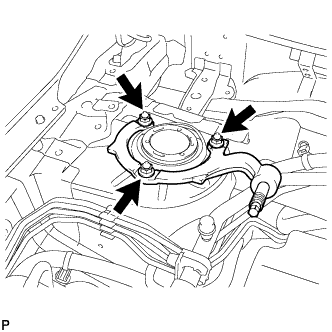
| 2. TEMPORARILY TIGHTEN TOWER BAR BRACKET SUB-ASSEMBLY RH |
Temporarily tighten the tower bar bracket sub assembly RH with the 3 nuts.
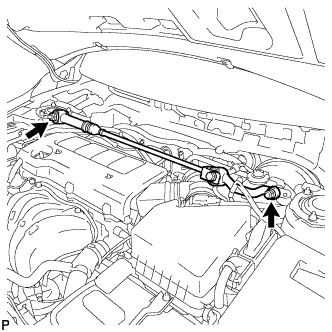
| 3. TEMPORARILY TIGHTEN SUSPENSION TOWER DAMPER ASSEMBLY |
Temporarily tighten the suspension tower damper assembly with the 2 nuts.
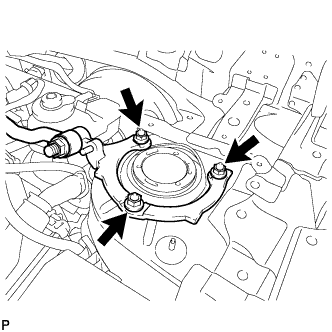
| 4. FULLY TIGHTEN TOWER BAR BRACKET SUB-ASSEMBLY LH |
Fully tighten the 3 nuts.
- Torque:
- 50 N*m{510 kgf*cm, 37 ft.*lbf}
| 5. FULLY TIGHTEN TOWER BAR BRACKET SUB-ASSEMBLY RH |
Fully tighten the 3 nuts.
- Torque:
- 50 N*m{510 kgf*cm, 37 ft.*lbf}
| 6. FULLY TIGHTEN SUSPENSION TOWER DAMPER ASSEMBLY |
Fully tighten the 2 nuts.
- Torque:
- 52 N*m{530 kgf*cm, 38 ft.*lbf}
| 7. INSTALL OUTER COWL TOP PANEL |
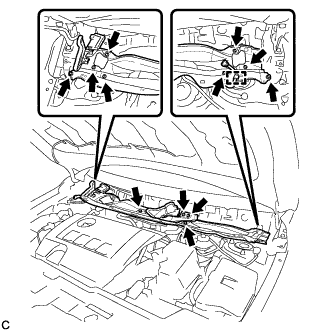
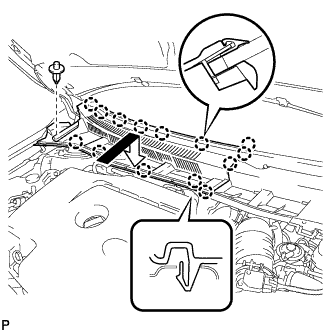
Install the outer cowl top panel with the 12 bolts.
- Torque:
- 8.8 N*m{90 kgf*cm, 78 in.*lbf}
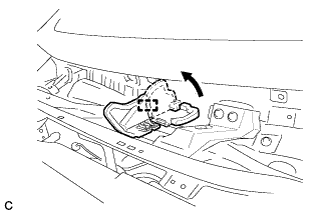
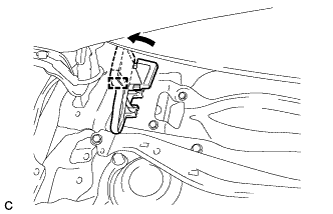
Engage the clamp.
Bend the water guard plate RH as shown in the illustration, and engage the clamp.
Bend the No. 1 heater air duct splash shield seal as shown in the illustration, and engage the clamp.
| 8. INSTALL WINDSHIELD WIPER MOTOR AND LINK ASSEMBLY |
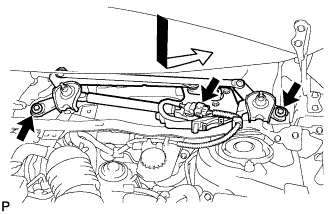
Install the windshield wiper motor and link assembly with the 2 bolts.
- Torque:
- 5.5 N*m{56 kgf*cm, 49 in.*lbf}
Connect the connector.
| 9. INSTALL COWL TOP VENTILATOR LOUVER LH |
Engage the clip and 8 claws to install the cowl top ventilator louver LH.
| 10. INSTALL CENTER NO.1 COWL TOP VENTILATOR LOUVER |
Engage the clip and 14 claws to install the center No. 1 cowl top ventilator louver.
| 11. INSTALL HOOD TO COWL TOP SEAL |
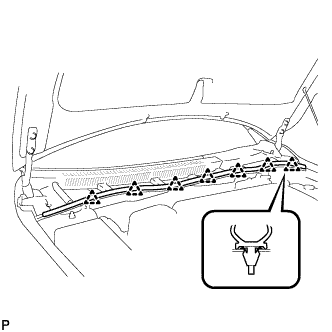
Engage the 7 clips to install the hood to cowl top seal.
| 12. INSTALL FRONT WIPER ARM AND BLADE ASSEMBLY RH |
Operate the wiper and stop the windshield wiper motor at the automatic stop position.
Clean the wiper arm serrations.
When reinstalling:
Clean the wiper pivot serrations with a wire brush.
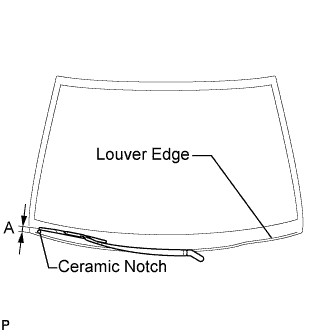
Install the front wiper arm and blade assembly RH with the nut to the position shown in the illustration.
- Torque:
- 26 N*m{265 kgf*cm, 19 ft.*lbf}
- HINT:
- Hold the arm hinge by hand while fastening the nut.
Area
| Measurement
|
A
| 27.5 to 42.5 mm (1.08 to 1.67 in.)
|
| 13. INSTALL FRONT WIPER ARM AND BLADE ASSEMBLY LH |
Operate the front wipers and stop the windshield wiper motor at the automatic stop position.
Clean the wiper arm serrations.
When reinstalling:
Clean the wiper pivot serrations with a wire brush.
Install the front wiper arm and blade assembly LH with the nut to the position shown in the illustration.
- Torque:
- 26 N*m{265 kgf*cm, 19 ft.*lbf}
- HINT:
- Hold the arm hinge by hand while fastening the nut.
Area
| Measurement
|
A
| 31.5 to 46.5 mm (1.24 to 1.83 in.)
|
Operate the front wipers while spraying washer fluid on the windshield glass. Make sure that the front wipers function properly and the wipers do not come into contact with the vehicle body.
| 14. REMOVE FRONT WIPER ARM HEAD CAP |
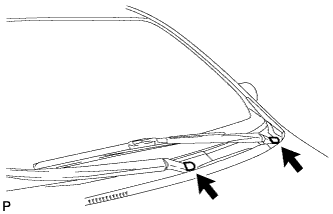
Install the 2 front wiper arm head caps.
