Starter -- Installation |
| 1. INSTALL STARTER ASSEMBLY (for Manual Transaxle) |
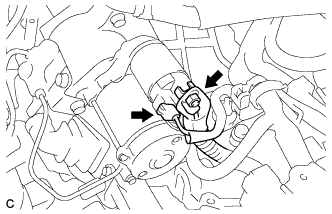
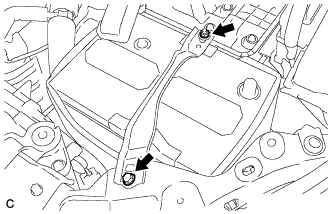
Install the starter assembly, clutch accumulator bracket and wire harness clamp bracket with the 3 bolts.
- Torque:
- Bolt A:
- 37 N*m{377 kgf*cm, 27 ft.*lbf}
- Bolt B:
- 12 N*m{120 kgf*cm, 9 ft.*lbf}
 |
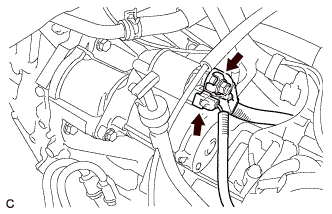
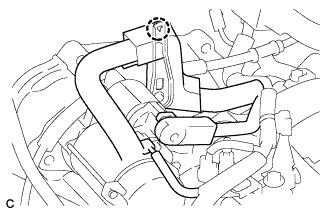
Connect the wire harness to terminal 30 and install the nut. Then, attach the terminal cap.
- Torque:
- 9.8 N*m{100 kgf*cm, 87 in.*lbf}
 |
Connect the terminal 50 connector to the starter assembly.
| 2. INSTALL STARTER ASSEMBLY (for Automatic Transaxle) |
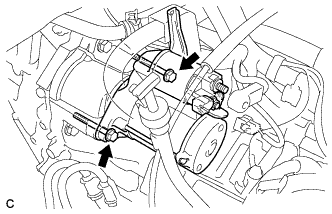
Install the starter assembly and wire harness clamp bracket with the 2 bolts.
- Torque:
- 37 N*m{377 kgf*cm, 27 ft.*lbf}
 |
Connect the wire harness to terminal 30 and install the nut. Then, attach the terminal cap.
- Torque:
- 9.8 N*m{100 kgf*cm, 87 in.*lbf}
 |
Connect the terminal 50 connector to the starter assembly.
| 3. INSTALL BATTERY CARRIER |
Install the battery carrier with the 4 bolts.
- Torque:
- 13 N*m{133 kgf*cm, 10 ft.*lbf}
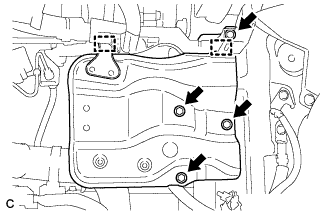 |
Connect the 2 wire harness clamps.
| 4. INSTALL BATTERY |
Install the battery tray, battery and battery insulator.
Install the battery clamp with the bolt and nut.
- Torque:
- Bolt:
- 6.5 N*m{66 kgf*cm, 58 in.*lbf}
- Nut:
- 3.5 N*m{36 kgf*cm, 31 in.*lbf}
 |
Connect the battery cables.
- Torque:
- 5.4 N*m{55 kgf*cm, 48 in.*lbf}
| 5. INSTALL WIRE HARNESS |
Install the claw and wire harness.
 |
| 6. INSTALL AIR CLEANER CASE |
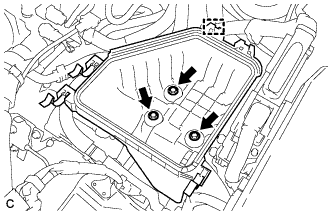
Install the air cleaner case with the 3 bolts.
- Torque:
- 7.0 N*m{71 kgf*cm, 62 in.*lbf}
 |
Install the engine wire clamp to the air cleaner case.
Install the air cleaner filter element.
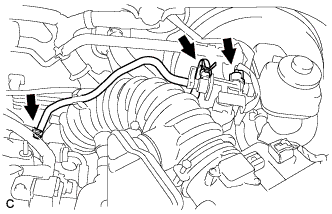
| 7. INSTALL AIR CLEANER CAP SUB-ASSEMBLY WITH HOSE |
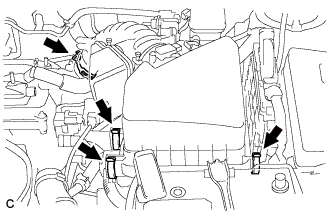
Install the air cleaner cap sub-assembly with hose and lock the 3 clamps.
 |
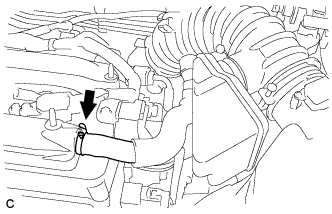
Tighten the air cleaner hose clamp.
Connect the ventilation hose.
 |
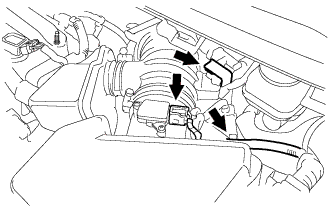
Connect the 2 vacuum hoses and No. 1 vacuum switching valve connector.
 |
Connect the 2 wire harness clamps and the mass air flow meter connector.
 |
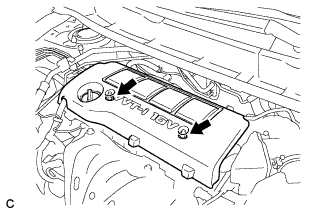
| 8. INSTALL NO. 1 ENGINE COVER SUB-ASSEMBLY |
Install the No. 1 engine cover sub-assembly with the 2 nuts.
 |
| 9. CONNECT CABLE TO NEGATIVE BATTERY TERMINAL |
- HINT: