Camshaft -- Removal |
| 1. REMOVE ENGINE UNDER COVER RH |
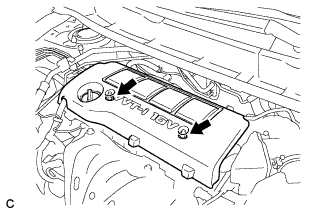
| 2. REMOVE NO. 1 ENGINE COVER SUB-ASSEMBLY |
Remove the 2 nuts and No. 1 engine cover sub-assembly.
 |
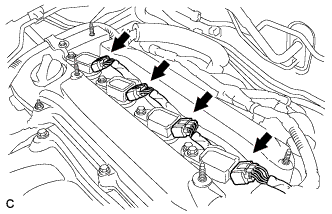
| 3. REMOVE IGNITION COIL ASSEMBLY |
Disconnect the 4 ignition coil connectors.
 |
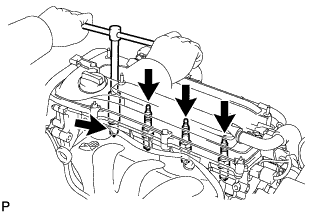
Remove the 4 bolts and 4 ignition coils.
 |
| 4. REMOVE SPARK PLUG |
Remove the 4 spark plugs.
 |
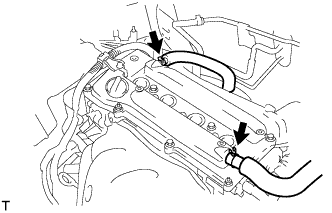
| 5. REMOVE CYLINDER HEAD COVER SUB-ASSEMBLY |
Remove the 2 ventilation hoses from the cylinder head cover sub-assembly.
 |
Remove the 2 bolts and separate the 2 wire harness brackets.
 |
Remove the 8 bolts and 2 nuts, then remove the cylinder head cover sub-assembly and gasket.
 |
| 6. SET NO. 1 CYLINDER TO TDC/COMPRESSION |
Turn the crankshaft pulley until the groove and the timing mark "0" on the timing chain cover are aligned.
 |
Check that each timing mark on the camshaft timing gear and sprocket is aligned with each timing mark located on the No. 1 and No. 2 bearing caps as shown in the illustration.
If not, turn the crankshaft pulley 1 revolution (360°) to align the timing marks as illustrated.
Place paint marks on the chain in alignment with the timing marks on the camshaft timing gear and camshaft timing sprocket.
| 7. REMOVE NO. 1 CHAIN TENSIONER ASSEMBLY |
Remove the 2 nuts, No. 1 chain tensioner assembly and gasket.
- NOTICE:
- Do not turn the crankshaft without the No. 1 chain tensioner assembly.
 |
| 8. LOOSEN CAMSHAFT TIMING GEAR OR SPROCKET |
While holding the No. 2 camshaft with a wrench, loosen the No. 2 camshaft timing set bolt.
 |
| 9. REMOVE NO. 2 CAMSHAFT |
Using several steps, uniformly loosen and remove the 10 bearing cap bolts in the sequence shown in the illustration.
 |
Remove the 5 bearing caps.
While holding the No. 2 camshaft by hand, remove the camshaft timing sprocket set bolt.
 |
Remove the camshaft timing sprocket from the No. 2 camshaft with the timing chain wrapped on the sprocket.
Remove the camshaft timing sprocket from the timing chain.
| 10. REMOVE CAMSHAFT |
In several steps, uniformly loosen and remove the 10 bearing caps bolts in the sequence shown in the illustration.
 |
Remove the 5 bearing caps.
Remove the camshaft and camshaft timing gear assembly while holding the timing chain by hand.
Support the timing chain with a string to prevent it from slipping off the crankshaft sprocket as shown in the illustration.
- NOTICE:
- Be careful not to drop anything inside the timing chain cover.
 |
| 11. REMOVE CAMSHAFT TIMING GEAR ASSEMBLY |
Clamp the camshaft in a vise, and make sure that the camshaft timing gear assembly does not rotate.
 |
Cover all the oil path with vinyl tape except the advance side path shown in the illustration.
Apply air pressure of 150 kPa (1.5 kgf/cm2, 22 psi) to the oil path, then turn the camshaft timing gear assembly to the advance direction (counterclockwise) by hand.
- CAUTION:
- Cover the paths with a piece of cloth to avoid oil splashes.
- HINT:
- Depending on the air pressure, the camshaft timing gear assembly may turn to the advance side without applying force by hand. Also, if the pressure is difficult to apply because of air leakage from a path, the lock pin may be difficult to release.
 |
Remove the flange bolt of the camshaft timing gear.
- NOTICE:
- Be sure not to remove the other 4 bolts.
- When reusing the camshaft timing gear, release the straight pin lock first, then install the gear.
 |