High Pitched Horn Removal
REMOVE COOL AIR INTAKE DUCT SEAL (for 2GR-FE)
REMOVE FRONT BUMPER ASSEMBLY (w/o Headlight Cleaner System)
REMOVE FRONT BUMPER ASSEMBLY (w/ Headlight Cleaner System)
REMOVE HIGH PITCHED HORN ASSEMBLY
High Pitched Horn -- Removal |
| 1. REMOVE COOL AIR INTAKE DUCT SEAL (for 2GR-FE) |
Remove the 7 clips and cool air intake duct seal.
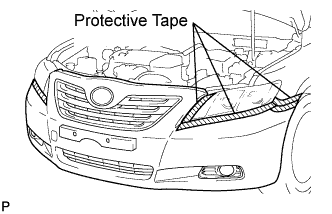
| 2. REMOVE FRONT BUMPER ASSEMBLY (w/o Headlight Cleaner System) |
Put protective tape around the front bumper assembly.
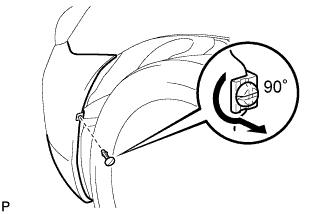
Using a screwdriver, turn the pin 90 degrees and remove the pin hold clip.
- HINT:
- Use the same procedures for the RH side and LH side.
Remove the 8 screws, 2 clips, 2 radiator grille protectors and bolt.
Disengage the 2 claws and disconnect the front bumper assembly as shown in the illustration.
- HINT:
- Use the same procedures for the RH side and LH side.
Disconnect each connector, and then remove the front bumper assembly.
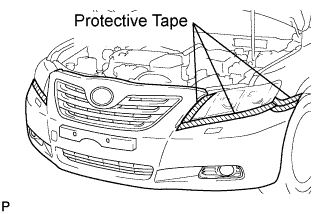
| 3. REMOVE FRONT BUMPER ASSEMBLY (w/ Headlight Cleaner System) |
Put protective tape around the front bumper assembly.
Using a screwdriver, turn the pin 90 degrees and remove the pin hold clip.
- HINT:
- Use the same procedures for the RH side and LH side.
Remove the 8 screws, 2 clips, 2 radiator grille protectors and bolt.
Disengage the 2 claws and disconnect the front bumper assembly as shown in the illustration.
- HINT:
- Use the same procedures for the RH side and LH side.
Disconnect each connector.
Disconnect the headlight cleaner washer hose, and then remove the front bumper assembly.
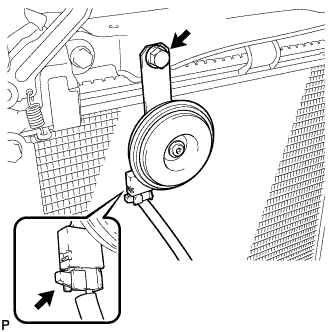
| 4. REMOVE HIGH PITCHED HORN ASSEMBLY |
Disconnect the connector.
Remove the bolt and the high pitched horn assembly.