Water Pump -- Removal |
| 1. DISCONNECT CABLE FROM NEGATIVE BATTERY TERMINAL |
| 2. REMOVE ENGINE UNDER COVER RH |
| 3. REMOVE ENGINE UNDER COVER LH |
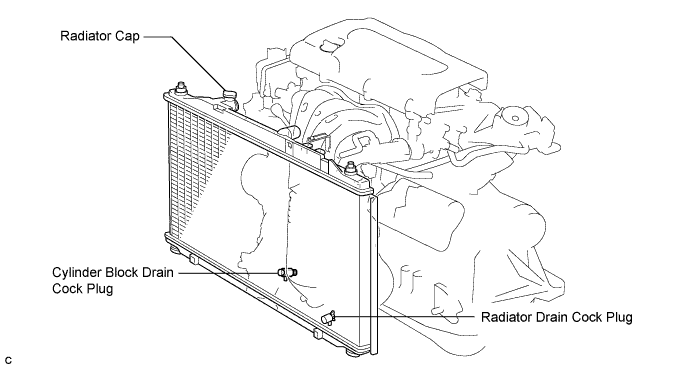
| 4. DRAIN ENGINE COOLANT |
- NOTICE:
- Do not remove the radiator cap sub-assembly while the engine and radiator are still hot. Pressurized, hot engine coolant and steam may be released and cause serious burns.
Remove the radiator cap sub-assembly from the radiator assembly.
Loosen the radiator drain cock plug and cylinder block drain cock plug, then drain the coolant.
- HINT:
- Collect the coolant in a container and dispose of it according to the regulations in your area.
| 5. REMOVE FRONT FENDER APRON SEAL RH |
| 6. REMOVE NO. 2 ENGINE MOUNTING STAY RH |
Remove the 2 bolts and No. 2 mounting stay RH.
 |
| 7. REMOVE ENGINE MOVING CONTROL ROD SUB-ASSEMBLY |
Remove the bolt and disconnect the ground cable.
 |
Remove the 3 bolts and the engine moving control rod with bracket.
 |
| 8. REMOVE NO. 2 ENGINE MOUNTING BRACKET RH |
Remove the 3 bolts and No. 2 mounting bracket RH.
 |
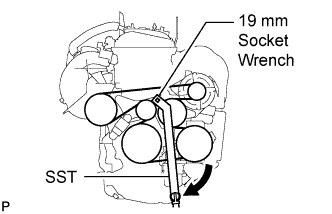
| 9. REMOVE V-RIBBED BELT |
Using SST and 19 mm socket wrench, loosen the V-ribbed belt tensioner arm clockwise, then remove the V-ribbed belt.
- SST
- 09216-42010
- NOTICE:
- Be sure to connect SST and the tools so that they are in line during use.
- When retracting the tensioner, turn it clockwise slowly for 3 seconds or more. Do not apply force rapidly.
- After the tensioner is fully retracted, do not apply force any more than necessary.
 |
| 10. REMOVE GENERATOR ASSEMBLY |
Disconnect the generator connector.
 |
Remove the nut and disconnect the wire harness from terminal B.
Remove the bolt and wire harness clamp bracket.
Remove the wire harness clamps.
Remove the 2 bolts and generator assembly.
 |
| 11. REMOVE WATER PUMP PULLEY |
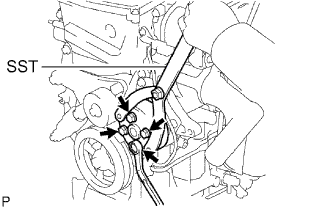 |
Using SST, remove the 4 bolts and water pump pulley.
- SST
- 09960-10010(09962-01000,09963-00700)
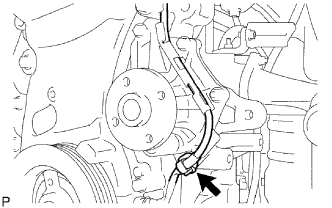
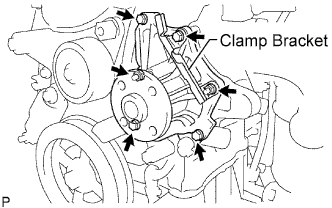
| 12. REMOVE WATER PUMP ASSEMBLY |
 |
Remove the clamp of the crankshaft position sensor from the water pump.
Disconnect the wire of the crankshaft position sensor from the clamp bracket.
Remove the 4 bolts, 2 nuts and clamp bracket.
 |
Using a screwdriver, pry between the water pump and cylinder block, and then remove the water pump.
- HINT:
- Tape the screwdriver tip before use.
- NOTICE:
- Be careful not to damage the contact surfaces of the water pump and cylinder block.
 |