Washer Nozzle -- Installation |
- HINT:
- Use the same procedure for the RH and LH sides.
- The procedure listed below is for the LH side.
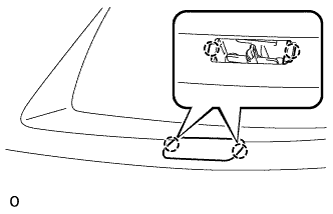
| 1. INSTALL HEADLIGHT WASHER ACTUATOR SUB-ASSEMBLY LH |
w/o Under Guard, w/ Under Guard:
Attach the 2 claws to install the headlight washer actuator sub-assembly.
Install the headlight washer actuator with the 2 screws.

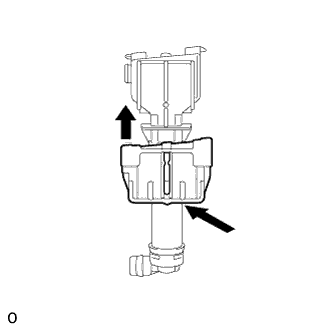
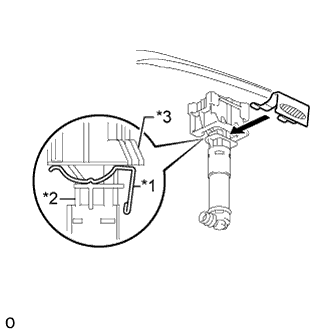
w/ Hood Moulding:
Attach the claw to install the headlight washer actuator sub-assembly with the headlight cleaner clamp as shown in the illustration.
Attach the 2 claws as shown in the illustration.
Push up the headlight cleaner clamp B to the surface of the bumper.
Install the headlight washer actuator sub-assembly with the clamp as shown in the illustration.
Text in Illustration *1 Clamp *2 Headlight Washer Actuator Sub-assembly LH *3 Headlight Cleaner Clamp 
Push Here
| 2. INSTALL HEADLIGHT WASHER ACTUATOR SUB-ASSEMBLY RH |
- HINT:
- Use the same procedures described for the LH side.
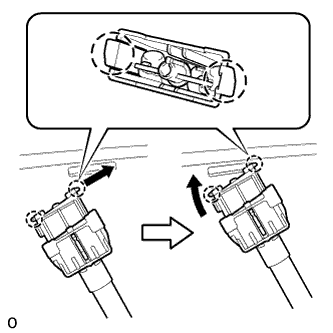
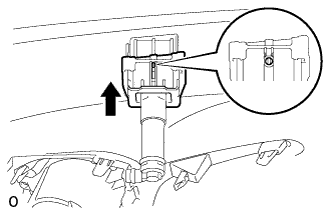
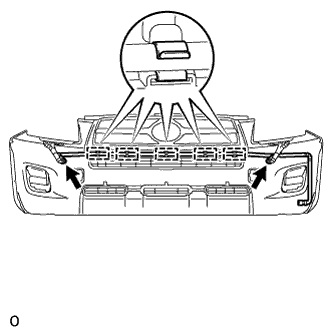
| 3. INSTALL HEADLIGHT WASHER NOZZLE SUB-ASSEMBLY LH |
Attach the 2 claws to install the headlight washer nozzle.
 |
| 4. INSTALL HEADLIGHT WASHER NOZZLE SUB-ASSEMBLY RH |
- HINT:
- Use the same procedures described for the LH side.
| 5. INSTALL HEADLIGHT CLEANER HOSE |
w/o Under Guard:
Attach the 5 clamps to install the hose to the front bumper.
Connect the clamp to the headlight washer hose.
w/ Under Guard:
Attach the 5 clamps to install the hose to the front bumper.
Connect the clamp to the headlight washer hose.
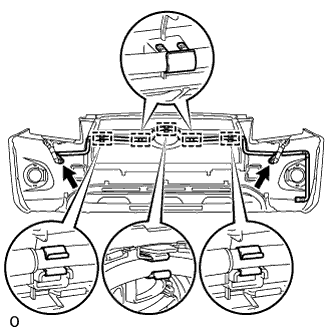
w/ Hood Moulding:
Attach the 6 clamps to install the hose to the front bumper.
Connect the clamp to the headlight washer hose.

| 6. INSTALL FRONT BUMPER COVER |
w/o Under Guard:
Install the front bumper cover (RAV4_ACA30 RM0000015RH00GX.html).
w/ Under Guard:
Install the front bumper cover (RAV4_ACA30 RM000003PKD001X.html).
w/ Hood Moulding:
Install the front bumper cover (RAV4_ACA30 RM0000015RH00PX.html).
| 7. INSTALL RADIATOR SUPPORT OPENING COVER |
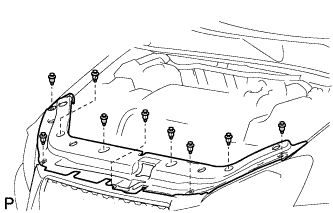 |
Install the radiator support opening cover with the 9 clips.
| 8. INSTALL FRONT FENDER LINER LH |
Install the fender liner with the clip and fender liner retainer.
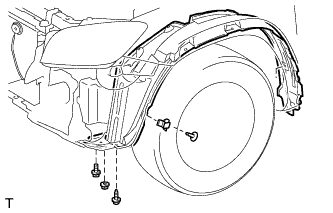 |
Install the screw, nut and bolt.
| 9. INSTALL FRONT FENDER LINER RH |
- HINT:
- Use the same procedures described for the LH side.
| 10. CONNECT CABLE TO NEGATIVE BATTERY TERMINAL |