Washer Nozzle -- Removal |
- HINT:
- Use the same procedure for the RH and LH sides.
- The procedure listed below is for the LH side.
| 1. DISCONNECT CABLE FROM NEGATIVE BATTERY TERMINAL |
- NOTICE:
- w/ Navigation System (for HDD):
- After the ignition switch is turned off, the HDD navigation system requires approximately a minute to record various types of memory and settings. As a result, after turning the ignition switch off, wait a minute or more before disconnecting the cable from the negative (-) battery terminal.
| 2. REMOVE FRONT FENDER LINER LH |
Using a screwdriver, remove the clip and fender liner retainer.
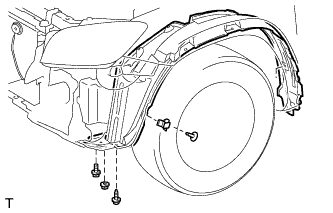 |
Remove the screw, nut and bolt.
Partially remove the fender liner.
- HINT:
- It is not necessary to fully remove the fender liner. Partially remove it so that the bumper cover can be removed later.
| 3. REMOVE FRONT FENDER LINER RH |
- HINT:
- Use the same procedures described for the LH side.
| 4. REMOVE RADIATOR SUPPORT OPENING COVER |
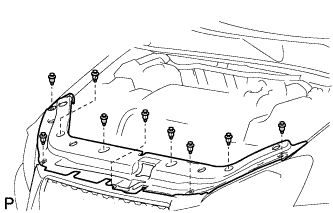 |
Remove the 9 clips and radiator support opening cover.
| 5. REMOVE FRONT BUMPER COVER |
w/o Under Guard:
Remove the front bumper cover (RAV4_ACA30 RM0000015RJ00HX.html).
w/ Under Guard:
Remove the front bumper cover (RAV4_ACA30 RM000003PKF001X.html).
w/ Hood Moulding:
Remove the front bumper cover (RAV4_ACA30 RM000003PKF007X.html).
| 6. REMOVE HEADLIGHT CLEANER HOSE |
w/o Under Guard:
Disconnect the headlight washer hose from the headlight washer actuator.
Detach the 5 clamps and remove the hose from the front bumper.
w/ Under Guard:
Disconnect the headlight washer hose from the headlight washer actuator.
Detach the 5 clamps and remove the hose from the front bumper.
w/ Hood Moulding:
Disconnect the headlight washer hose from the headlight washer actuator.
Detach the 6 clamps and remove the hose from the front bumper.

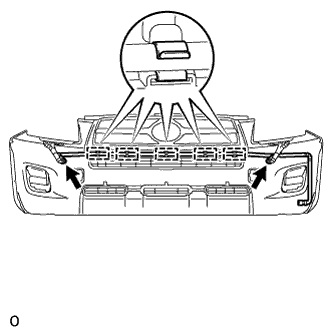
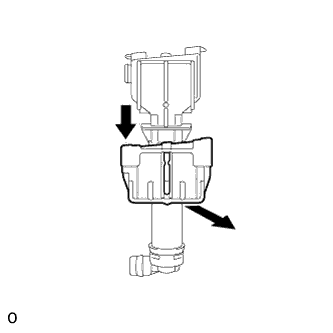
| 7. REMOVE HEADLIGHT WASHER NOZZLE SUB-ASSEMBLY LH |
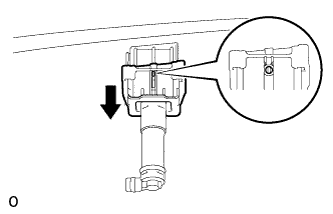
Extend the headlight cleaner washer nozzle.
 |
Detach the 2 claws and remove the headlight cleaner washer nozzle.
 |
| 8. REMOVE HEADLIGHT WASHER NOZZLE SUB-ASSEMBLY RH |
- HINT:
- Use the same procedures described for the LH side.
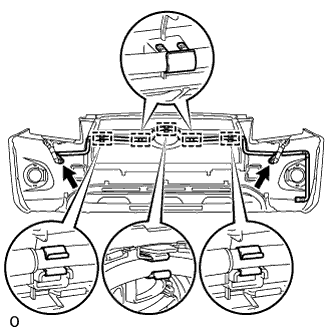
| 9. REMOVE HEADLIGHT WASHER ACTUATOR SUB-ASSEMBLY LH |
w/o Under Guard, w/ Under Guard:
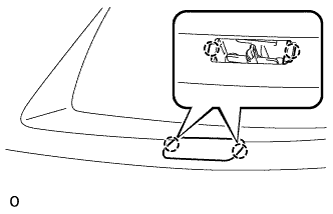
Remove the 2 screws.
Detach the 2 claws and remove the headlight washer actuator sub-assembly.

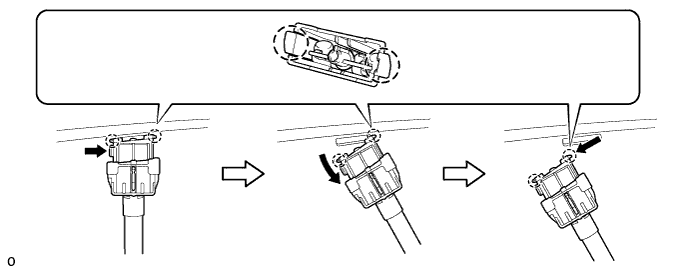
w/ Hood Moulding:
Remove the clamp as shown in the illustration.
Pull down the headlight cleaner clamp and remove it.
Detach the 2 claws and remove the headlight washer actuator sub-assembly as shown in the illustration.
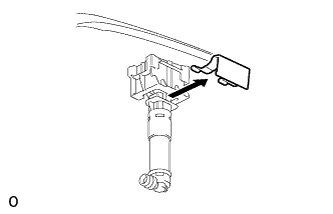
Detach the claw and remove the headlight cleaner clamp as shown in the illustration.
| 10. REMOVE HEADLIGHT WASHER ACTUATOR SUB-ASSEMBLY RH |
- HINT:
- Use the same procedures described for the LH side.