Shift Lever Assembly Removal
DISCONNECT CABLE FROM NEGATIVE BATTERY TERMINAL
REMOVE NO. 1 CONSOLE UPPER PANEL GARNISH
REMOVE NO. 2 CONSOLE UPPER PANEL GARNISH
REMOVE SHIFT LEVER KNOB
REMOVE UPPER CONSOLE PANEL SUB-ASSEMBLY
REMOVE SWITCH BASE
REMOVE CONSOLE CUP HOLDER BOX
REMOVE UPPER REAR CONSOLE PANEL SUB-ASSEMBLY
REMOVE CONSOLE REAR END PANEL
REMOVE REAR CONSOLE BOX SUB-ASSEMBLY
DISCONNECT TRANSAXLE CONTROL CABLE ASSEMBLY
REMOVE FLOOR SHIFT SHIFT LEVER ASSEMBLY
Shift Lever Assembly -- Removal |
| 1. DISCONNECT CABLE FROM NEGATIVE BATTERY TERMINAL |
- NOTICE:
- Wait at least 90 seconds after disconnecting the cable from the negative (-) battery terminal to prevent airbag and seat belt pretensioner activation.
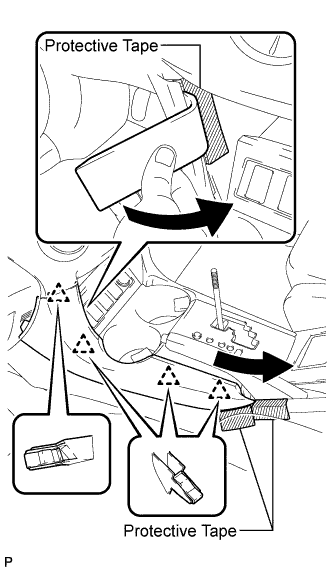
| 2. REMOVE NO. 1 CONSOLE UPPER PANEL GARNISH |
Place protective tape as shown in the illustration.
Using a moulding remover, detach the 4 clips and remove the upper panel garnish.
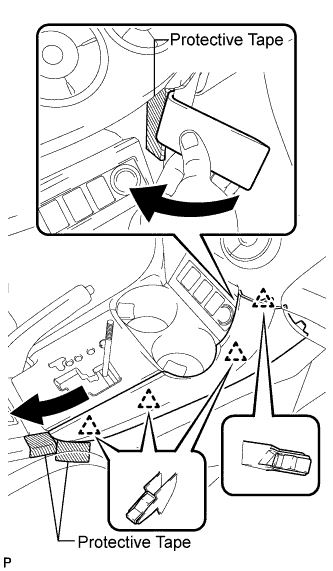
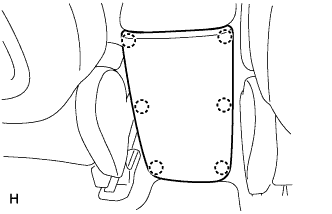
| 3. REMOVE NO. 2 CONSOLE UPPER PANEL GARNISH |
Place protective tape as shown in the illustration.
Using a moulding remover, detach the 4 clips and remove the upper panel garnish.
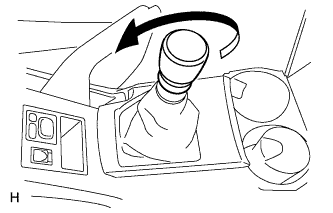
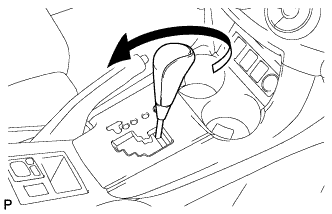
| 4. REMOVE SHIFT LEVER KNOB |
for Manual Transaxle:
Twist the shift lever knob in the direction indicated by the arrow and remove it.
for Automatic Transaxle:
Twist the shift lever knob in the direction indicated by the arrow and remove it.
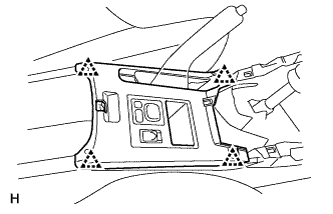
| 5. REMOVE UPPER CONSOLE PANEL SUB-ASSEMBLY |
Using a screwdriver, detach the 2 clips and 4 claws, and then remove the upper console panel.
- HINT:
- Tape the screwdriver tip before use.
Detach the 2 clips and 2 claws.
Disconnect the connectors and remove the switch base.
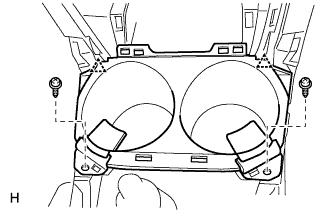
| 7. REMOVE CONSOLE CUP HOLDER BOX |
Remove the 2 screws.
Detach the 2 clips and remove the cup holder box.
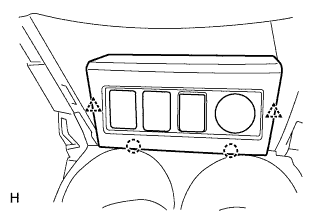
| 8. REMOVE UPPER REAR CONSOLE PANEL SUB-ASSEMBLY |
Using a screwdriver, detach the 4 clips.
- HINT:
- Tape the screwdriver tip before use.
Disconnect the connectors and remove the upper rear console panel.
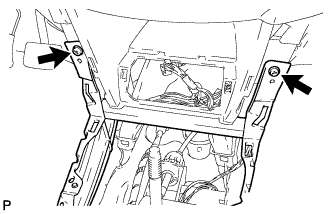
| 9. REMOVE CONSOLE REAR END PANEL |
Using a screwdriver, detach the 6 claws and remove the console rear end panel.
- HINT:
- Tape the screwdriver tip before use.
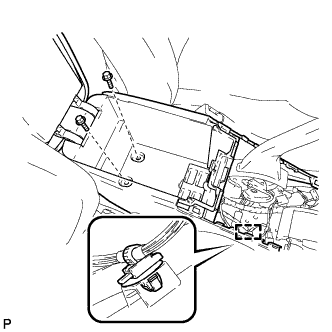
| 10. REMOVE REAR CONSOLE BOX SUB-ASSEMBLY |
Remove the 2 bolts and detach the wire harness clamp.
Remove the 2 screws.
Disconnect the connector and remove the rear console box.
| 11. DISCONNECT TRANSAXLE CONTROL CABLE ASSEMBLY |
Remove the 2 clips, and disconnect the cable ends of the control cable.
Using a screwdriver, release the cable locks of the shift cable and select cable.
Turn the lock nuts 180° counterclockwise and hold them in that position. Remove the shift cable and select cable while holding them.
- NOTICE:
- Do not push in the cable locks.
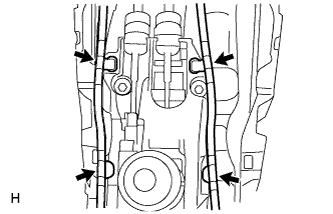
| 12. REMOVE FLOOR SHIFT SHIFT LEVER ASSEMBLY |
Detach the 4 clamps and disconnect the wire harness.
Remove the 4 bolts and shift lever.