Back Door Outside Garnish -- Reassembly |
| 1. INSTALL BACK DOOR OUTSIDE GARNISH PROTECTOR LH |
- HINT:
- When installing the back door outside garnish protector, heat the back door outside garnish surface using a heat light.
- Standard:
Item Temperature Back Door Outside Garnish 40 to 60°C (104 to 140°F)
- NOTICE:
- Do not heat the back door outside garnish excessively.
Clean the back door outside garnish surface.
Using a heat light, heat the back door outside garnish surface.
Remove the double-sided tape from the back door outside garnish surface.
Wipe off any tape adhesive residue with cleaner.
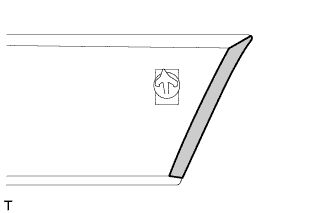
Install a new back door outside garnish protector in the position shown in the illustration.
 |
| 2. INSTALL BACK DOOR OUTSIDE GARNISH PROTECTOR RH |
- HINT:
- Use the same procedure described for the LH side.
| 3. INSTALL BACK DOOR OUTSIDE GARNISH PROTECTOR |
- HINT:
- When installing the back door outside garnish protector, heat the back door outside garnish surface using a heat light.
- Standard:
Item Temperature Back Door Outside Garnish 40 to 60°C (104 to 140°F)
- NOTICE:
- Do not heat the back door outside garnish excessively.
Clean the back door outside garnish surface.
Using a heat light, heat the back door outside garnish surface.
Remove the double-sided tape from the back door outside garnish surface.
Wipe off any tape adhesive residue with cleaner.
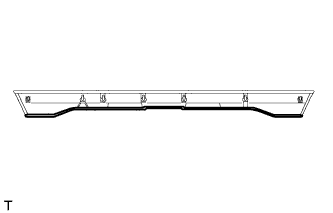
Install a new back door outside garnish protector in the position shown in the illustration.
 |
| 4. INSTALL BACK DOOR OUTSIDE GARNISH PAD |
- HINT:
- When installing the back door outside garnish pad, heat the back door outside garnish surface using a heat light.
- Standard:
Item Temperature Back Door Outside Garnish 40 to 60°C (104 to 140°F)
- NOTICE:
- Do not heat the back door outside garnish excessively.
Clean the back door outside garnish surface.
Using a heat light, heat the back door outside garnish surface.
Remove the double-sided tape from the back door outside garnish surface.
Wipe off any tape adhesive residue with cleaner.
Install a new back door outside garnish pad in the position shown in the illustration.
 |
| 5. INSTALL LICENSE PLATE LIGHT ASSEMBLY |
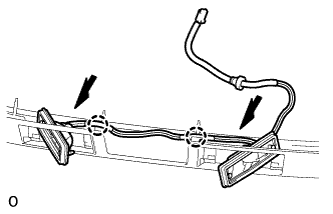
Install the license plate light assembly while turning it as shown in the illustration.
 |
Attach the 2 claws to the license plate light assembly.