Front Door Glass Weatherstrip Removal
DISCONNECT CABLE FROM NEGATIVE BATTERY TERMINAL
REMOVE FRONT DOOR LOWER FRAME BRACKET GARNISH LH
REMOVE DOOR PULL HANDLE
REMOVE FRONT ARMREST UPPER BASE PANEL LH
REMOVE FRONT DOOR TRIM BOARD SUB-ASSEMBLY LH
REMOVE OUTER REAR VIEW MIRROR ASSEMBLY LH
REMOVE FRONT DOOR GLASS OUTER WEATHERSTRIP LH
Front Door Glass Weatherstrip -- Removal |
- HINT:
- Use the same procedures for the RH side and LH side.
- The procedures listed below are for the LH side.
| 1. DISCONNECT CABLE FROM NEGATIVE BATTERY TERMINAL |
- CAUTION:
- Wait at least 90 seconds after disconnecting the cable from the negative (-) battery terminal to prevent airbag and seat belt pretensioner activation.
| 2. REMOVE FRONT DOOR LOWER FRAME BRACKET GARNISH LH |
Using a screwdriver, detach the 2 clips and remove the garnish.
- HINT:
- Tape the screwdriver tip before use.
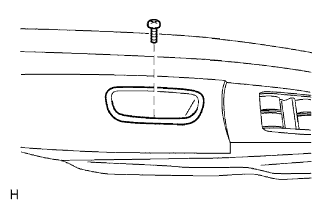
| 3. REMOVE DOOR PULL HANDLE |
Remove the screw and pull handle.
| 4. REMOVE FRONT ARMREST UPPER BASE PANEL LH |
Using a screwdriver, detach the clip and 5 claws, and remove the panel together with the window regulator master switch.
- HINT:
- Tape the screwdriver tip before use.
Disconnect the switch connector.
for Driver side:
Remove the 3 screws and window regulator master switch from the base panel.
- NOTICE:
- Be careful when removing the screws as the switch may fall and become damaged.
for Passenger side:
Using a screwdriver, detach the 2 claws and remove the window regulator switch from the base panel.
- HINT:
- Tape the screwdriver tip before use.
- NOTICE:
- Be careful when detaching the claws as the switch may fall and become damaged.
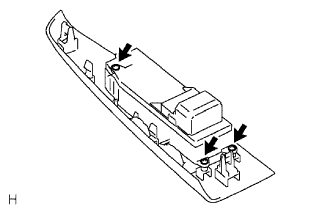
| 5. REMOVE FRONT DOOR TRIM BOARD SUB-ASSEMBLY LH |
Remove the screw and clip labeled A.
Using a screwdriver, detach the 8 remaining clips and remove the trim board.
- HINT:
- Tape the screwdriver tip before use.
- If the screwdriver cannot reach the clips, pull on the lower trim to remove it.
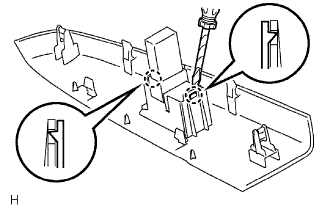
- NOTICE:
- The clip labeled B cannot be reused. When installing the trim board, replace clip B.
- In order to prevent the door panel from being damaged, use protective tape to cover the areas indicated by the arrows in the illustration.
Using a screwdriver, detach the 7 claws and remove the weatherstrip inner.
- HINT:
- Tape the screwdriver tip before use.
| 6. REMOVE OUTER REAR VIEW MIRROR ASSEMBLY LH |
Disconnect the mirror connector labeled A.
Remove the 3 nuts.
Push down the claw and remove the outer rear view mirror.
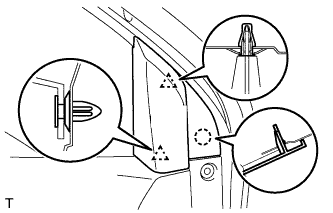
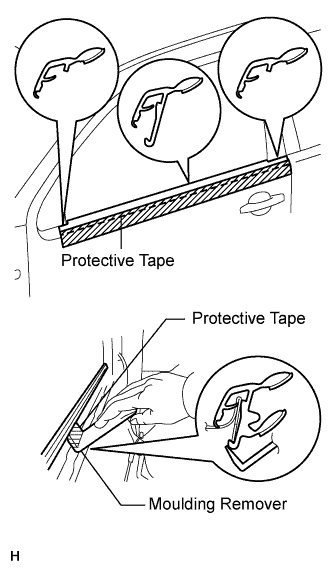
| 7. REMOVE FRONT DOOR GLASS OUTER WEATHERSTRIP LH |
Put protective tape under the weatherstrip.
Using a moulding remover, detach the claws to remove the weatherstrip as shown in the illustration.
- HINT:
- Tape the remover tip before use.
- NOTICE:
- Be careful when removing the weatherstrip as there are claws attached to the front and rear ends of the weatherstrip.