Front Door Speaker Installation
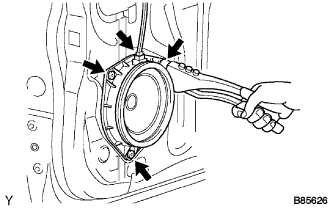
INSTALL FRONT NO. 1 SPEAKER ASSEMBLY
INSTALL FRONT DOOR TRIM BOARD SUB-ASSEMBLY LH
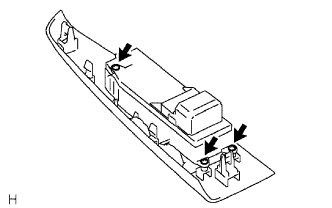
INSTALL FRONT ARMREST BASE PANEL UPPER LH
INSTALL DOOR PULL HANDLE
INSTALL FRONT DOOR LOWER FRAME BRACKET GARNISH LH
CONNECT CABLE TO NEGATIVE BATTERY TERMINAL
Front Door Speaker -- Installation |
- HINT:
- Use the same procedures for the RH side and LH side.
- The procedures listed below are for the LH side.
| 1. INSTALL FRONT NO. 1 SPEAKER ASSEMBLY |
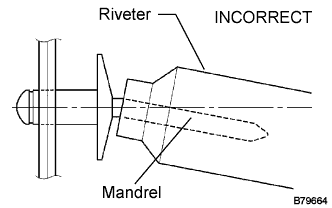
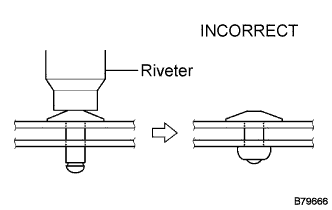
Using an air riveter or hand riveter, install the speaker with 3 new rivets.
- NOTICE:
- Do not pry the rivet with the riveter, as this will cause damage to the riveter and mandrel.
- Confirm that the rivets are seated properly against the speaker.
Do not tilt the riveter when installing the rivet to the speaker.
Do not leave any space between the rivet head and speaker.
- Do not leave any space between the speaker and door. Firmly hold together the 2 items while installing the rivet.
Connect the connector.
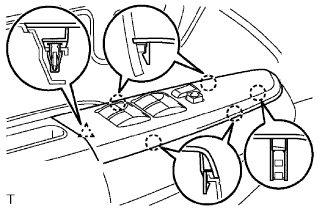
| 2. INSTALL FRONT DOOR TRIM BOARD SUB-ASSEMBLY LH |
Attach the 7 claws to install the weatherstrip inner.
Install the trim board.
Attach the 8 clips to install the trim board.
Install the screw and clip.
| 3. INSTALL FRONT ARMREST BASE PANEL UPPER LH |
for Passenger side:
Attach the 2 claws and install the window regulator switch to the base panel.
for Driver side:
Install the window regulator master switch to the base panel.
Install the 3 screws.
Connect the switch connector.
Attach the clip and 5 claws to install the panel together with the window regulator master switch.
| 4. INSTALL DOOR PULL HANDLE |
Install the pull handle with the screw.
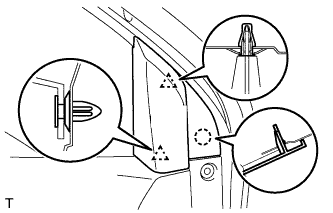
| 5. INSTALL FRONT DOOR LOWER FRAME BRACKET GARNISH LH |
Attach the 2 clips to install the garnish.
| 6. CONNECT CABLE TO NEGATIVE BATTERY TERMINAL |