Радиатор Снятие. Corolla Auris
Двигатель. COROLLA, AURIS. ZZE150 ZRE151,152 NDE150
REMOVE RADIATOR GRILLE PROTECTOR (for Sedan)
REMOVE FRONT BUMPER ASSEMBLY (for Sedan)
REMOVE FRONT BUMPER ASSEMBLY (for Hatchback)
REMOVE NO. 1 ENGINE UNDER COVER
REMOVE BATTERY
REMOVE BATTERY TRAY
DRAIN ENGINE COOLANT
REMOVE NO. 3 AIR HOSE
REMOVE NO. 2 AIR HOSE
REMOVE VACUUM HOSE
REMOVE NO. 2 RADIATOR SUPPORT
REMOVE INTERCOOLER ASSEMBLY
DISCONNECT THERMISTOR ASSEMBLY
DISCONNECT RADIATOR RESERVOIR TANK HOSE
DISCONNECT NO. 3 RADIATOR HOSE
DISCONNECT NO. 2 RADIATOR HOSE
DISCONNECT HOOD LOCK ASSEMBLY (for Hatchback)
DISCONNECT HOOD LOCK ASSEMBLY (for Sedan)
REMOVE NO. 2 FAN SHROUD
REMOVE RADIATOR ASSEMBLY
REMOVE FAN SHROUD
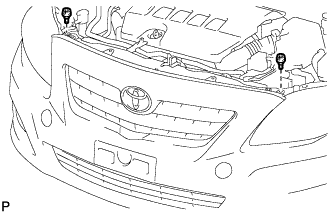
| 1. REMOVE RADIATOR GRILLE PROTECTOR (for Sedan) |
Снимите 2 защитных элемента решетки радиатора.
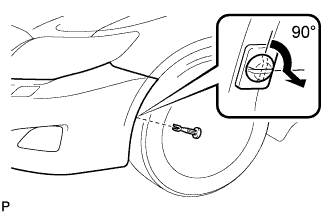
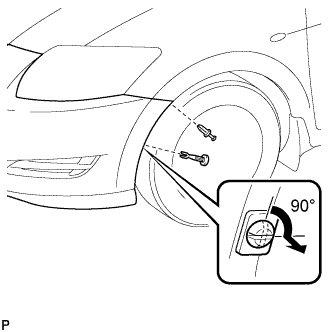
| 2. REMOVE FRONT BUMPER ASSEMBLY (for Sedan) |
С помощью отвертки поверните палец на 90 градусов и снимите фиксатор штифтов.
- УКАЗАНИЕ:
- Порядок выполнения работ одинаков для правой и левой стороны.
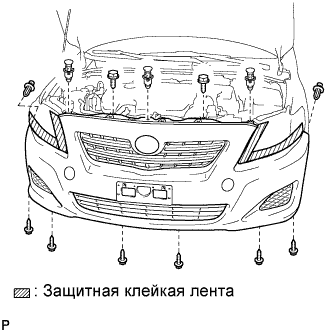
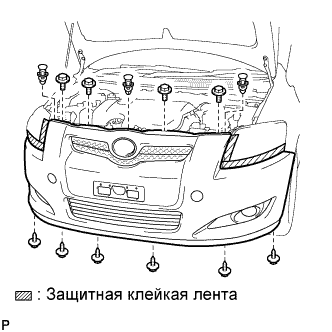
Наклейте вокруг переднего бампера в сборе защитную клейкую ленту.
Выверните 6 винтов, 2 болта и освободите 5 фиксаторов.
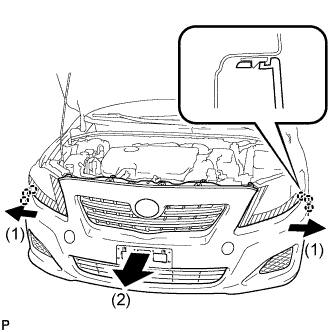
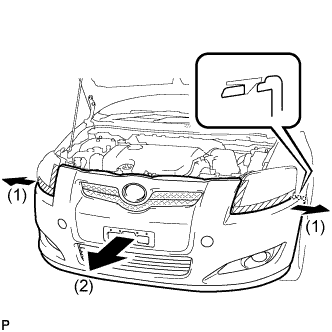
Освободите 6 захватов и снимите передний бампер в сборе, как показано на рисунке.
Для моделей с противотуманными фарами:
Отсоедините разъем противотуманной фары.
Для моделей с очистителями фар:
Слейте омывающую жидкость. (Нажмите здесь)
| 3. REMOVE FRONT BUMPER ASSEMBLY (for Hatchback) |
Снимите фиксатор.
- УКАЗАНИЕ:
- Порядок выполнения работ для правой и левой сторон одинаков.
С помощью отвертки поверните палец на 90 градусов и снимите фиксатор штифтов.
- УКАЗАНИЕ:
- Порядок выполнения работ для правой и левой сторон одинаков.
Наклейте вокруг переднего бампера в сборе защитную клейкую ленту.
Выверните 6 винтов, 4 болта и освободите 3 фиксатора.
Освободите 6 захватов и снимите передний бампер в сборе, как показано на рисунке.
Для моделей с противотуманными фарами:
Отсоедините разъем противотуманной фары.
Для моделей с очистителями фар:
Слейте омывающую жидкость. (Нажмите здесь)
| 4. REMOVE NO. 1 ENGINE UNDER COVER |
Loosen the bolt and nut, and remove the battery clamp.
Remove the battery and battery tray.
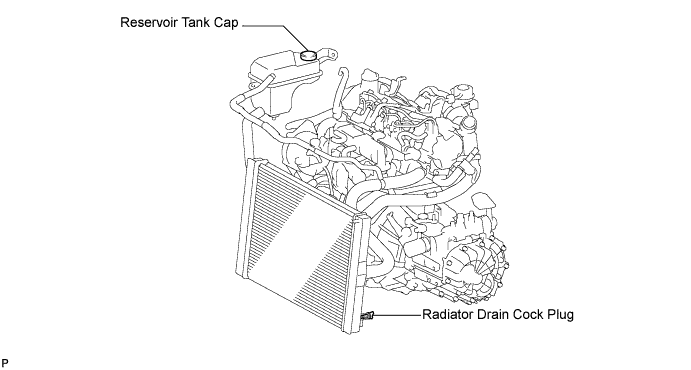
Loosen the radiator drain cock plug.
- УКАЗАНИЕ:
- Collect the coolant in a container and dispose of it according to the regulations in your area.
Remove the radiator reservoir cap.
- ПРЕДОСТЕРЕЖЕНИЕ:
- Do not remove the radiator reservoir cap while the engine and radiator are still hot.
- Pressurized, hot engine coolant and steam may be released and cause serious burns.
Loosen the cylinder block drain cock plug.
- УКАЗАНИЕ:
- The plug is on the backside of the generator on the exhaust manifold side.
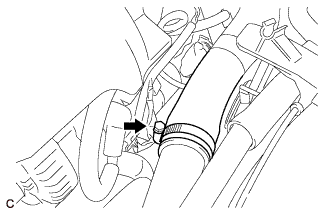
Loosen the hose clamp, and disconnect the No. 3 air hose.
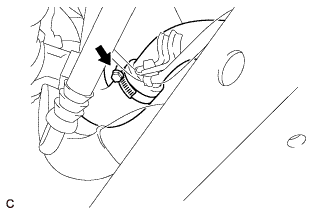
Loosen the hose clamp, and disconnect the No. 2 air hose.
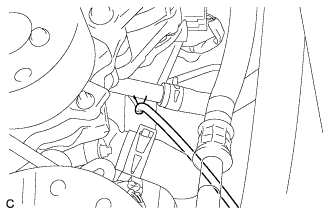
Disconnect the vacuum hose.
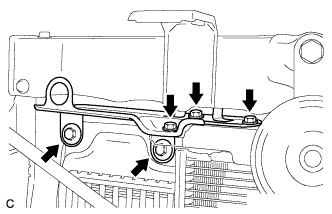
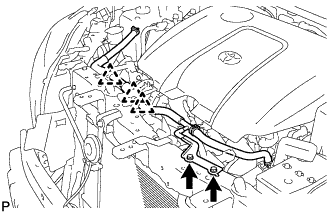
| 11. REMOVE NO. 2 RADIATOR SUPPORT |
Remove the 5 bolts and No. 2 radiator support sub-assembly.
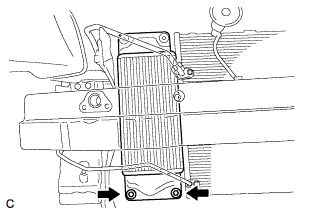
| 12. REMOVE INTERCOOLER ASSEMBLY |
Remove the 2 bolts and intercooler assembly.
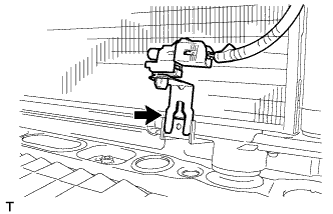
| 13. DISCONNECT THERMISTOR ASSEMBLY |
Remove the clip and separate the thermistor assembly.
| 14. DISCONNECT RADIATOR RESERVOIR TANK HOSE |
Remove the 2 bolts, 3 clamps and radiator reservoir tank hose from the radiator support upper.
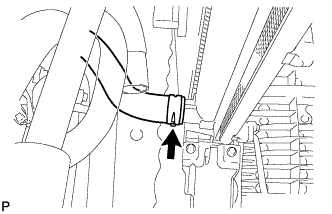
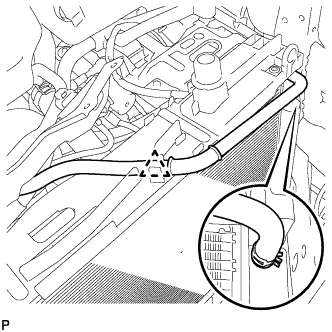
| 15. DISCONNECT NO. 3 RADIATOR HOSE |
Disconnect the No. 3 radiator hose from the radiator assembly.
| 16. DISCONNECT NO. 2 RADIATOR HOSE |
Disconnect the No. 2 radiator hose from the radiator assembly.
| 17. DISCONNECT HOOD LOCK ASSEMBLY (for Hatchback) |
with Engine hood courtesy switch: See page Нажмите здесьwithout Engine hood courtesy switch: See page Нажмите здесь
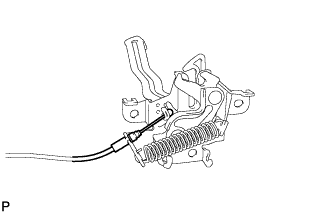
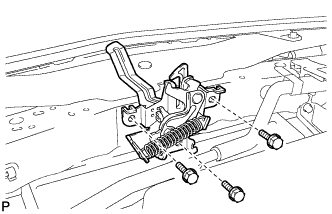
| 18. DISCONNECT HOOD LOCK ASSEMBLY (for Sedan) |
Отсоедините трос управления замком капота.
Выверните 3 болта и снимите замок капота в сборе.
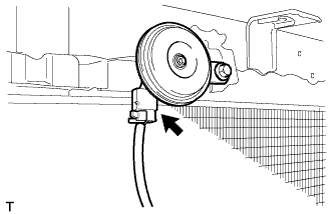
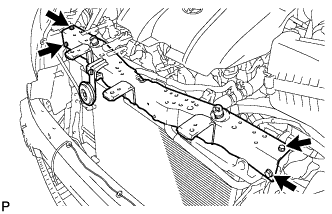
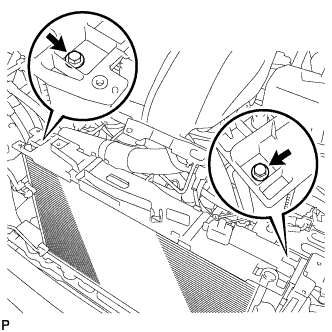
| 19. REMOVE NO. 2 FAN SHROUD |
Disconnect the horn connector.
Remove the 4 bolts and radiator support upper.
Disconnect the radiator reservoir tank hose from the hose clamp.
Disconnect the radiator reservoir tank hose from the radiator assembly.
Remove the 2 bolts and No. 2 fan shroud from the radiator assembly.
Remove the 2 radiator support cushions from the No. 2 fan shroud.
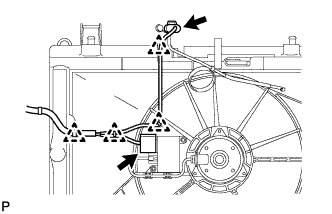
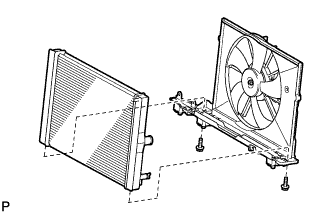
| 20. REMOVE RADIATOR ASSEMBLY |
Disconnect the 2 connectors and the 4 clamps from the fan shroud.
- ПРИМЕЧАНИЕ:
- Be careful not to damage the connector.
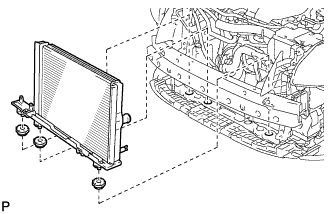
Remove the radiator assembly with the fan shroud.
- ПРИМЕЧАНИЕ:
- For vehicles with the air conditioning system, do not apply any excessive force to the cooler condenser assembly or pipe when removing the radiator assembly.
Remove the 3 radiator support lowers.
Remove the 2 bolts and fan shroud from the radiator assembly.