Automatic Transaxle Assembly Removal
REMOVE ENGINE ASSEMBLY WITH TRANSAXLE
REMOVE DRIVE PLATE AND TORQUE CONVERTER ASSEMBLY SETTING BOLT
INSTALL ENGINE HANGERS
REMOVE FRONT ENGINE MOUNTING INSULATOR
REMOVE REAR ENGINE MOUNTING INSULATOR
REMOVE STARTER ASSEMBLY
DISCONNECT WIRE HARNESS AND CONNECTOR
REMOVE AUTOMATIC TRANSAXLE ASSEMBLY
REMOVE FRONT ENGINE MOUNTING BRACKET
REMOVE REAR ENGINE MOUNTING BRACKET
REMOVE ENGINE MOUNTING BRACKET LH
REMOVE NO. 1 TRANSMISSION CONTROL CABLE BRACKET
REMOVE TRANSMISSION OIL FILLER TUBE SUB-ASSEMBLY
REMOVE OIL COOLER TUBE
REMOVE SPEEDOMETER DRIVEN HOLE COVER SUB-ASSEMBLY
REMOVE UPPER TRANSAXLE CASE COVER
REMOVE WIRE HARNESS CLAMP BRACKET
REMOVE TORQUE CONVERTER ASSEMBLY
Automatic Transaxle Assembly -- Removal |
| 1. REMOVE ENGINE ASSEMBLY WITH TRANSAXLE |
- HINT:
- See the steps from "Discharge Fuel System Pressure" through "Remove Engine Assembly with Transaxle" (COROLLA_ZRE142 RM000001BC301CX.html).
| 2. REMOVE DRIVE PLATE AND TORQUE CONVERTER ASSEMBLY SETTING BOLT |
Remove the flywheel housing under cover.
Turn the crankshaft to gain access and remove the 6 bolts while holding the crankshaft pulley bolt with a wrench.
- NOTICE:
- One of the 6 bolts has a different color than the other ones.
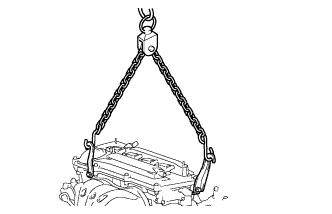
| 3. INSTALL ENGINE HANGERS |
Install the No. 1 and No. 2 engine hangers with new bolts as shown in the illustration.
- Torque:
- 38 N*m{387 kgf*cm, 28 ft.*lbf}
Item
| Part No.
|
No. 1 engine hanger
| 12281-28010
|
No. 2 engine hanger
| 12282-28010 or 12282-AB010
|
Bolt
| 90080-10177
|
Using an engine sling device and a chain block, suspend the engine assembly with transaxle.
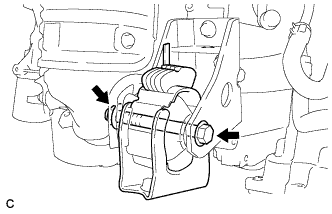
| 4. REMOVE FRONT ENGINE MOUNTING INSULATOR |
Remove the through bolt and nut, and separate the front engine mounting insulator.
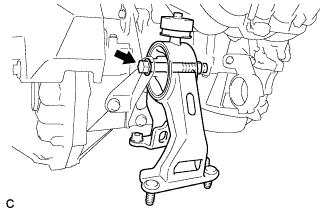
| 5. REMOVE REAR ENGINE MOUNTING INSULATOR |
Remove the through bolt and separate the rear engine mounting insulator.
| 6. REMOVE STARTER ASSEMBLY |
Disconnect the terminal 50 connector from the starter assembly.
Remove the nut and disconnect the wire harness from terminal 30.
Remove the 2 bolts, wire harness clamp bracket and starter assembly.
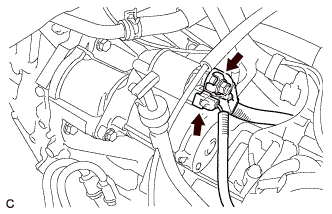
| 7. DISCONNECT WIRE HARNESS AND CONNECTOR |
Remove the bolt, disconnect the 3 engine wire clamps and speed sensor connector.
Disconnect the engine wire clamp, speed sensor connector, park/neutral position switch connector and transmission wire connector.
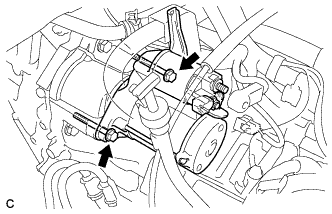
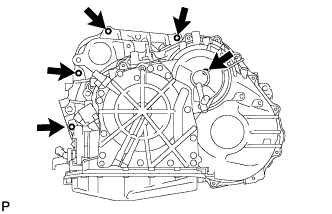
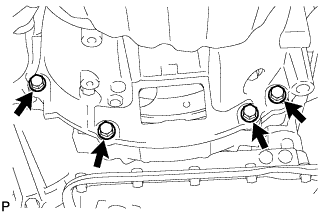
| 8. REMOVE AUTOMATIC TRANSAXLE ASSEMBLY |
Remove the 5 bolts.
Remove the 4 lower side mounting bolts.
Separate and remove the automatic transaxle.
| 9. REMOVE FRONT ENGINE MOUNTING BRACKET |
Remove the 3 bolts and front engine mounting bracket.
| 10. REMOVE REAR ENGINE MOUNTING BRACKET |
Remove the 3 bolts and rear engine mounting bracket.
| 11. REMOVE ENGINE MOUNTING BRACKET LH |
Remove the 3 bolts and engine mounting bracket LH.
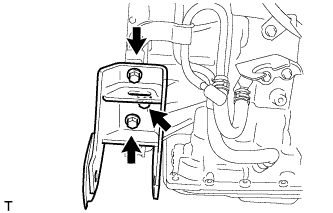
| 12. REMOVE NO. 1 TRANSMISSION CONTROL CABLE BRACKET |
Remove the 2 bolts and No. 1 transmission control cable bracket.
| 13. REMOVE TRANSMISSION OIL FILLER TUBE SUB-ASSEMBLY |
Remove the transmission oil level gauge sub-assembly.
Remove the bolt and remove the transmission oil filler tube sub-assembly.
Remove the O-ring from the transmission oil filler tube sub-assembly.
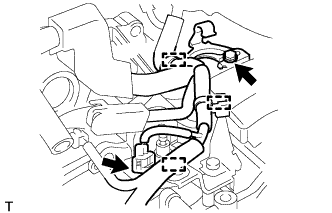
| 14. REMOVE OIL COOLER TUBE |
Remove the 2 hose clamps, bolt and oil cooler tube sub-assembly.
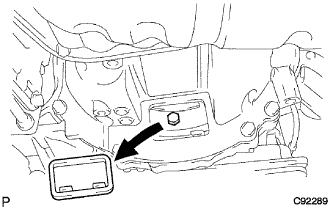
| 15. REMOVE SPEEDOMETER DRIVEN HOLE COVER SUB-ASSEMBLY |
Remove the bolt and hole cover from the transaxle case.
Remove the O-ring from the hole cover.
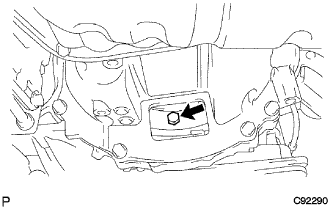
| 16. REMOVE UPPER TRANSAXLE CASE COVER |
Remove the 3 bolts and upper transaxle case cover.
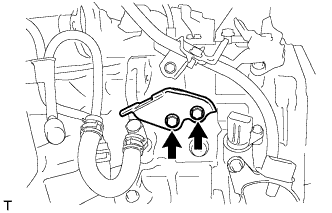
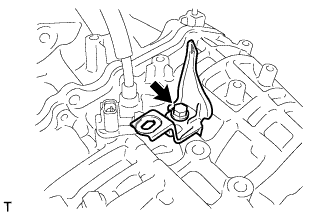
| 17. REMOVE WIRE HARNESS CLAMP BRACKET |
Remove the bolt and wire harness clamp bracket.
| 18. REMOVE TORQUE CONVERTER ASSEMBLY |
Remove the torque converter assembly from the automatic transaxle.