Shift And Select Lever Shaft Reassembly
INSTALL SHIFT FORK SHAFT BEARING
INSTALL CONTROL SHAFT COVER OIL SEAL
INSTALL SHIFT LEVER DAMPER
INSTALL PIN
INSTALL SHIFT GATE PLATE
INSTALL SHIFT AND SELECT LEVER SHAFT
INSTALL NO. 1 SHIFT LEVER INNER
INSTALL CONTROL SHAFT COVER
INSTALL SHIFT GATE PIN
INSTALL NO. 2 LOCK BALL ASSEMBLY
INSTALL NO. 1 LOCK BALL ASSEMBLY
INSTALL BACK-UP LIGHT SWITCH ASSEMBLY
INSTALL NO. 1 SELECTING BELLCRANK DUST COVER
INSTALL CONTROL SHIFT LEVER BUSH
INSTALL SELECTING BELL CRANK ASSEMBLY
Shift And Select Lever Shaft -- Reassembly |
| 1. INSTALL SHIFT FORK SHAFT BEARING |
Using SST and a press, press the needle roller bearing into the control shaft cover.
- Специальный инструмент (SST):
- 09285-76010
- Standard depth:
- 1.0 to 1.5 mm (0.039 to 0.059 in.)
| 2. INSTALL CONTROL SHAFT COVER OIL SEAL |
Using SST and a hammer, tap a new oil seal into the control shaft cover.
- Специальный инструмент (SST):
- 09307-12010
- Standard depth:
- 0 to 0.5 mm (0 to 0.020 in.)
Coat the lip of the oil seal with MP grease.
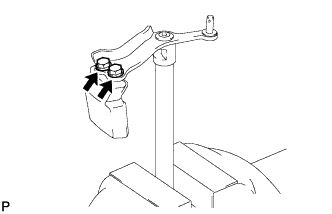
| 3. INSTALL SHIFT LEVER DAMPER |
Coat the 2 bolts with sealant.
- Adhesive:
- Toyota Genuine Adhesive 1344, THREE BOND 1344, or equivalent
Install the shift lever damper to the shift and select lever shaft with the bolts.
- Момент затяжки:
- 19 Н*м{190 кгс*см, 14 фунт-сила-футов}
Install the 2 pins to the No. 1 shift lever inner.
| 5. INSTALL SHIFT GATE PLATE |
Install the shift gate plate with the 2 bolts.
- Момент затяжки:
- 8.5 Н*м{87 кгс*см, 75 фунт-сила-дюймов}
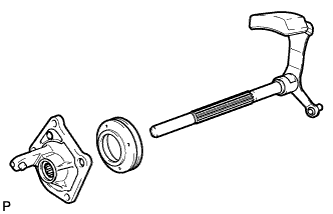
| 6. INSTALL SHIFT AND SELECT LEVER SHAFT |
Install the shift and select lever boot and the shift control cover into the select lever shaft.
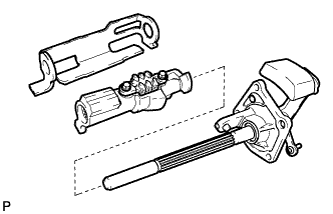
| 7. INSTALL NO. 1 SHIFT LEVER INNER |
Install the No. 1 shift lever inner and the shift interlock plate onto the shift and select lever shaft.
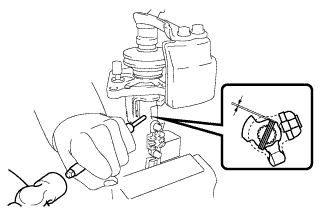
Using a pin punch and hammer, tap the slotted spring pin into the No. 1 shift lever inner.
- Standard depth:
- 0.4 to 1.4 mm (0.016 to 0.055 in.)
| 8. INSTALL CONTROL SHAFT COVER |
Align the 4 shift fork shafts as shown in the illustration.
Apply Toyota genuine seal packing black to the manual transmission case, as shown in the illustration.
- Seal packing:
- Toyota Genuine Seal Packing black 1281, THREE BOND 1281 or equivalent
Coat the 4 bolts with sealant.
- Adhesive:
- Toyota Genuine Adhesive 1344, THREE BOND 1344 or equivalent
Install the shift and select lever shaft onto the transmission case with the 4 bolts.
- Момент затяжки:
- 19 Н*м{190 кгс*см, 14 фунт-сила-футов}
| 9. INSTALL SHIFT GATE PIN |
Coat the shift gate pin with sealant.
- Adhesive:
- Toyota Genuine Adhesive 1344, THREE BOND 1344 or equivalent
Install the shift gate pin onto the transmission case.
- Момент затяжки:
- 30 Н*м{306 кгс*см, 22 фунт-сила-футов}
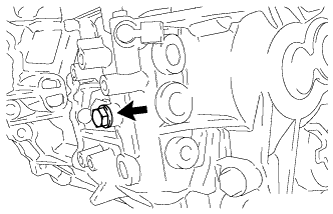
| 10. INSTALL NO. 2 LOCK BALL ASSEMBLY |
Coat the lock ball with sealant.
- Adhesive:
- Toyota Genuine Adhesive 1344, THREE BOND 1344 or equivalent
Install the lock ball onto the transmission case.
- Момент затяжки:
- 29 Н*м{299 кгс*см, 22 фунт-сила-футов}
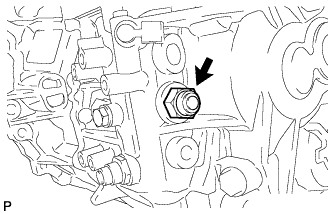
| 11. INSTALL NO. 1 LOCK BALL ASSEMBLY |
Coat the lock ball with sealant.
- Adhesive:
- Toyota Genuine Adhesive 1344, THREE BOND 1344 or equivalent
Install the lock ball onto the transmission case.
- Момент затяжки:
- 39 Н*м{400 кгс*см, 29 фунт-сила-футов}
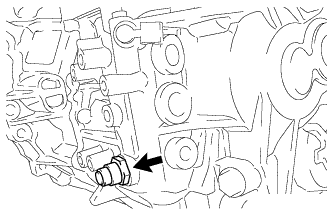
| 12. INSTALL BACK-UP LIGHT SWITCH ASSEMBLY |
Install the back-up light switch onto the transmission case.
- Специальный инструмент (SST):
- 09816-30010
- Момент затяжки:
- 40 Н*м{410 кгс*см, 30 фунт-сила-футов}
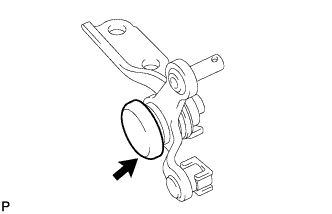
| 13. INSTALL NO. 1 SELECTING BELLCRANK DUST COVER |
Install the dust cover onto the selecting bellcrank.
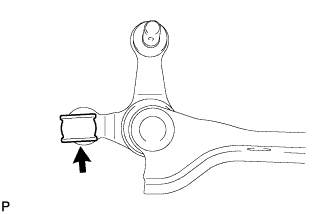
| 14. INSTALL CONTROL SHIFT LEVER BUSH |
Install the control shift lever bush to the selecting bellcrank.
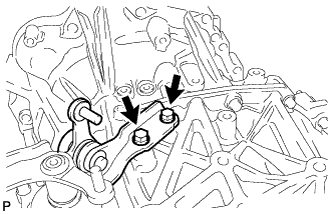
| 15. INSTALL SELECTING BELL CRANK ASSEMBLY |
Coat the 2 bolts with sealant, and install the selecting bell crank to the transmission case with the bolts.
- Adhesive:
- Toyota Genuine Adhesive 1344, THREE BOND 1344 or equivalent
- Момент затяжки:
- 20 Н*м{204 кгс*см, 15 фунт-сила-футов}


