Интегрированное Реле -- Снятие |
| 1. DISCONNECT CABLE FROM NEGATIVE BATTERY TERMINAL |
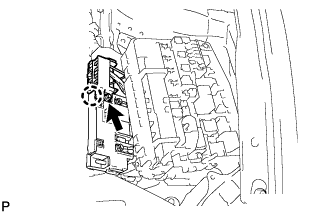
| 2. REMOVE NO. 1 RELAY BLOCK COVER |
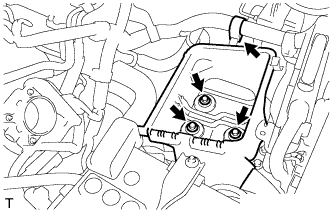
| 3. DISCONNECT WIRE HARNESS |
Remove the 2 nuts.
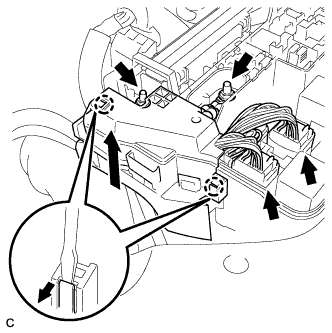 |
Disconnect the 2 wire harness connectors.
Detach the 2 claws and disconnect the wire harness.
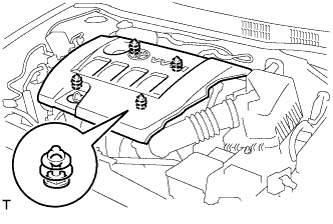
| 4. REMOVE NO. 2 CYLINDER HEAD COVER |
Hold the rear of the cover and raise it to disengage the 2 clips on the front of the cover. Continue to raise the cover to disengage the 2 clips on the front of the cover and remove the cover.
- ПРИМЕЧАНИЕ:
- Attempting to disengage both front and rear clips at the same time may cause the cover to break.
 |
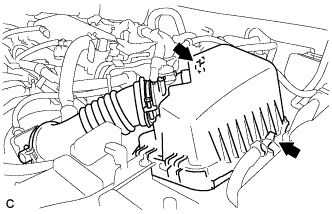
| 5. REMOVE AIR CLEANER CAP SUB-ASSEMBLY |
Disconnect the mass air flow meter connector.
Disconnect the 2 clamps.
 |
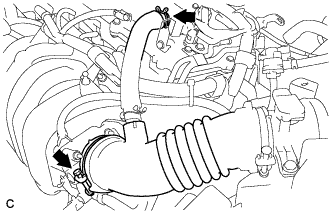
Disconnect the band and ventilation hose, and remove the air cleaner cap sub-assembly.
 |
| 6. REMOVE AIR CLEANER CASE |
Separate the air cleaner filter element from the air cleaner.
Remove the 3 bolts from the air cleaner case.
 |
| 7. REMOVE ECM |
Disconnect the 2 ECM connectors.
Raise the 2 levers while pushing the locks on the levers, and disconnect the 2 ECM connectors.
- ПРИМЕЧАНИЕ:
- After disconnecting the connectors, make sure that dirt, water or other foreign matter does not contact the connecting parts of the connectors.
Remove the 2 bolts from the ECM.
 |
Remove the 4 screws and ECM bracket.
 |
| 8. REMOVE FRONT FENDER LINER LH |
Using a screwdriver, turn the clip 90° and remove it.
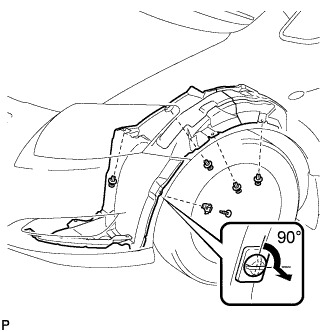 |
Remove the 4 clips and turn over the front liner LH.
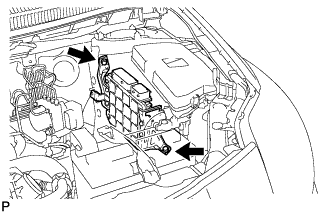
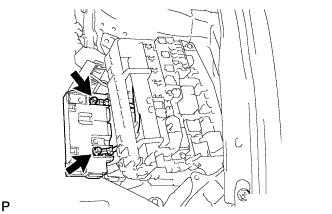
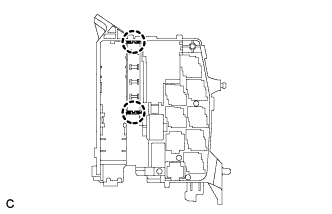
| 9. REMOVE RELAY BLOCK |
Disconnect the 2 wire harness clamps.
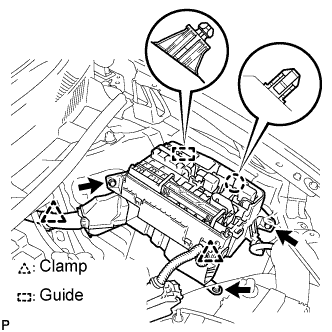 |
Remove the 3 bolts.
Disengage the claw and guide, and slide the relay block to the inside of the engine compartment.
- ПРИМЕЧАНИЕ:
- Do not forcibly pull the relay block as the wire harness is connected.
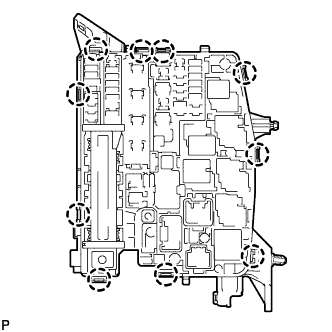
| 10. REMOVE FUSIBLE LINK BLOCK ASSEMBLY |
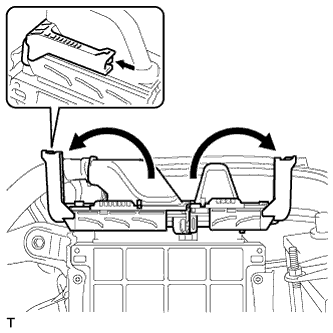
Disengage the 10 claws and separate the relay block cover into the upper side and lower side.
 |
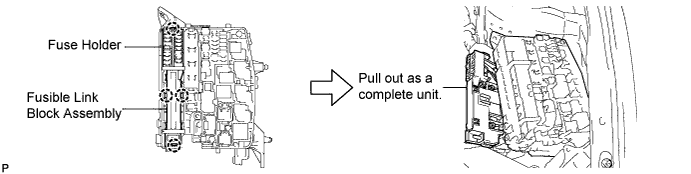
Disengage the 4 claws of the fuse holder and fusible link block assembly, and pull out the fuse holder and fusible link block assembly as a unit from the separated relay block cover.
- ПРИМЕЧАНИЕ:
- Do not forcibly pull the relay block as the wire harness is connected.
Remove the bolt.
 |
Disengage the claw and disconnect the fuse holder from the fusible link block assembly.
Remove the 2 bolts and disconnect the 2 wire harnesses.
- ПРИМЕЧАНИЕ:
- When disconnecting the wire harnesses from the fusible link block assembly, mark the fusible link block assembly, wire harnesses and bolt to prevent mistakes when reconnecting.
 |
Remove the 3 bolts and disconnect the 3 wire harnesses.
- ПРИМЕЧАНИЕ:
- When disconnecting the wire harnesses from the fusible link block assembly, mark the fusible link block assembly, wire harnesses, connector and bolt to prevent mistakes when reconnecting.
 |
Disconnect the 2 connectors and remove the fusible link block assembly.
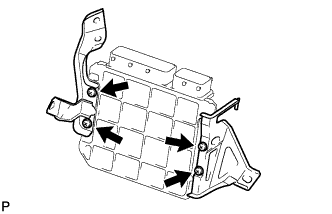
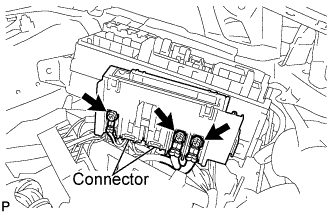
| 11. REMOVE INTEGRATION RELAY |
Disconnect the 3 connectors.
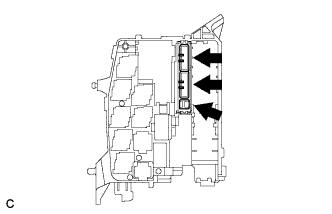 |
Disengage the 2 claws and remove the integration relay.
 |