Промежуточный Охладитель Снятие. Corolla Auris
Двигатель. COROLLA, AURIS. ZZE150 ZRE151,152 NDE150
REMOVE UPPER RADIATOR AIR DEFLECTOR
REMOVE FRONT BUMPER ASSEMBLY
REMOVE FRONT BUMPER ENERGY ABSORBER
REMOVE FRONT BUMPER REINFORCEMENT SUB-ASSEMBLY
REMOVE NO. 1 ENGINE UNDER COVER
DISCONNECT CABLE FROM NEGATIVE BATTERY TERMINAL
REMOVE BATTERY CLAMP SUB-ASSEMBLY
REMOVE BATTERY
REMOVE BATTERY TRAY
DRAIN ENGINE COOLANT
REMOVE THERMISTOR ASSEMBLY
REMOVE HOOD LOCK ASSEMBLY
REMOVE INJECTOR DRIVER
REMOVE RADIATOR SUPPORT SUB-ASSEMBLY
REMOVE VACUUM TRANSMITTING HOSE ASSEMBLY
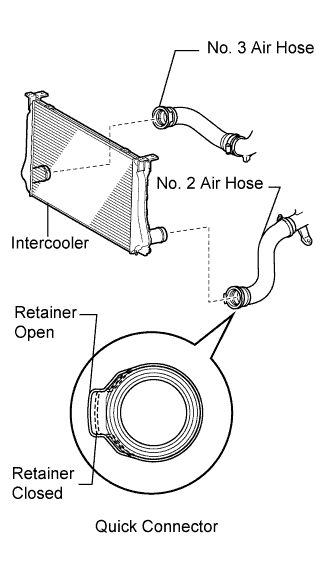
DISCONNECT AIR HOSE
DISCONNECT NO. 1 RADIATOR HOSE
DISCONNECT NO. 2 RADIATOR HOSE
REMOVE INTERCOOLER ASSEMBLY
Промежуточный Охладитель -- Снятие |
- ПРЕДОСТЕРЕЖЕНИЕ:
- Be sure that the ignition switch is off if you work near the electric cooling fans or radiator grille. With the ignition switch on, the electric cooling fans may automatically start to run if the engine coolant temperature becomes high and/or the air conditioning is turned on.
| 1. REMOVE UPPER RADIATOR AIR DEFLECTOR |
Remove the 6 clips and upper radiator air deflector.
| 2. REMOVE FRONT BUMPER ASSEMBLY |
(See page Нажмите здесь)
| 3. REMOVE FRONT BUMPER ENERGY ABSORBER |
Снимите передний поглотитель энергии удара с усилителя переднего бампера.
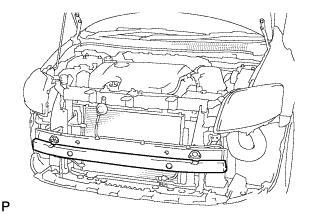
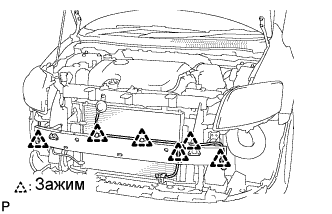
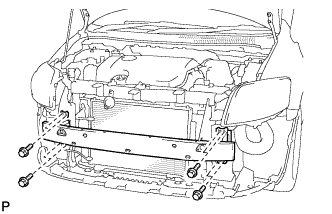
| 4. REMOVE FRONT BUMPER REINFORCEMENT SUB-ASSEMBLY |
Расцепите все зажимы.
Выверните 8 болтов и снимите усилитель переднего бампера.
| 5. REMOVE NO. 1 ENGINE UNDER COVER |
| 6. DISCONNECT CABLE FROM NEGATIVE BATTERY TERMINAL |
| 7. REMOVE BATTERY CLAMP SUB-ASSEMBLY |
Remove the bolt and loosen the nut.
Detach the hook of the battery clamp from the battery carrier, and then remove the battery clamp.
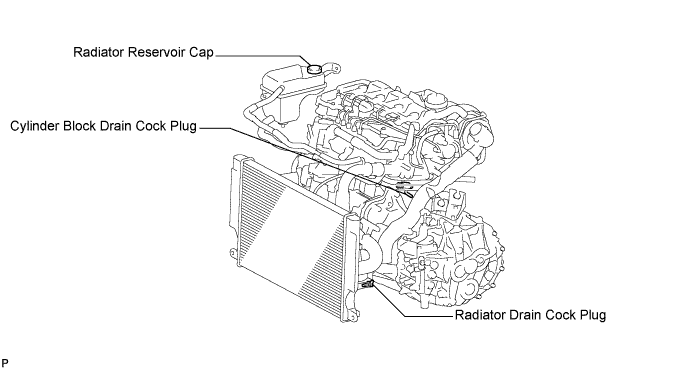
Loosen the radiator drain cock plug.
- УКАЗАНИЕ:
- Collect the coolant in a container and dispose of it according to the regulations in your area.
Remove the radiator reservoir cap.
- ПРЕДОСТЕРЕЖЕНИЕ:
- Do not remove the radiator reservoir cap while the engine and radiator are still hot.
- Pressurized, hot engine coolant and steam may be released and cause serious burns.
Loosen the cylinder block drain cock plug.
- УКАЗАНИЕ:
- The plug is on the backside of the generator on the exhaust manifold side.
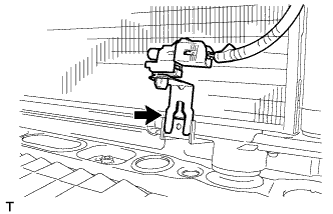
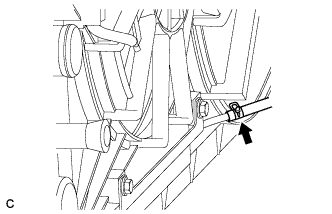
| 11. REMOVE THERMISTOR ASSEMBLY |
Remove the clip and separate the thermistor assembly.
| 12. REMOVE HOOD LOCK ASSEMBLY |
- УКАЗАНИЕ:
- w/o Engine Hood Courtesy Switch: See page Нажмите здесь
- w/ Engine Hood Courtesy Switch: See page Нажмите здесь
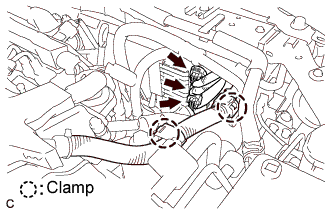
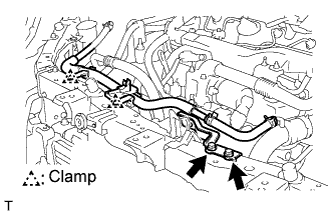
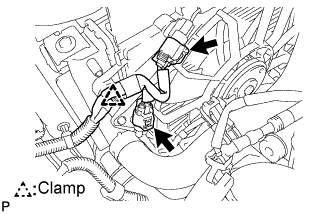
| 13. REMOVE INJECTOR DRIVER |
Remove the 2 clamps and disconnect the 3 injector driver connectors.
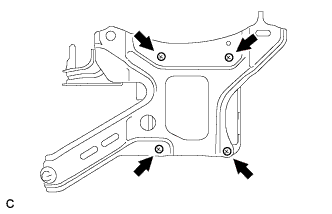
Remove the 2 bolts, separate the clip then remove the injector driver assembly.
Remove the 4 bolts then remove the injector driver.
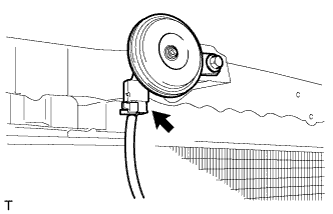
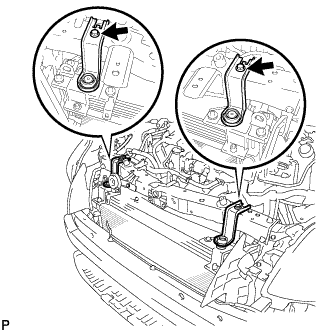
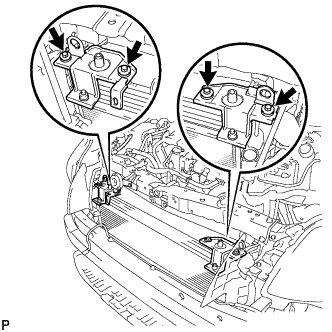
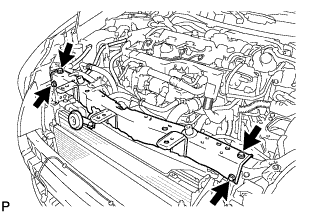
| 14. REMOVE RADIATOR SUPPORT SUB-ASSEMBLY |
Disconnect the horn connector.
Remove the 2 bolts, 2 clamps and the radiator reserve tank hose from the radiator support sub-assembly.
Disconnect the 2 connectors and clamp.
Disconnect the clamp and hose.
Remove the 2 bolts and 2 upper radiator supports.
Remove the 2 radiator support cushions.
Remove the 4 bolts, upper radiator support sub-assembly LH and upper radiator support sub-assembly RH.
Remove the 4 bolts and radiator support sub-assembly.
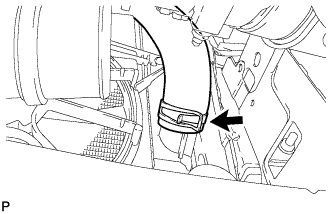
| 15. REMOVE VACUUM TRANSMITTING HOSE ASSEMBLY |
Disconnect the vacuum transmitting hose assembly.
Separate the No. 2 and No. 3 air hoses.
- УКАЗАНИЕ:
- Pull out the air hoses after the retainer is opened.
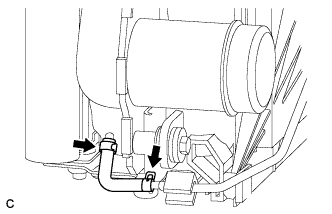
| 17. DISCONNECT NO. 1 RADIATOR HOSE |
Disconnect the No. 1 radiator hose from the radiator.
| 18. DISCONNECT NO. 2 RADIATOR HOSE |
Disconnect the No. 2 radiator hose from the radiator.
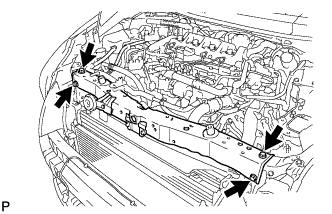
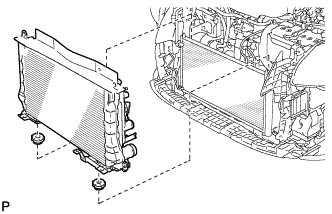
| 19. REMOVE INTERCOOLER ASSEMBLY |
Remove the 4 bolts and center radiator support.
Remove the radiator assembly with the fan shroud.
- ПРИМЕЧАНИЕ:
- For vehicles with an air conditioning system, do not apply any excessive force to the cooler condenser assembly or pipe when removing the radiator assembly.
Remove the 2 radiator support cushions.
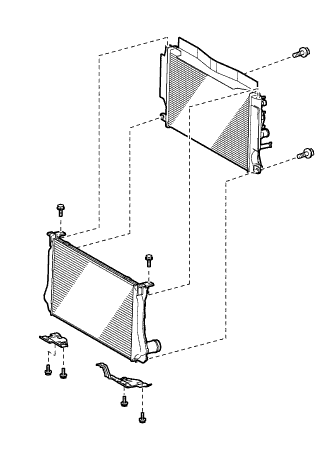
Remove the vacuum hose.
Remove the 8 bolts, 2 lower radiator supports and intercooler.