Вал Рычага Выбора И Переключения Передач Повторная Сборка. Corolla ZZE150
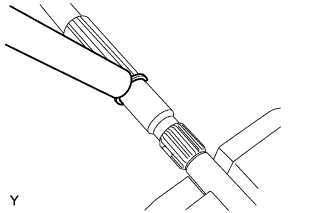
INSTALL NO. 1 SELECT SPRING SEAT SHAFT SNAP RING
INSTALL SELECT INNER LEVER
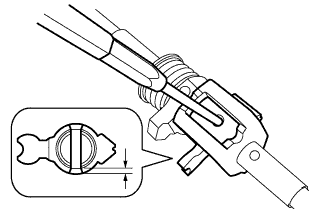
INSTALL INNER NO. 1 SHIFT LEVER
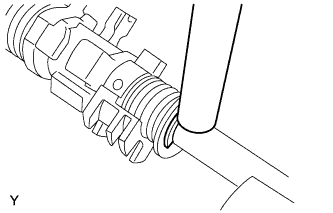
INSTALL INNER NO. 2 SHIFT LEVER
INSTALL NO. 2 SELECT SPRING SEAT
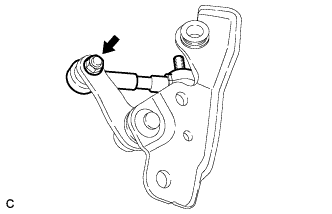
INSTALL FLOOR SHIFT CONTROL SHAFT ASSEMBLY
INSTALL NO. 2 SELECTING BELLCRANK BUSHING
INSTALL NO. 2 SELECTING BELLCRANK DUST COVER
INSTALL SELECTING BELLCRANK
INSTALL NO. 2 SELECTING BELLCRANK PLATE WASHER
INSTALL NO. 1 SELECTING BELLCRANK DUST COVER
INSTALL FLOOR SHIFT CONTROL BELLCRANK DUST COVER
Вал Рычага Выбора И Переключения Передач -- Повторная Сборка |
| 1. INSTALL NO. 1 SELECT SPRING SEAT SHAFT SNAP RING |
Coat the shift and select lever shaft with MP grease, and install a new snap ring onto the shift and select lever shaft using a brass bar and a hammer.
| 2. INSTALL SELECT INNER LEVER |
Coat the No. 1 select spring seat with MP grease.
Using a pin punch (φ5 mm) and a hammer, install the No. 1 select spring seat, compression spring, select inner lever and select inner lever slotted spring pin onto the shift and select lever.
- Drive in depth:
- 3.0 to 4.0 mm (0.1181 to 0.1575 in.)
| 3. INSTALL INNER NO. 1 SHIFT LEVER |
Coat the shift inter lock plate and inner No. 1 shift lever with MP grease.
Using a pin punch (φ5 mm) and a hammer, install the shift inter lock plate, inner No. 1 shift lever and shift inner lever slotted spring pin onto the shift and select lever shaft.
- Drive in depth:
- -0.5 to 0.5 mm (-0.0197 to 0.0197 in.)
| 4. INSTALL INNER NO. 2 SHIFT LEVER |
Coat the inner No. 2 shift lever with MP grease.
Using a pin punch (φ5 mm) and a hammer, install the inner No. 2 shift lever and shift inner lever slotted spring pin onto the shift and select lever shaft.
- Drive in depth:
- 1.0 to 2.0 mm (0.0394 to 0.0787 in.)
| 5. INSTALL NO. 2 SELECT SPRING SEAT |
Coat the No. 2 select spring seat with MP grease.
Install the No. 2 select spring seat and compression spring. Using a brass bar and a hammer, install a new E-ring onto the shift and select lever shaft.
| 6. INSTALL FLOOR SHIFT CONTROL SHAFT ASSEMBLY |
Install the floor shift control shaft assembly to the selecting bellcrank support with the spring washer and nut.
- Момент затяжки:
- 12 Н*м{122 кгс*см, 8.7 фунт-сила-футов}
| 7. INSTALL NO. 2 SELECTING BELLCRANK BUSHING |
Install the 2 selecting bellcrank bushings to the selecting bellcrank support as shown in the illustration.
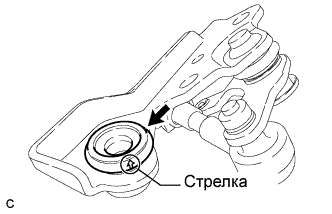
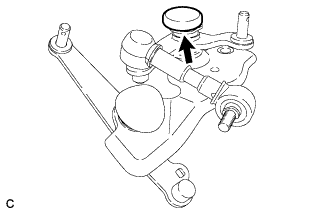
| 8. INSTALL NO. 2 SELECTING BELLCRANK DUST COVER |
Install the No. 2 selecting bellcrank dust cover to the selecting bellcrank support.
- УКАЗАНИЕ:
- Position the arrow mark direction as shown in the illustration.
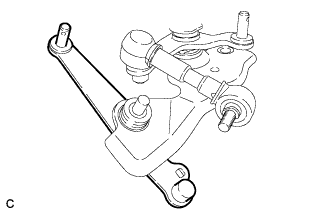
| 9. INSTALL SELECTING BELLCRANK |
Install the selecting bellcrank to the selecting bellcrank support.
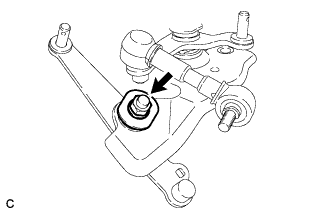
| 10. INSTALL NO. 2 SELECTING BELLCRANK PLATE WASHER |
Install the selecting bellcrank plate washer to the selecting bellcrank with the spring washer and nut.
- Момент затяжки:
- 12 Н*м{122 кгс*см, 8.7 фунт-сила-футов}
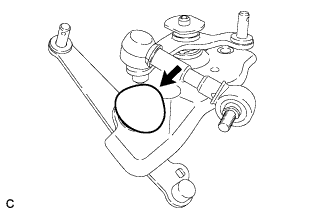
| 11. INSTALL NO. 1 SELECTING BELLCRANK DUST COVER |
Install the No. 1 selecting bellcrank dust cover to the selecting bellcrank.
| 12. INSTALL FLOOR SHIFT CONTROL BELLCRANK DUST COVER |
Install the floor shift control bellcrank dust cover to the selecting bellcrank assembly.