Масляный Насос Снятие. Corolla Auris
Двигатель. COROLLA, AURIS. ZZE150 ZRE151,152 NDE150
DISCONNECT CABLE FROM NEGATIVE BATTERY TERMINAL
REMOVE FRONT TIRE (for RH Side)
REMOVE NO. 1 ENGINE COVER
DRAIN ENGINE OIL
DRAIN ENGINE COOLANT
REMOVE REAR ENGINE UNDER COVER RH
REMOVE ENGINE UNDER COVER
REMOVE V-RIBBED BELT
REMOVE GENERATOR ASSEMBLY
REMOVE WATER PUMP PULLEY
REMOVE WATER PUMP ASSEMBLY
REMOVE CYLINDER HEAD COVER SUB-ASSEMBLY
REMOVE VACUUM PUMP ASSEMBLY
REMOVE CRANKSHAFT DAMPER SUB-ASSEMBLY
REMOVE ENGINE MOUNTING INSULATOR SUB-ASSEMBLY RH
REMOVE TRANSVERSE ENGINE ENGINE MOUNTING BRACKET
REMOVE NO. 2 TIMING CHAIN COVER
REMOVE OIL PUMP ASSEMBLY
REMOVE OIL PUMP SEAL
| 1. DISCONNECT CABLE FROM NEGATIVE BATTERY TERMINAL |
| 2. REMOVE FRONT TIRE (for RH Side) |
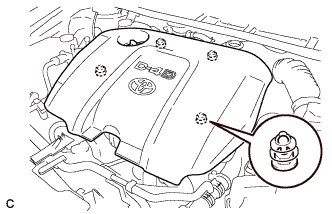
| 3. REMOVE NO. 1 ENGINE COVER |
Disengage the 4 pins and remove No. 1 engine cover sub-assembly.
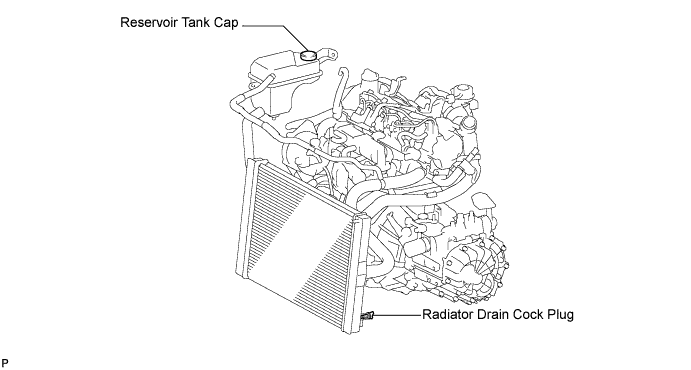
Loosen the radiator drain cock plug.
- УКАЗАНИЕ:
- Collect the coolant in a container and dispose of it according to the regulations in your area.
Remove the radiator reservoir cap.
- ПРЕДОСТЕРЕЖЕНИЕ:
- Do not remove the radiator reservoir cap while the engine and radiator are still hot.
- Pressurized, hot engine coolant and steam may be released and cause serious burns.
Loosen the cylinder block drain cock plug.
- УКАЗАНИЕ:
- The plug is on the backside of the generator on the exhaust manifold side.
| 6. REMOVE REAR ENGINE UNDER COVER RH |
Remove the 5 clips and engine under cover rear RH.
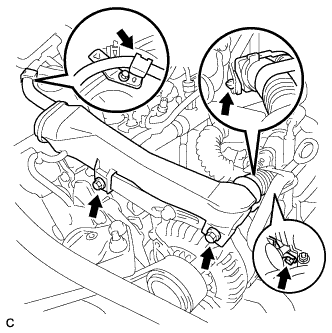
| 7. REMOVE ENGINE UNDER COVER |
Remove the 3 bolts and 2 wire harness clamps, then separate the wire harness.
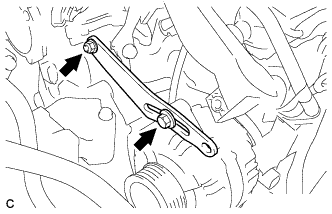
Loosen bolts A and B.
Remove the v-ribbed belt.
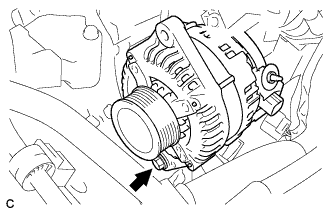
| 9. REMOVE GENERATOR ASSEMBLY |
Remove the terminal cap.
Remove the nut and disconnect the wire harness from terminal B.
Disconnect the generator connector.
Remove the bolt, nut, and fan belt adjusting slider.
Remove the bolt and generator assembly.
| 10. REMOVE WATER PUMP PULLEY |
Using SST, hold the water pump pulley.
- SST
- 09960-10010(09962-01000,09963-00700)
Remove the 4 bolts, then remove the water pump pulley.
| 11. REMOVE WATER PUMP ASSEMBLY |
Remove the 3 bolts and 2 nuts, then remove the water pump.
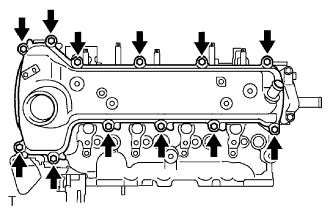
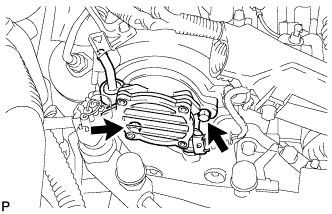
| 12. REMOVE CYLINDER HEAD COVER SUB-ASSEMBLY |
Remove the 12 bolts, then remove the cylinder head cover.
Remove the cylinder head cover gasket from the cylinder head cover.
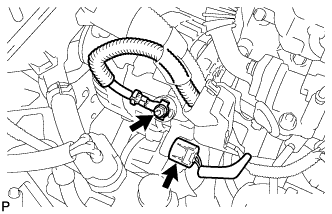
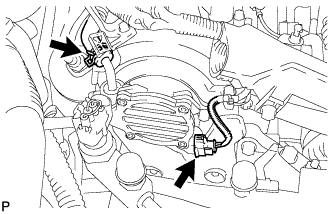
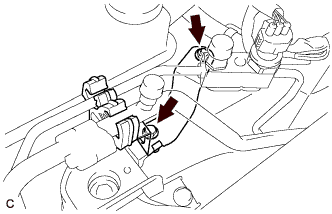
| 13. REMOVE VACUUM PUMP ASSEMBLY |
Сдвиньте фиксатор и отсоедините вакуумный шланг.
Отсоедините разъем датчика положения распредвала.
Вывыерните 2 болта и снимите вакуумный насос.
Снимите 2 кольцевых уплотнения с вакуумного насоса.
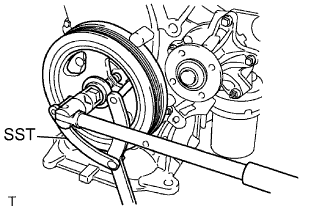
| 14. REMOVE CRANKSHAFT DAMPER SUB-ASSEMBLY |
Using SST, hold the crankshaft damper and loosen the crankshaft bolt.
- SST
- 09960-10010(09962-01000,09963-01000)
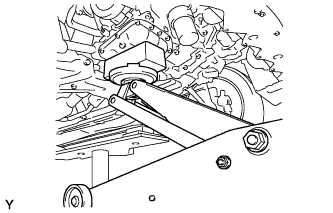
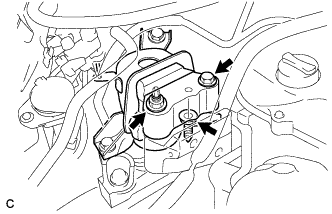
| 15. REMOVE ENGINE MOUNTING INSULATOR SUB-ASSEMBLY RH |
Support the engine with a jack and a wooden block as shown in the illustration.
Remove the bolt, nut, and air conditioner pipe bracket.
Remove the bolt, 2 nuts and engine mounting insulator RH from the engine mounting bracket.
Remove the 3 bolts and engine mounting insulator RH.
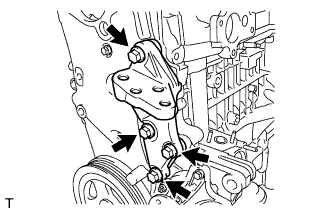
| 16. REMOVE TRANSVERSE ENGINE ENGINE MOUNTING BRACKET |
Remove the 4 bolts and engine mounting bracket.
| 17. REMOVE NO. 2 TIMING CHAIN COVER |
Remove the 2 bolts and No. 2 timing cover.
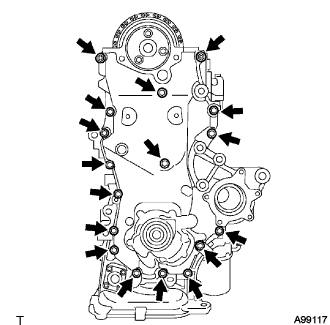
| 18. REMOVE OIL PUMP ASSEMBLY |
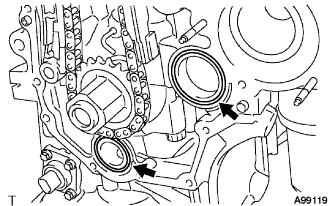
Remove the 16 bolts and nut.
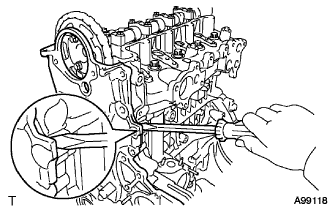
Using a screwdriver with its tip wrapped in tape, remove the oil pump by prying out between the cylinder head and cylinder block.
- ПРИМЕЧАНИЕ:
- Be careful not to damage the contact surfaces of the oil pump assembly, cylinder head, and cylinder block.
Remove the 2 O-rings from the cylinder block and oil pan.
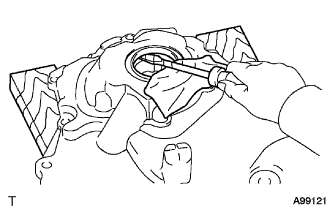
Using a screwdriver with its tip wrapped in tape, remove the oil pump seal.