Center Power Outlet Socket -- Installation |
| 1. INSTALL POWER OUTLET SOCKET ASSEMBLY |
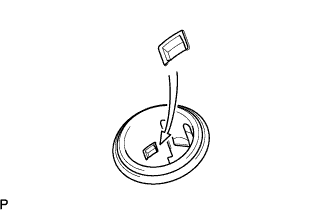 |
Align the protrusion on the backside of the socket with the groove of the cover. Then push the socket into the cover.
Connect the connector.
| 2. INSTALL CONSOLE BOX SUB-ASSEMBLY |
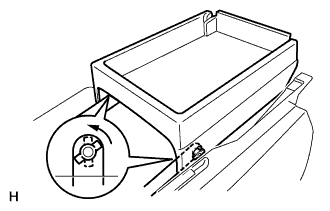 |
Install the console box, as shown in the illustration.
| 3. INSTALL REAR CONSOLE ARMREST ASSEMBLY |
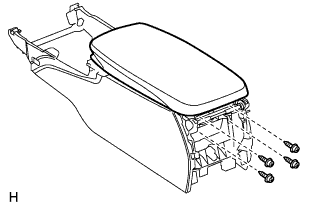 |
Install the armrest with the 4 screws.
| 4. INSTALL CONSOLE BOX |
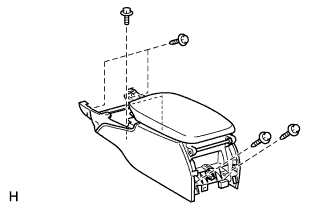 |
Connect the connector.
Install the console box with the 4 bolts and 2 screws.
| 5. INSTALL CONSOLE BOX REGISTER ASSEMBLY |
 |
Using a screwdriver, detach the 4 clips and remove the register.
- HINT:
- Tape the screwdriver tip before use.
| 6. INSTALL CONSOLE BOX PLATE |
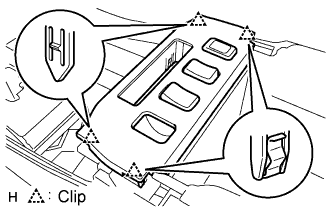 |
Connect the connector.
Attach the 4 clips to install the console box.
| 7. INSTALL INSTRUMENT PANEL FINISH PANEL END LH |
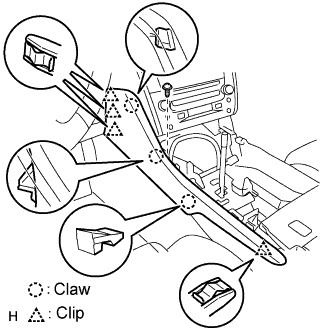 |
Attach the 4 clips and 3 claws to install the finish panel end.
Install the screw.
| 8. INSTALL INSTRUMENT PANEL FINISH PANEL END RH |
 |
Attach the 3 clips and 3 claws to install the finish panel end.
Install the screw.
| 9. INSTALL CONSOLE UPPER PANEL ASSEMBLY |
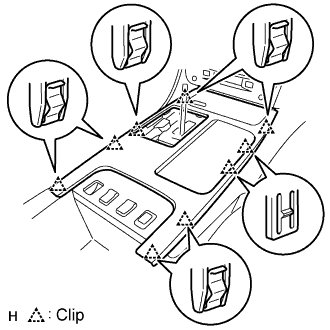 |
Connect the connector.
Attach the 9 clips to install the ash receptacle.
Install the shift lever knob and twist it in the direction indicated by the arrow.
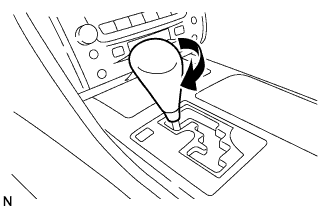 |
| 10. INSTALL FRONT CONSOLE UPPER PANEL GARNISH |
Attach the claws to install the garnish.
| 11. CONNECT CABLE TO NEGATIVE BATTERY TERMINAL |
| 12. PERFORM INITIALIZATION |
Perform initialization (Click here).
- NOTICE:
- Certain systems need to be initialized after disconnecting and reconnecting the cable from the negative (-) battery terminal.