Body Electrical. Lexus Gs430, Gs300. Uzs190 Grs190
Audio Visual. Lexus Gs430, Gs300. Uzs190 Grs190
Stereo Component Amplifier -- Installation |
- HINT:
- A bolt without a torque specification is shown in the standard bolt chart (Click here).
| 1. INSTALL NO. 2 AMPLIFIER BRACKET |
Install the bracket's aligning protrusions labeled A to the amplifier.
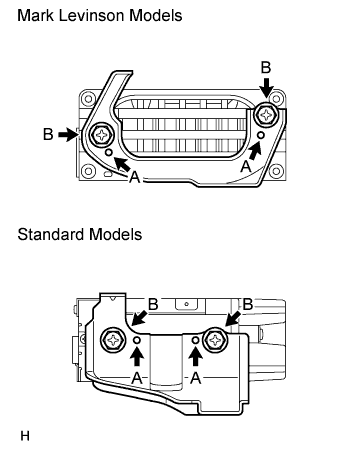 |
Install the 2 screws labeled B.
| 2. INSTALL NO. 1 AMPLIFIER BRACKET |
Install the bracket's aligning protrusions labeled A to the amplifier.
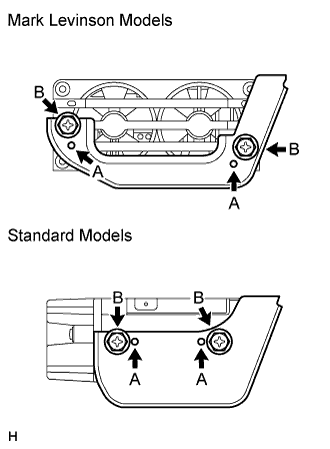 |
Install the 2 screws labeled B.
| 3. INSTALL STEREO COMPONENT AMPLIFIER ASSEMBLY WITH AMPLIFIER BRACKET |
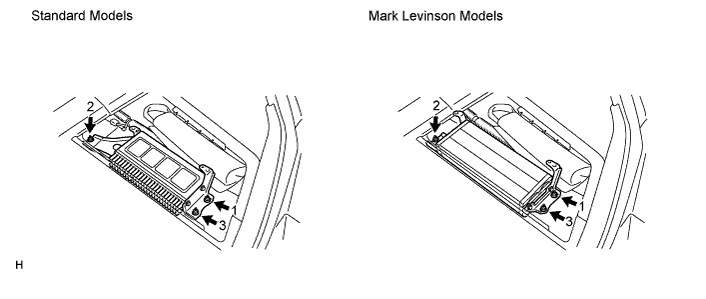
Install the amplifier with the 3 nuts.
- HINT:
- Tighten the nuts in the order shown in the illustration.
| 4. INSTALL LUGGAGE COMPARTMENT COVER RH |
| 5. INSTALL LUGGAGE COMPARTMENT FLOOR MAT |
| 6. CONNECT CABLE TO NEGATIVE BATTERY TERMINAL |
| 7. PERFORM INITIALIZATION |
Perform initialization (Click here).
- NOTICE:
- Certain systems need to be initialized after disconnecting and reconnecting the cable from the negative (-) battery terminal.