Back Door Garnish (W/ Tire Carrier) -- Removal |
- HINT:
- When removing the back door garnish, heat the back door garnish and vehicle body using a heat light.
- Standard Heating Temperature:
Item Temperature Back Door Garnish 20 to 30°C (68 to 86°F) Vehicle Body 40 to 60°C (104 to 140°F)
- NOTICE:
- Do not heat the back door garnish and vehicle body excessively.
| 1. REMOVE BACK DOOR GARNISH SUB-ASSEMBLY OUTSIDE RH |
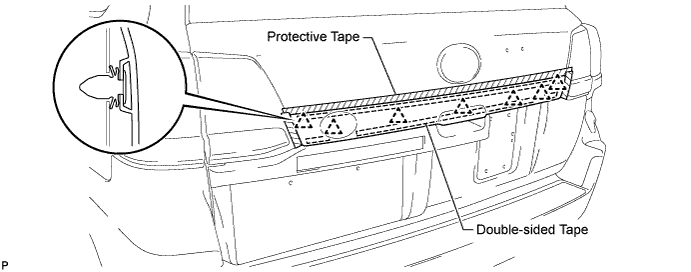
Put protective tape around the back door garnish.
Detach the 7 clips and remove the double-sided tape to remove the back door garnish.
| 2. REMOVE SYMBOL EMBLEM |
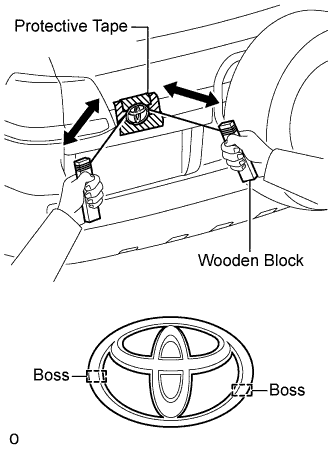 |
Put protective tape around the emblem.
Insert a piano wire between the vehicle body and emblem.
- HINT:
- Be careful of the boss position.
Tie objects that can serve as handles (for example, wooden blocks) to both wire ends.
Pull the piano wire and scrape off the double-sided tape that holds the emblem to the vehicle body.
- NOTICE:
- Be careful not to damage the vehicle body.
Remove the emblem.
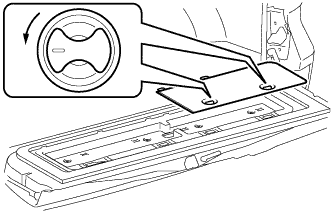
| 3. REMOVE REAR FLOOR MAT REAR SUPPORT PLATE |
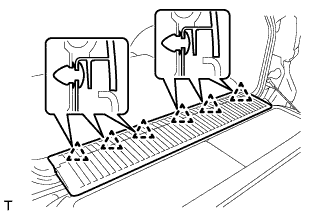 |
Detach the 6 clips and remove the support plate.
| 4. REMOVE BACK DOOR TRIM COVER LH |
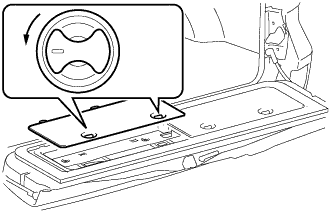
Remove the back door trim cover LH as shown in the illustration.
 |
| 5. REMOVE BACK DOOR TRIM COVER RH |
Remove the back door trim cover RH as shown in the illustration.
 |
| 6. REMOVE BACK DOOR TRIM PANEL ASSEMBLY |
Remove the 4 bolts.
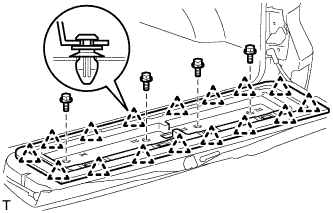 |
Detach the 16 clips and remove the back door trim panel assembly.
| 7. REMOVE NO. 2 BACK DOOR GARNISH SUB-ASSEMBLY OUTSIDE |
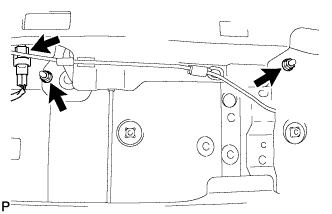 |
Remove the 2 nuts and disconnect the connector.
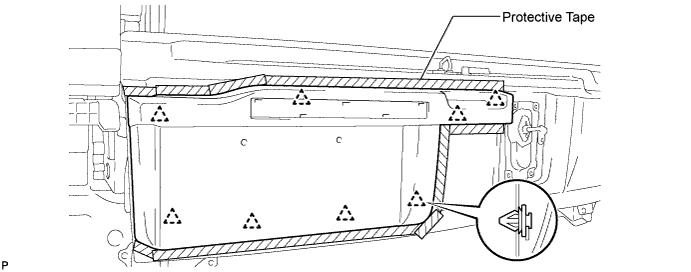
Put protective tape around the No. 2 back door garnish.
Detach the 8 clips.
Pull out the wire harness of the license plate light from the tail gate, and remove the No. 2 back door garnish.
| 8. REMOVE LICENSE PLATE LIGHT ASSEMBLY |
Remove the 2 screws and 2 lights.
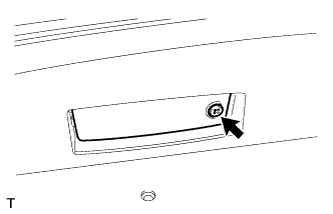 |
| 9. REMOVE REAR LICENSE LIGHT COVER |
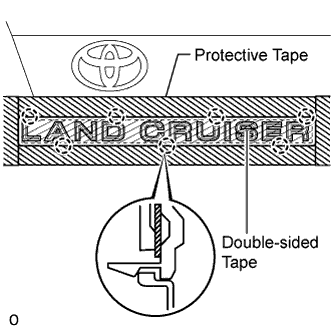 |
Put protective tape around the rear license light cover.
Detach the 7 claws and remove the double-sided tape to remove the rear license light cover.