Vehicle Exterior. Land Cruiser. Urj200, 202 Grj200 Vdj200
Exterior Panels Trim. Land Cruiser. Urj200, 202 Grj200 Vdj200
Roof Drip Side Finish Moulding -- Removal |
- HINT:
- Use the same procedures for the RH side and LH side.
- The procedures listed below are for the LH side.
- When replacing a clip, heat the vehicle body and clip using a heat light.
- Standard Heating Temperature:
Item Temperature Vehicle Body 40 to 60°C (104 to 140°F) Clip 20 to 30°C (68 to 86°F)
- NOTICE:
- Do not heat the vehicle body and clip excessively.
| 1. REMOVE ROOF CARRIER ASSEMBLY LH (w/ Roof Carrier) |
Remove the roof carrier assembly LH (Click here).
| 2. REMOVE ROOF RACK ASSEMBLY (w/ Roof Rack) |
Remove the roof rack assembly (Click here).
| 3. REMOVE ROOF DRIP SIDE FINISH MOULDING JOINT COVER LH |
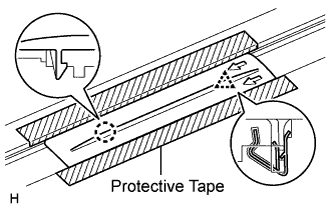 |
Put protective tape around the cover.
w/o Roof Carrier:
Detach the claw and clip and remove the 4 covers.
w/ Roof Carrier:
Detach the claw and clip and remove the cover.
| 4. REMOVE ROOF DRIP SIDE FINISH MOULDING LH |
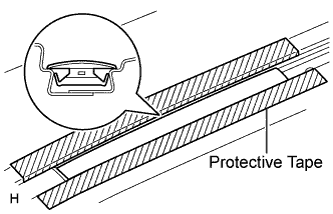 |
- HINT:
- Use the same procedure to remove the moulding on the other side.
Put protective tape around the moulding.
Remove the moulding.
| 5. REMOVE CENTER ROOF DRIP SIDE FINISH MOULDING LH |
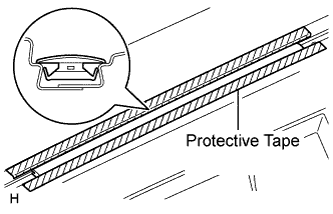 |
- HINT:
- Use the same procedure to remove the moulding on the other side.
Put protective tape around the moulding.
Remove the moulding.
| 6. REMOVE REAR ROOF DRIP SIDE FINISH MOULDING LH |
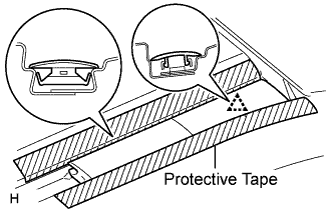 |
Put protective tape around the moulding.
Using a moulding remover, detach the clip and remove the moulding.
- NOTICE:
- When removing the rear roof drip side finish moulding, be careful not to damage the No. 1 roof drip side finish moulding clip.
- If the No. 1 roof drip side finish moulding clip is damaged or becomes detached from the vehicle, replace it with a new one.
| 7. REMOVE NO. 1 ROOF DRIP SIDE FINISH MOULDING CLIP |
 |
- HINT:
- Perform the following procedures if replacing a No. 1 roof drip side finish moulding clip.
Using a heat light, heat the clip and vehicle body.
- NOTICE:
- Do not heat the clip and vehicle body excessively.
Remove the clip.
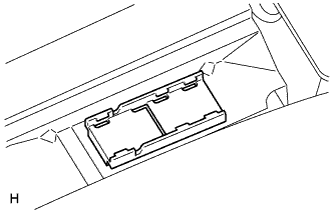
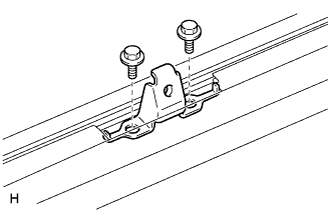
| 8. REMOVE ROOF RACK BRACKET |
 |
w/o Roof Carrier:
Remove the 8 bolts and 4 brackets.
w/ Roof Carrier:
Remove the 2 bolts and bracket.
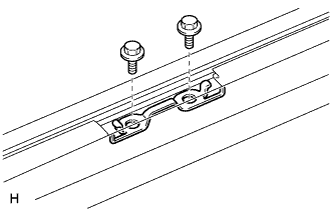
| 9. REMOVE NO. 2 ROOF DRIP SIDE FINISH MOULDING RETAINER (w/ Roof Carrier) |
 |
Remove the 2 bolts and retainer.